Contents
Track micro-model training data
Route workflow tasks according to who took the latest action
Improved Documentation and Active Learning Notebooks
DICOM Visual Enhancements: 3D Volumes and Zoom Per Window
Did you know?
Around the web and around the world
Encord Blog
Product Updates [July 2023]


Written by


Justin Sharps
View more postsWe wrapped up July with some important advancements in workflows, model training, and DICOM. We’ve complemented these improvements with a new documentation system to make it easier to learn all the details of how the platform and the SDK work. Read on below to catch up with all the news!
Track micro-model training data
We wrapped up July with some important advancements in workflows, model training, and DICOM. We’ve complemented these improvements with a new documentation system to make it easier to learn all the details of how the platform and the SDK work. Read on below to catch up with all the news!
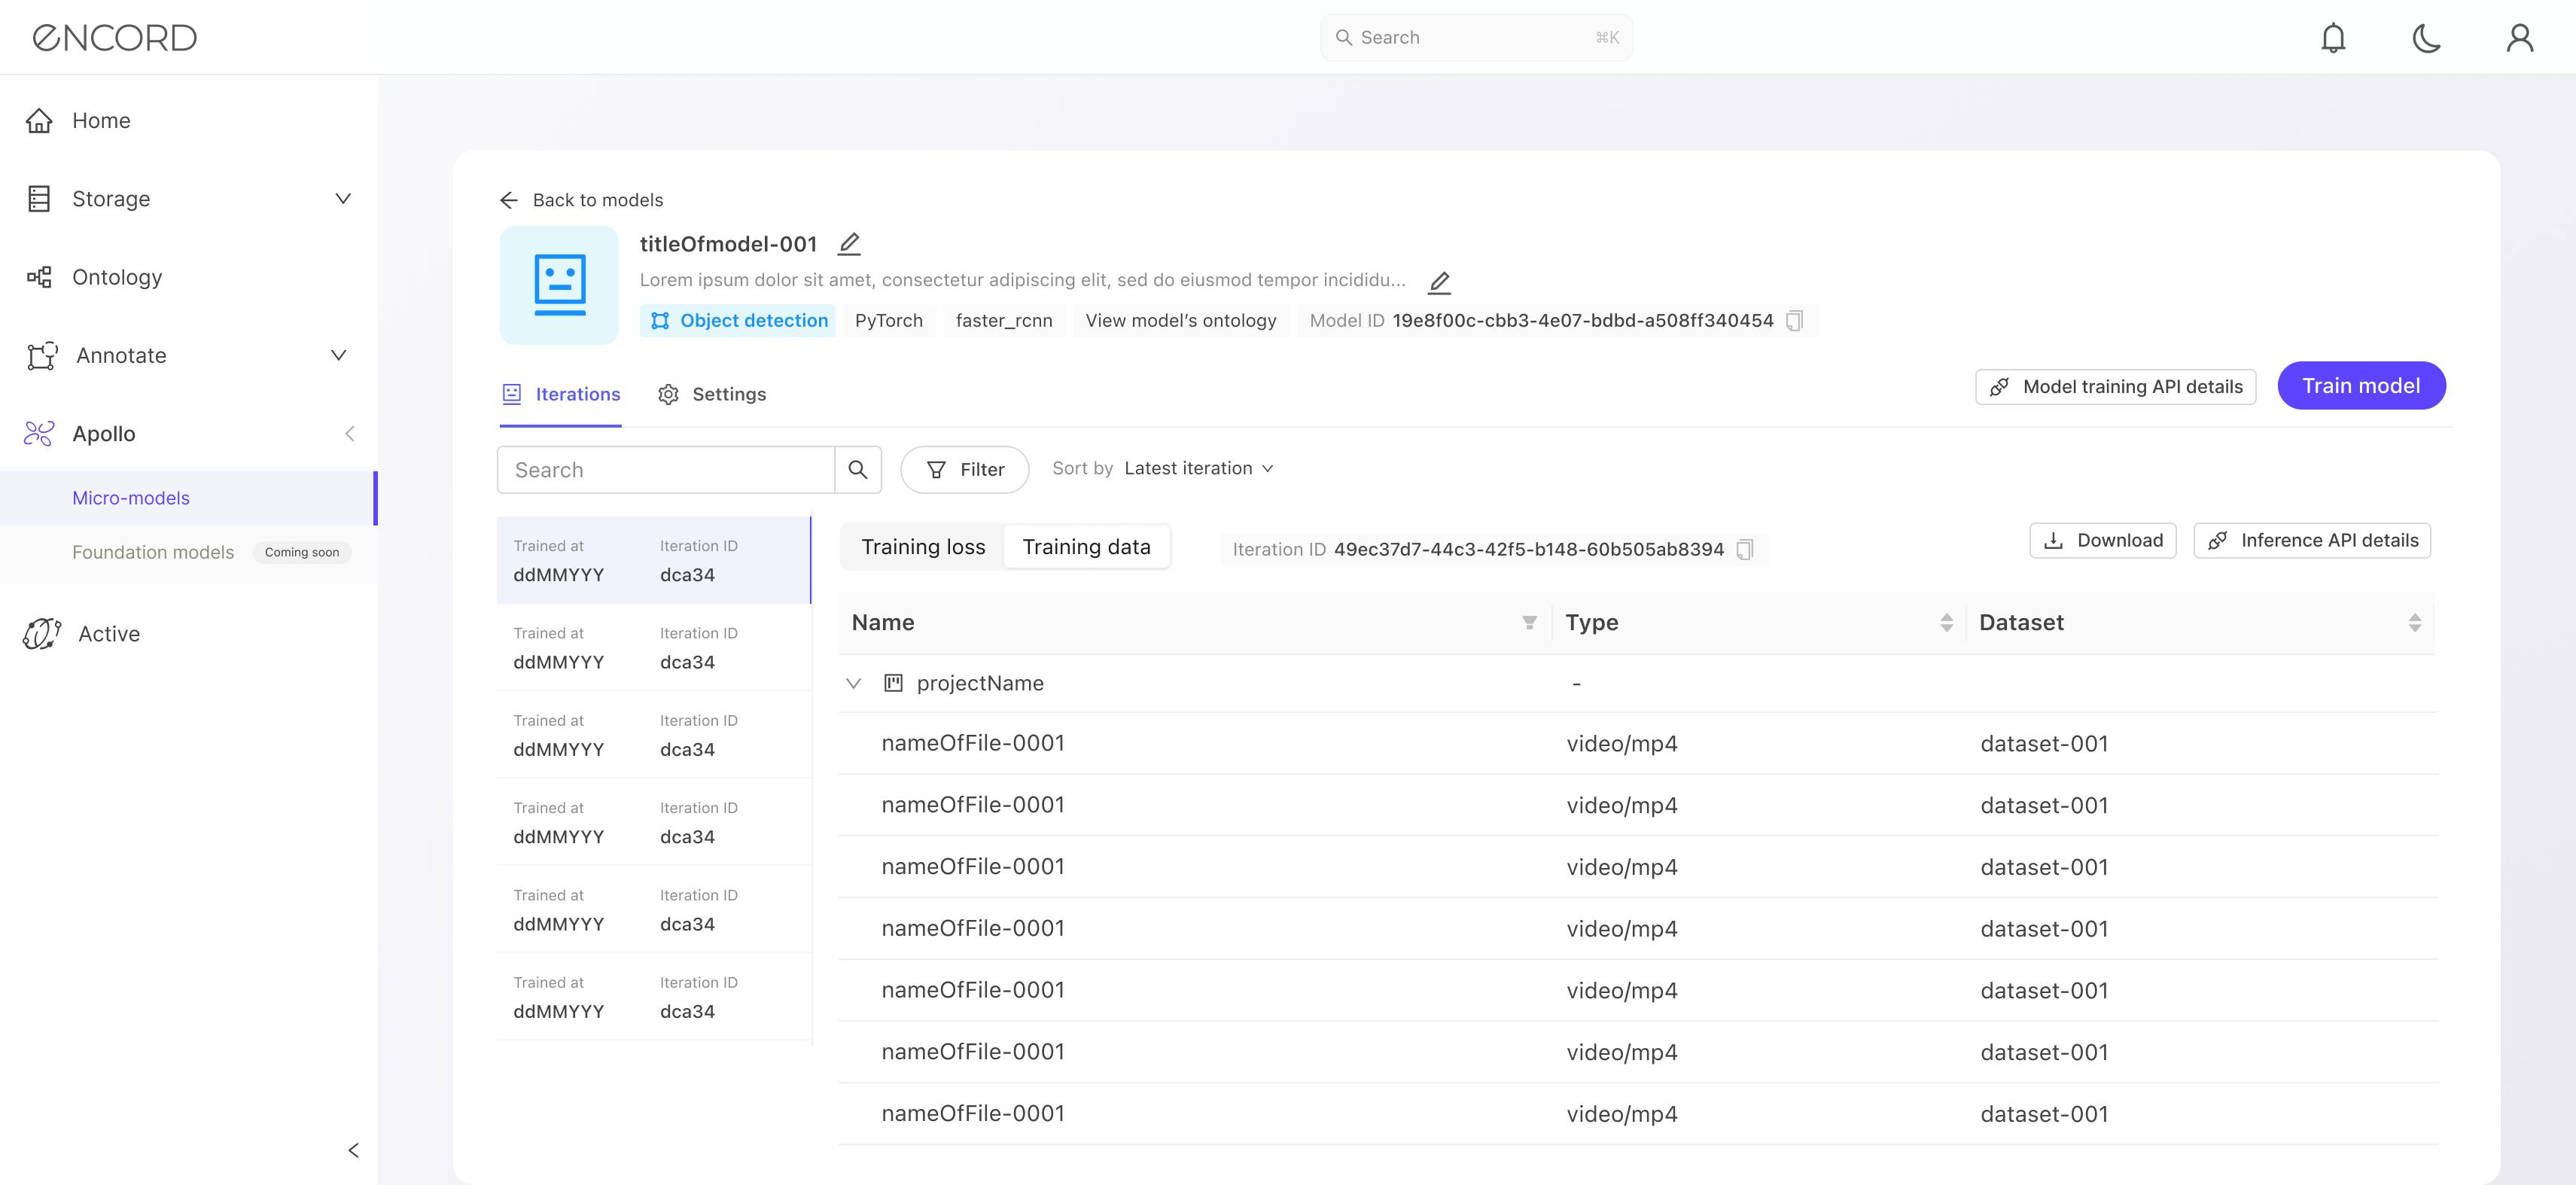
After your automation-powered annotation workflows generate lots of labels — use enhanced sorts and filters in the export interface to get exactly the labels you want. We’ve added the ability to filter exports by dataset — a quick way to get what you need. Check out our docs on exporting labels from the web-app to learn more.

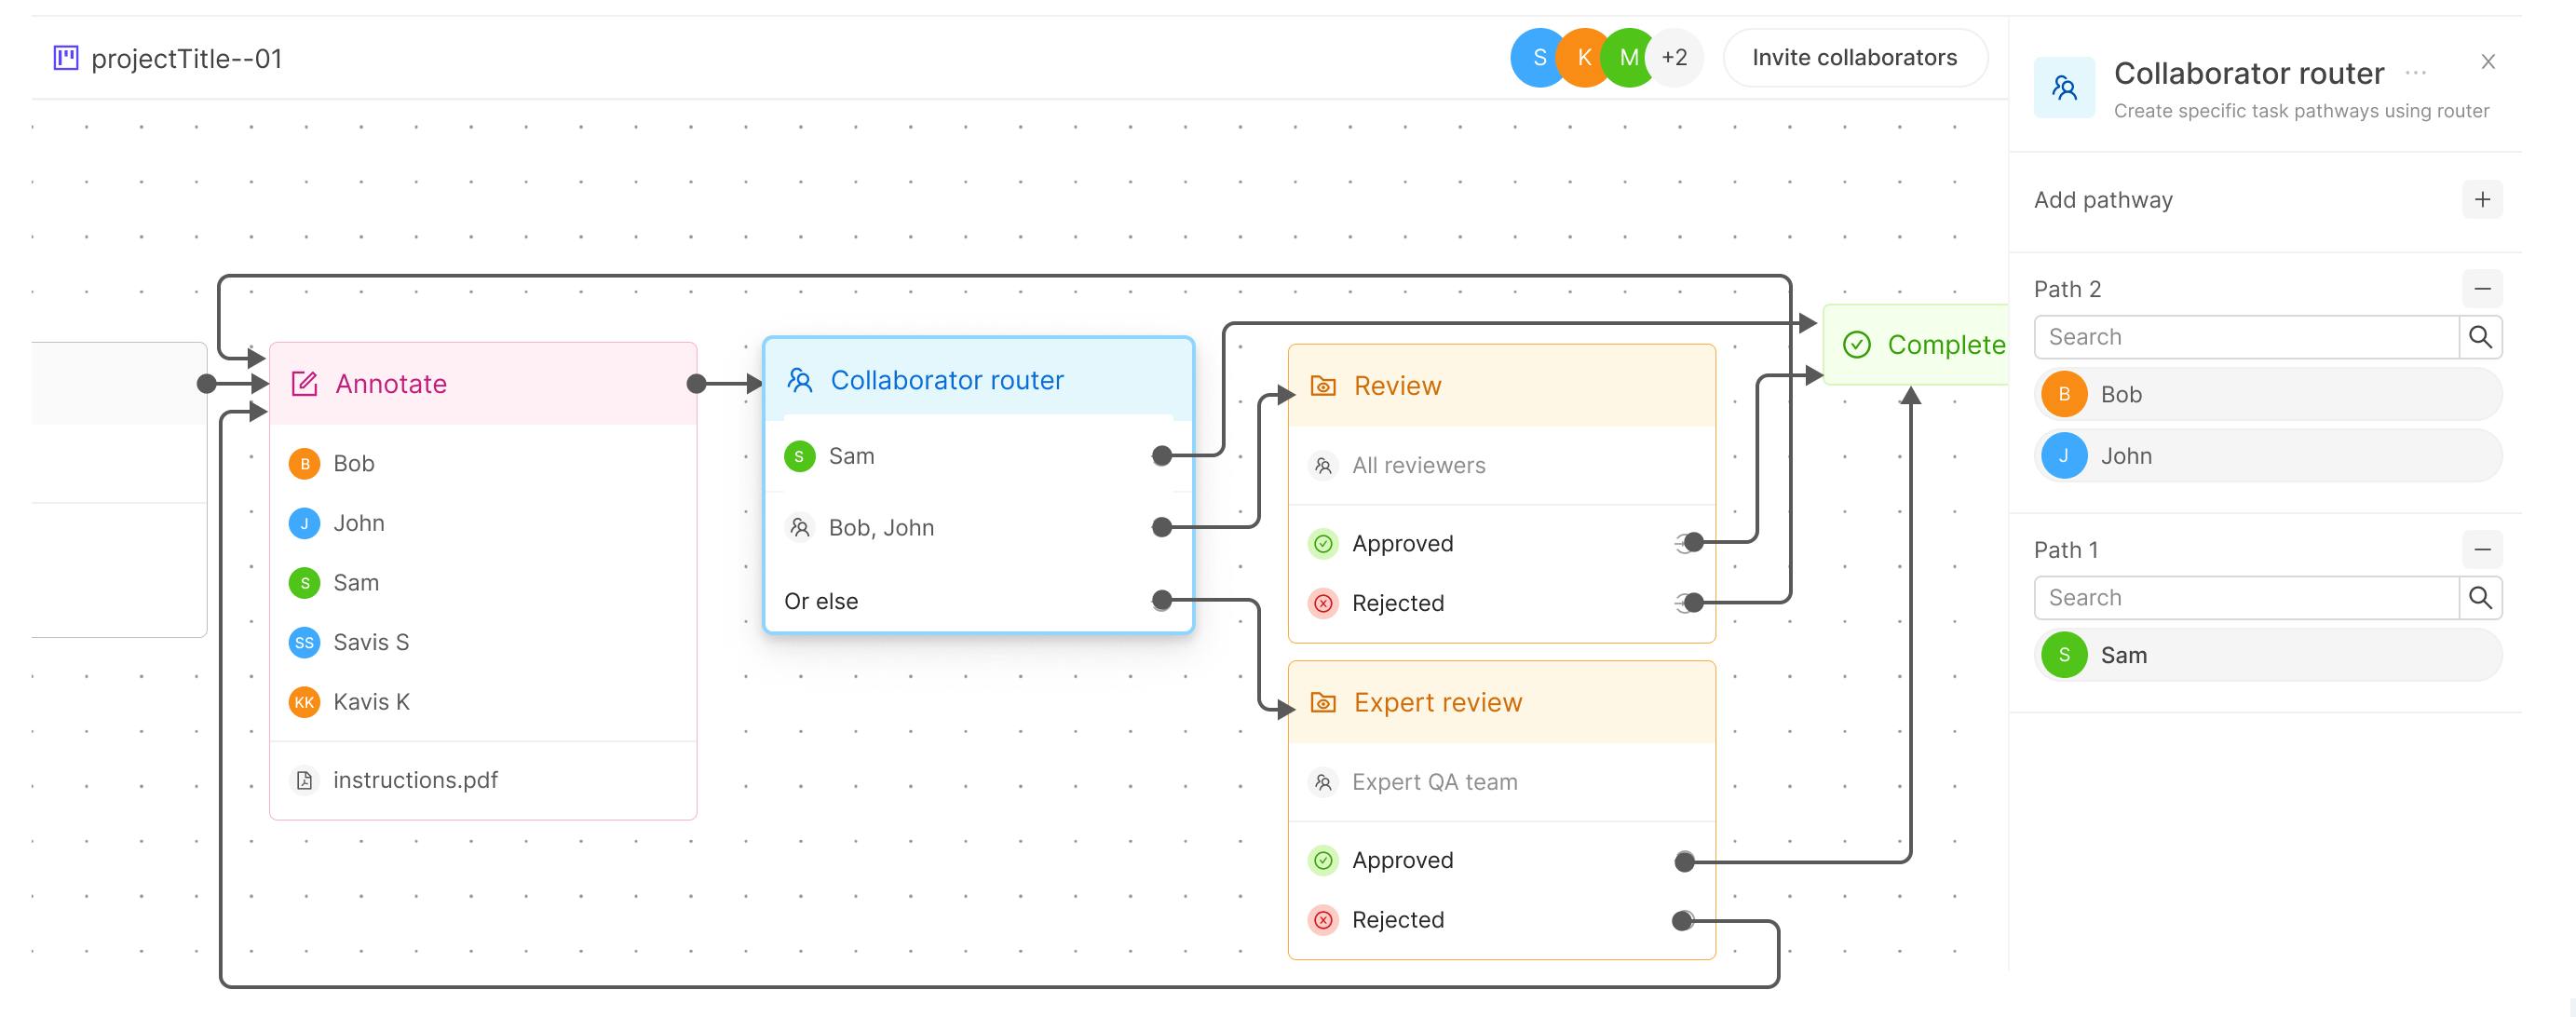
Route workflow tasks according to who took the latest action
It’s often appropriate to change you QC in annotation workflows based on the workflow participant. It can help when training new staff, or creating good communication partnerships between label annotators and reviewers. To address these needs, we’re introducing the Collaborator Router which will you to route tasks through your annotation and QC workflows according to the last actor! A versatile workflows component -- contact us if you would like to discuss how collaborator routing can enhance your QC and annotation workflows!
Improved Documentation and Active Learning Notebooks
Master the annotate, automate, debug active learning cycle with ease using our new documentation and notebook guides. This new centralized setup provides a clear and comprehensive overview of Encord's full range of capabilities. Coupled with an enhanced search and a vote-based feedback interface, you can quickly find precise nuggets of information easier than ever before and let us know what’s working and what isn’t. As part of the migration, the new documentation may have invalidated a couple previous bookmarks — simply search and re-book your go-to content to stay productive!
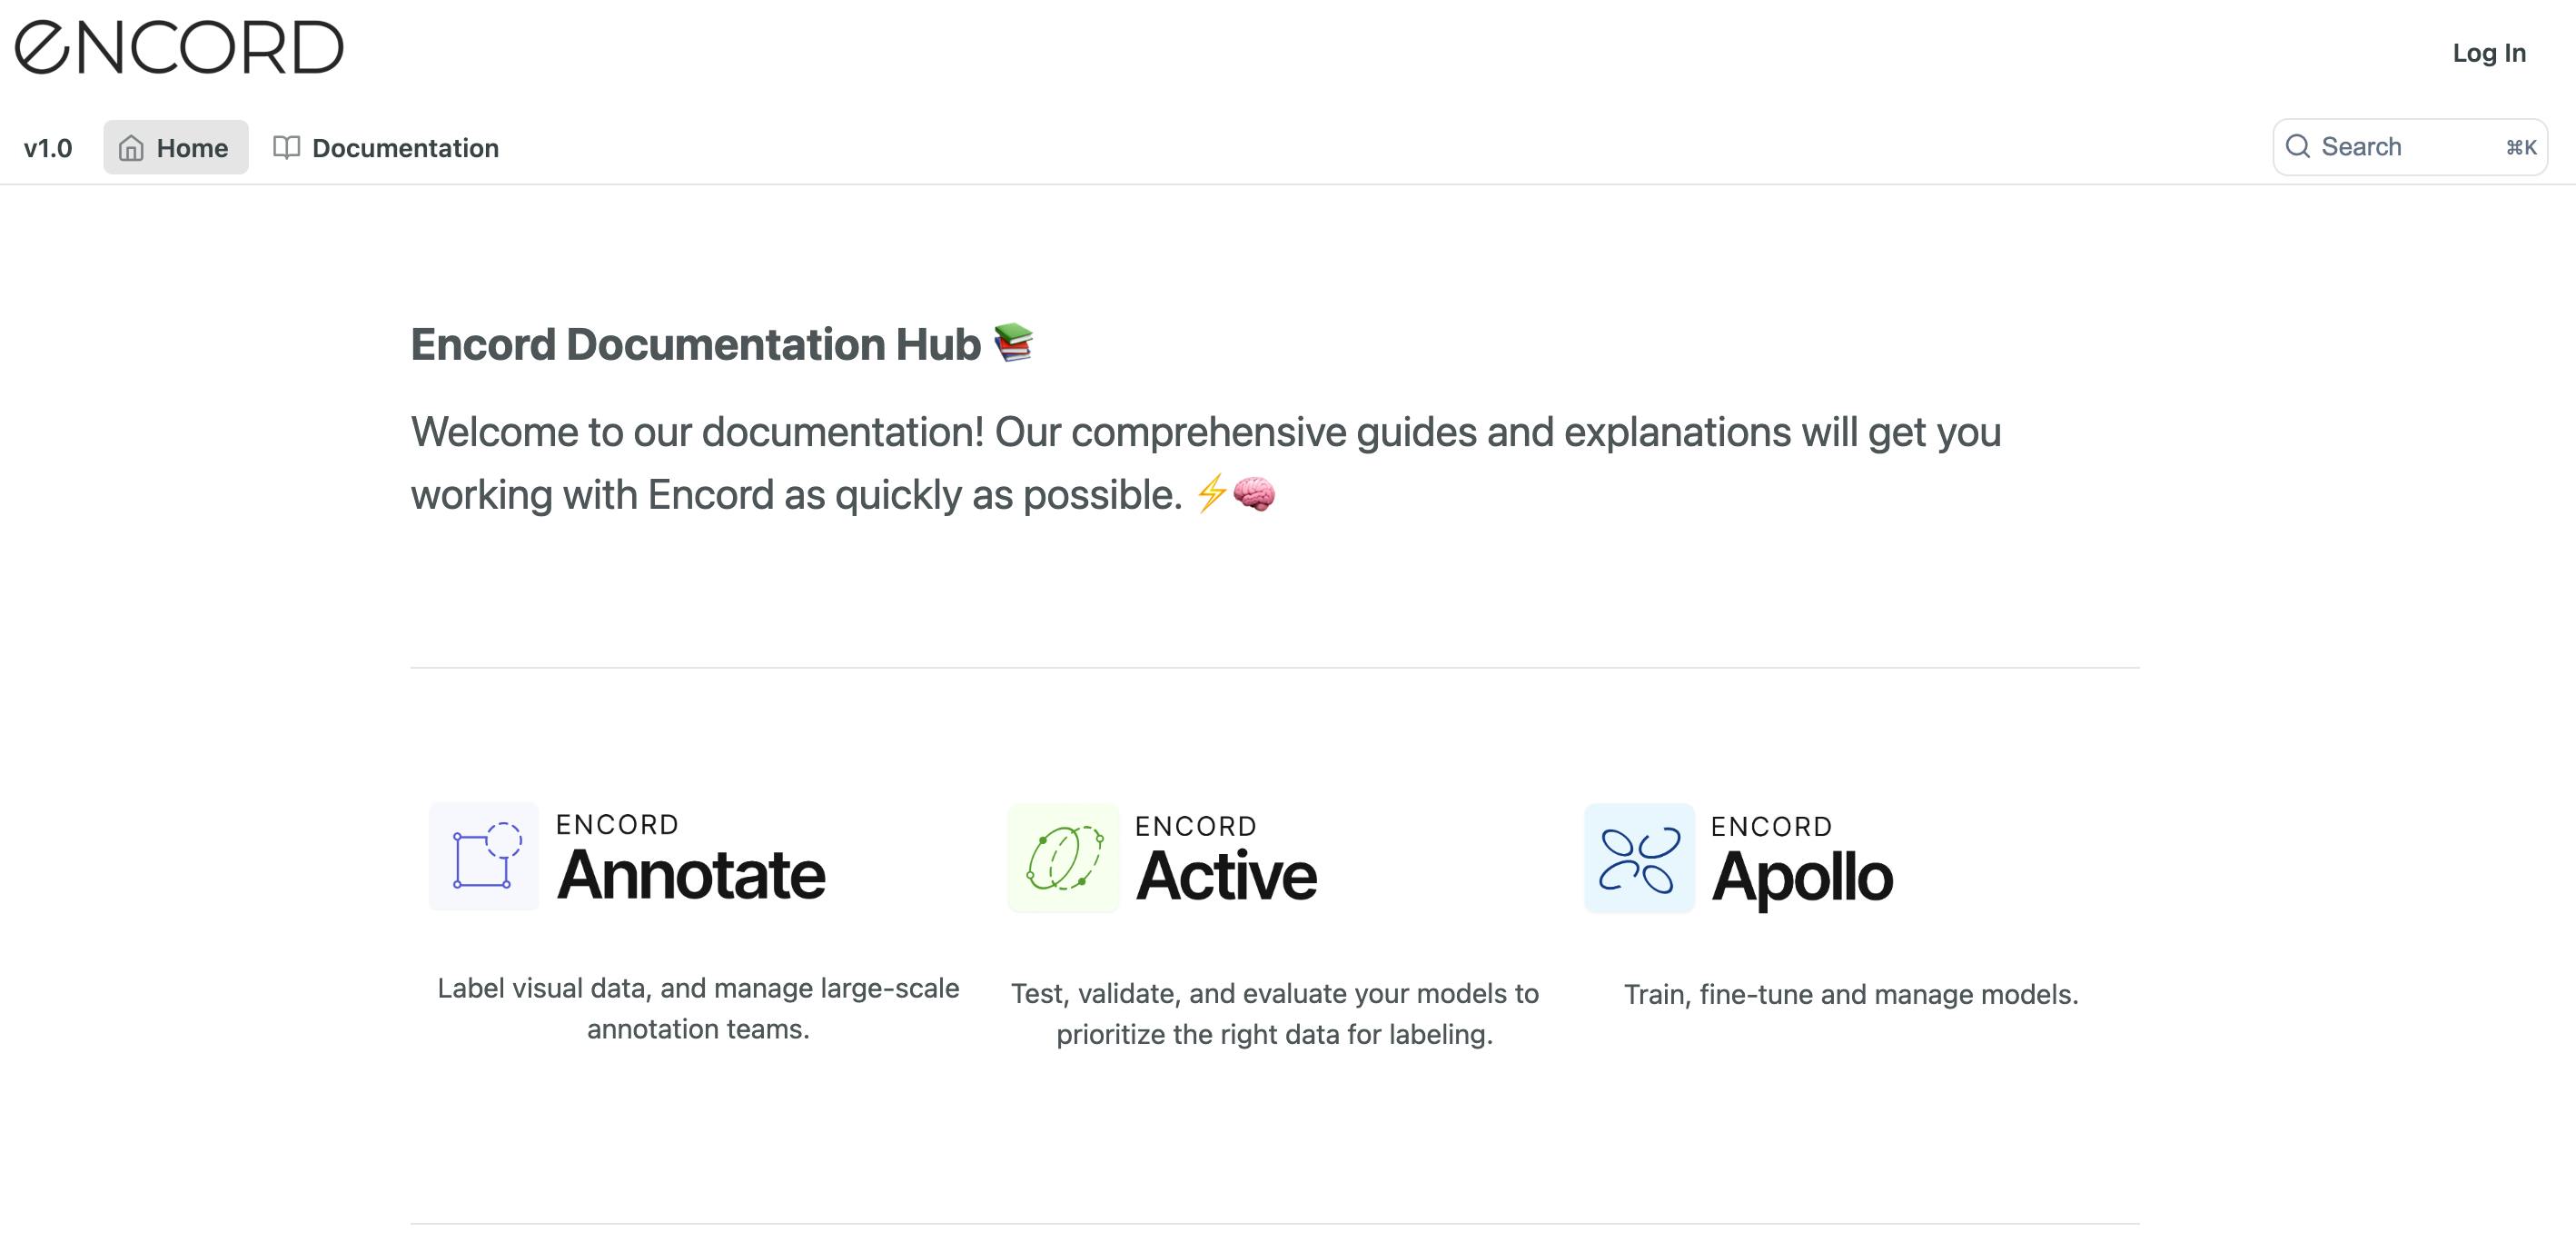
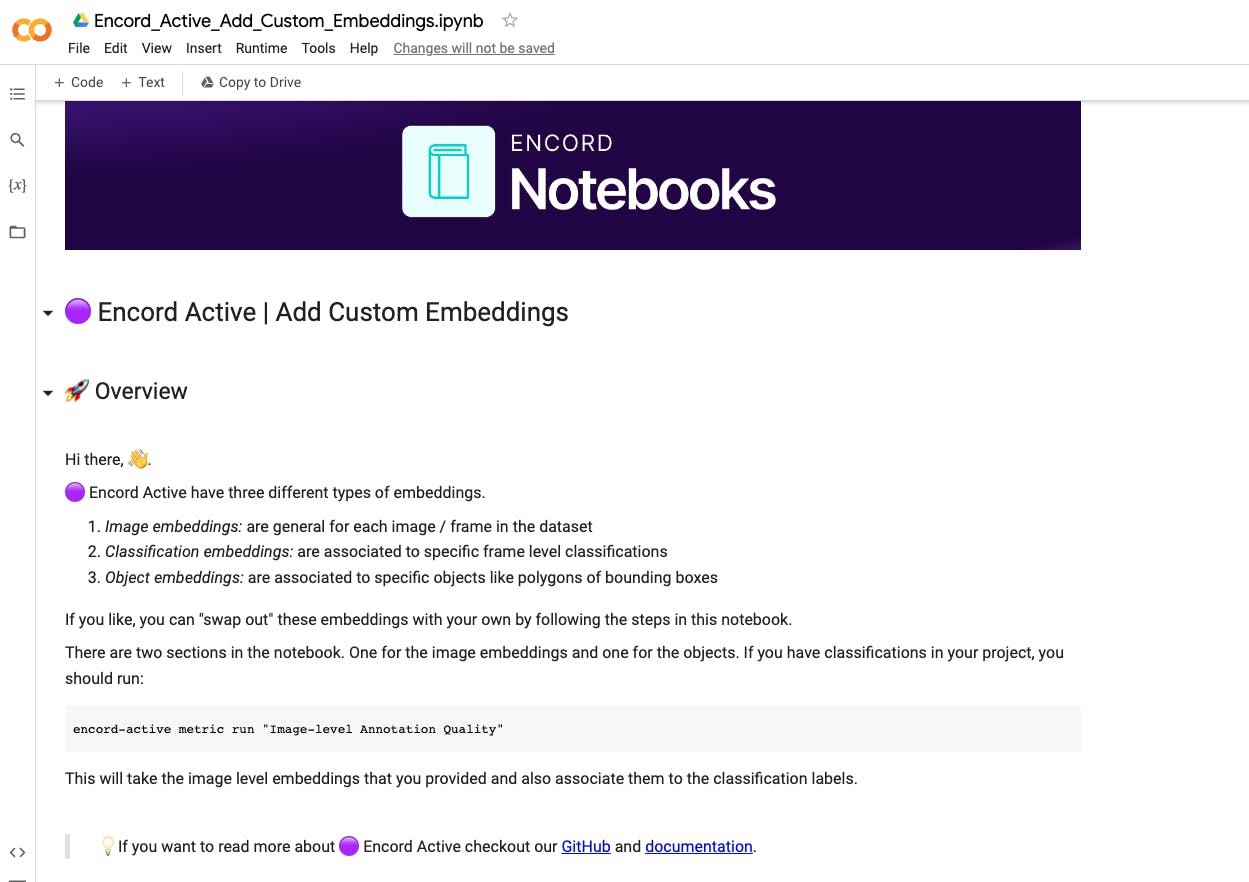
Once you’re oriented — jump into the details with end to end tutorials and active learning workflows prepared in our Encord Notebooks repository! Everything you need to get up and running with Encord Active and your active learning projects in one place! As always — reach out for any workflows or tutorials you feel will accelerate your active learning initiatives!
DICOM Visual Enhancements: 3D Volumes and Zoom Per Window
When working with modalities that support multiple views, you can now zoom and pan them separately to fully understand the data at hand. Seamlessly navigate through high-resolution scans with ease, zooming in to scrutinize the finest details and panning across images effortlessly. Combined with the ability to render medical scans in 3D, the upgraded DICOM tool provides a seamless experience that empowers you to make more informed diagnoses and more precise annotations.
 Catch up on the full details of feature details in the DICOM update blog.
Did you know?
You can use our Python SDK to view label logs — providing comprehensive analytics on actions taken in the label editor — for example who created and edited certain annotations. Filters can be adjusted and combined to suit your all your needs - whether you’re interested in viewing logs for a particular time period, or want to see all actions taken on a data unit. Follow the steps in this recipe to get started, or consult the SDK’s API documentation, here!

Around the web and around the world
The world of AI moving fast, but Encord’s got your back. Check out these explainers for a deep-dive into the inner-workings of the latest in AI.
- Meta-Transformer: Framework for Multimodal Learning
- LLaMA 2: Meta AI’s Latest Open Source Large Language Model
- Text2Cinemagraph: Synthesizing Artistic Cinemagraphs

Thanks for reading — as always, the inbox at product@encord.com is always open — we’d love to hear your thoughts on the feedback on the above!
Build better ML models with Encord
Get started todayWritten by
Justin Sharps
View more postsRelated blogs


Announcing the launch of Advanced Video Curation
At Encord we continually look for ways to enable our customers to bring their models to market faster. Today, we’re announcing the launch of Video Data Management within the Encord Platform, providing an entirely new way to interact with video data. Gone are the days of searching frame by frame for the relevant clip. Now filter and search across your entire dataset of videos with just a few clicks. What is Advanced Video Curation? In our new video explorer page users can search, filter, and sort entire datasets of videos. Video-level metrics, calculated by taking an average from the frames of a video, allow the user to curate videos based on a range of characteristics, including average brightness, average sharpness, the number of labeled frames, and many more. Users can also curate within individual videos with the new video frame analytics timelines, enabling a temporal view over the entire video. We're thrilled that Video Data Curation in the Encord platform is the first and only platform available to search, query, and curate relevant video clips as part of your data workflows. Support within Encord This is now available for all Encord Active customers. Please see our documentation for more information on activating this tool. For any questions on how to get access to video curation please contact sales@encord.com.
Apr 24 2024
2 M


Setting Up a Computer Vision Testing Platform
When machine learning (ML) models, especially computer vision (CV) models, move from prototyping to real-world application, they face challenges that can hinder their performance and reliability. Gartner's research reveals a telling statistic: just over half of AI projects make it past the prototype stage into production. This underlines a critical bottleneck—the need for rigorous testing. Why do so many models fail to make it to real-world applications? At Encord, ML teams tell us that model performance bottlenecks include: the complexity of ML models and diverse datasets, the need for testing processes that can handle large amounts of data, the need for automation to handle repetitive tasks, and the need for teams to collaborate to improve ML systems. This article will teach you the intricacies of setting up a computer vision (CV) testing platform. You will gain insights into the essence of thorough test coverage—vital for the unpredictable nature of CV projects—and learn about managing test cases effectively. You will also learn how collaborative features can be the centerpiece of successful testing and validation. By the end of the article, you should understand what it takes to set up a CV testing platform. Challenges Faced by Computer Vision Models in Production Computer Vision (CV) models in dynamic production environments frequently encounter data that deviates significantly from their training sets—be it through noise, missing values, outliers, seasonal changes, or general unpredictable patterns. These deviations can introduce challenges that compromise model performance and reliability. Building reliable, production-ready models comes with its own set of challenges. In this section, you will learn why ensuring the reliability of CV models is a complex task. We are going to look at the following factors: Model Complexity: The intricate architecture of CV models can be challenging to tune and optimize for diverse real-world scenarios. Hidden Stratification: Variations within classes the model hasn't explicitly trained on can lead to inaccurate predictions. Overfitting: A model might perform exceptionally well on the training data but fail to generalize to new, unseen data. Model Drift: Changes in real-world data over time can gradually decrease a model's accuracy and applicability. Adversarial Attacks: Deliberate attempts to fool models using input data crafted to cause incorrect outputs. Understanding these challenges is the first step toward building robust, production-ready CV models. Next, we will explore strategies to mitigate these challenges, ensuring your models can withstand the rigors of real-world application. 🚀 Model Complexity As CV models, particularly visual foundation models (VFMs), visual language models (VLMs), and multimodal AI models, grow in complexity, they often become 'black boxes.' This term refers to the difficulty in understanding how these models make decisions despite their high accuracy. Because these models have complicated, multi-layered architectures with millions of parameters, it is hard to figure out the reasoning behind their outputs. Confidence in the model's performance can be challenging, mainly when it produces unexpected predictions. Consider a security surveillance system with advanced visual recognition to spot suspicious activity. This system, powered by a complex visual language model (VLM), is trained on lots of video data encompassing various scenarios from numerous locations and times. The system can accurately identify threats like unattended bags in public spaces and unusual behavior, but its decision-making process is unclear. Security personnel may struggle to understand why the system flags a person or object as suspicious. The model may highlight factors like an object's size, shape, or movement patterns, but it is unclear how these factors are synthesized to determine a threat. This opacity raises concerns about the model's trustworthiness and the potential for false positives or negatives. The lack of interpretability in such CV models is not just an academic issue but has significant real-world consequences. It affects the confidence of those relying on the system for public safety, potentially leading to mistrust or misinterpretation of the alerts generated. Want to dig deeper into these models? Watch our webinar, ‘Vision Language Models: Powering the Next Chapter in AI.’ Hidden Stratification Precision, accuracy, recall, and mean Average Precision (mAP) are commonly used metrics when evaluating the performance of CV models. However, it's important to remember that these metrics may not provide a complete picture of the model's performance. A model could be very accurate when trained on a specific dataset, but if that dataset doesn't represent the real-world scenario, the model may perform poorly. This dilemma is called hidden stratification. Hidden stratification occurs when the training data doesn't have enough representative examples of certain groups or subgroups. For instance, a model trained on a dataset of images of primarily Caucasian patients may struggle to accurately diagnose skin cancer in black patients. This could raise serious inclusivity concerns, especially in mission-critical applications. See Also: The ultimate guide to data curation in computer vision. Overfitting A model could learn so well from the training data that it cannot make correct predictions on new data, which could lead to wrong predictions on real-world data in production systems. You have probably encountered this before: You train a model to classify images of cats and dogs with a 1000-image dataset split evenly between the two classes and trained for 100 epochs. The model achieves a high accuracy of 99% on the training data but only manages 70% accuracy on a separate test dataset. The discrepancy suggests overfitting, as the model has memorized specific details from the training images, like ear shape or fur texture, rather than learning general features that apply to all cats and dogs. Model Drift You consider a model “drifting” when its predictive accuracy reduces over time when deployed to production. If you do not build your ML system so that the model can adapt to real-world data changes, it might experience sudden drifts or slow decay over time, depending on how your business patterns change. One practical example is to consider an autonomous vehicle's pedestrian detection system. Initially trained on extensive datasets covering various scenarios, such a system might still experience model drift due to unforeseen conditions, like new types of urban development or changes in pedestrian behavior over time. For instance, introducing electric scooters and their widespread use on sidewalks presents new challenges not in the original training data, potentially reducing the system's accuracy in identifying pedestrians. Recommended Read: Best Practices to Improve ML Model Performance and Mitigate Model Drfit. Adversarial Attacks Adversarial attacks consist of deliberately crafted inputs that fool models into making incorrect predictions. These attacks threaten ML applications, from large language models (LLMs) to CV systems. While prompt injection is a known method affecting text-based models, CV models face similar vulnerabilities through manipulated images (image perturbation) or objects within their field of view. A notable demonstration of this was by researchers at the University of California, Berkeley, in 2016. They executed an adversarial attack against a self-driving car system using a simple sticker, misleading the car's vision system into misidentifying the type of vehicle ahead. This manipulation caused the self-driving car to stop unnecessarily, revealing how seemingly innocuous input data changes can impact decision-making in CV applications. Adversarial attacks are challenging because of their subtlety and precision. Only minor alterations are often needed to deceive an AI system, making detection and prevention particularly challenging. This underscores the critical importance of rigorously testing ML models to identify and mitigate such vulnerabilities. You can make CV systems more resistant to these attacks by testing them thoroughly and using adversarial simulation as part of your process for reliable applications. Testing Computer Vision Models and Applications Testing CV applications is more complex than testing traditional software applications. This is because the tests only partially depend on the software. Instead, they rely on factors such as the underlying business problem, dataset characteristics, and the models you trained or fine-tuned. Therefore, establishing a standard for testing CV applications can be complex. Understanding the Computer Vision Testing Platform A CV test platform forms the backbone of a reliable testing strategy. It comprises an ecosystem of tools and processes that facilitate rigorous and efficient model evaluation. The platform can help teams automate the testing process, monitor test results over time, and rectify issues with their models. Essential components of a robust CV testing platform include: Test Data Management: Involves managing the test data (including versioning and tracing lineage) to mirror real-world scenarios critical for models to understand such conditions. With this component, you can manage the groups and sub-groups (collections) to test your model against before to ensure production readiness. Test Reporting: An effective reporting system (dashboards, explorers, visualizations, etc.) is instrumental in communicating test outcomes to stakeholders, providing transparency, and helping to track performance over time. Model Monitoring: The platform should also include a component that monitors the model's performance in production, compares it against training performance, and identifies any problems. The monitoring component can track data quality, model metrics, and detect model vulnerabilities to improve the model’s robustness against adversarial attacks. Test Automation: Setting up automated testing as part of a continuous integration, delivery, and testing (CI/CD/CT) pipeline allows you to configure how you validate the model behavior. This ensures that models work as expected by using consistent and repeatable tests. Recommended Read: New to model monitoring? Check out our guide to ML model observability. Setting Up Your Computer Vision Testing Platform Having established what the CV testing platform is and its importance, this section will describe what a good platform setup should look like. 1. Define Test Cases In ML, test cases are a set of conditions used to evaluate an ML model's performance in varying scenarios and ensure it functions as expected. Defining robust model test cases is crucial for assessing model performance and identifying areas to improve the model’s predictive abilities. For instance, you trained a model on diverse driving video datasets and parking lot videos. You then used it on a dashcam system to count the number of vehicles while driving and in a parking lot. The successfully trained model performs admirably in Boston with cameras installed on various dashcams and across parking lots. An example of the Berkley Diverse Driving Dataset in Encord Active. Stakeholders are satisfied with the proof-of-concept and are asking to scale the model to include additional cities. Upon deploying the model in a new area in Boston and another town, maybe Minnesota, new scenarios emerge that you did not consider. In one parking garage in Boston, camera images are slightly blurred, contrast levels differ, and vehicles are closer to the cameras. In Minnesota, snow is on the ground, the curbside is different, various lines are painted on the parking lot, and new out-of-distribution car models (not in the training data) are present. Production scenario for the CV model in a Minnesota snowy parking lot (left) and Boston parking house in a dashcam (right). These scenarios are strange to the model and will harm its performance. That is why you should consider them test cases when testing or validating the model's generalizability. Defining the test cases should begin with preparing a test case design. A test case design is the process of planning and creating test cases to verify that a model meets its requirements and expected behavior. It involves identifying what aspects of the ML model need to be tested and how to test them. Recommended Read: Model Test Cases: A Practical Approach to Evaluating ML Models. Steps in test case design Define test objectives: Clearly state what the tests are expected to achieve. This starts with identifying failure scenarios, which may include a wide range of factors, such as changing lighting conditions, vehicle types, unique perspectives, or environmental variations, that could impact the model's performance. For example, in a car parking management system, some of the potential edge cases and outliers could include snow on the parking lot, different types of lines painted on the parking lot, new kinds of cars that weren't in the training data, other lighting conditions at varying times of day, different camera angles, perspectives, or distances to cars, and different weather conditions, such as rain or fog. By identifying scenarios where the model might fail, you can develop test cases that evaluate the model's ability to handle these scenarios effectively. After defining the test objectives, the next step is selecting test data for each case. See Also: How to Analyze Failure Modes of Object Detection Models for Debugging. Select test data and specify test inputs: When selecting input data, consider a diverse range of scenarios and conditions. This ensures that the data is representative of the defined test cases, providing a comprehensive understanding of the system or process being analyzed. Be sure to include edge cases in your selection, as they can reveal potential issues or limitations that may not be apparent with only typical data. In the car parking management system above, obtain samples of video images from different locations and parking lot types. Determine expected ML model outcomes and behaviors: Specify each test case's expected results or behaviors. This includes defining what the model should predict or what the software should do in response to specific inputs. Based on the failure mode scenarios of the model in the car parking management system, here are some recommendations: The model should achieve a mean Average Precision (mAP) of at least 0.75 for car detection when cars are partially covered or surrounded by snow and in poorly lit parking garages. The model's accuracy should be at least 98% for partially snow-covered parking lines. Create test cases: Document each test case with inputs, actions, and expected outcomes for clear and effective evaluation. Execute test cases: Execute the prepared test cases systematically to evaluate the ML model. Where possible, utilize automated testing to ensure efficiency and consistency. Record the actual outcomes to facilitate a detailed comparison with the expected results. Analyzing results: Review the outcomes using established metrics such as precision, recall, and f1-score. Document any deviations and conduct a thorough analysis to uncover the root cause of each discrepancy. Common issues may include model overfitting, data bias, or inadequate training. Useful Read: 5 Ways to Reduce Bias in Computer Vision Datasets. Iterative improvement: Upon identifying any issues, take corrective actions such as adjusting the model's hyperparameters, enriching the dataset with more samples and subsets, or refining the features. After modifications, re-run the test cases to verify improvements. This iterative process is essential for achieving the desired model performance and reliability. Keep iterating through this process until the model's performance aligns with the objectives defined in your test cases. 2. Compute Environment Most CV tests involving complex models and large datasets are computationally intensive. Adequate computing resources are essential for efficient and effective testing. Without these resources, you may encounter scalability issues, an inability to manage large visual test datasets, longer testing times, crashing sessions, insufficient test coverage, and a higher risk of errors. Strategies for ensuring adequate compute resources for CV testing: Resource estimation: Begin assessing the computational load by considering the model's size and complexity, dataset volume, and the number of tests. This will help in estimating the required resources to ensure tests run smoothly. Using cloud computing: Use services from cloud providers such as AWS, Azure, or GCP. These platforms provide scalable resources to accommodate varying workloads and requirements. Tools like Encord Active—a comprehensive CV testing and evaluation platform—streamline the process by connecting to cloud storage services (e.g., AWS S3, Google Cloud Storage, Azure Blob Storage) to retrieve test data. Distributed computing: Use distributed computing frameworks like Apache Spark to distribute CV tests across multiple machines. This can help reduce the time it takes to execute the tests. Optimization of tests: Optimize your CV tests by choosing efficient algorithms and data structures to minimize the computational resources required. ML teams can ensure their models are fully tested and ready for production by carefully planning how to use modern cloud-based solutions and distributed computing. 3. Running Tests and Analyzing Results For a smooth CV testing process, follow these comprehensive steps: Data and code preparation: Transfer the test data and code to the computing environment using secure file transfer methods or uploading directly to a cloud storage service. Install dependencies: Install the CV testing framework or tool you have chosen to work with and any additional libraries or tools required for your specific testing scenario. Configure the test environment: Set the necessary environment variables and configuration parameters. For example, define database connection strings, store secrets, or specify the path to the dataset and model artifacts. Execute tests: Run the tests manually or through an automation framework. Encord Active, for instance, can facilitate test automation by computing quality metrics for models based on the predictions and test data. Collect and analyze results: Gather the test outputs and logs, then analyze them to evaluate the model's performance. This includes mAP, Mean Square Error (MSE), and other metrics relevant to the use case and model performance. 4. Automating ML Testing with Continuous Integration, Delivery, and Testing (CI/CD/CT) Continuous integration, delivery (or deployment), and testing for CV automates the process of building, testing, and deploying the models. This automation is crucial in ensuring that models are reliable and issues are identified and resolved early on. Steps for a robust CI/CD/CT pipeline in ML: Pipeline trigger: Automate the pipeline to trigger upon events like code commits or set it for manual initiation when necessary. Code repository cloning: The pipeline should clone the latest version of the codebase into the test environment, ensuring that tests run on the most current iteration. Dependency installation: The pipeline must automatically install dependencies specific to the model, such as data processing libraries and frameworks. Model training and validation: In addition to training, the pipeline should validate the ML model using a separate dataset to prevent overfitting and ensure that the model generalizes well. Model testing: Implement automated tests to evaluate the model's performance on out-of-distribution, unseen data, focusing on the model metrics. Model deployment: The pipeline could automatically ship the model upon successful testing. Depending on the pipeline configuration, this may involve a soft deployment to a staging environment or a full deployment to production. Platforms like GitHub Actions, CircleCI, Jenkins, and Kubeflow offer features that cater to the iterative nature of ML workflows, such as experiment tracking, model versioning, and advanced deployment strategies. Advantages of CI/CD/CT for computer vision Enhanced model quality: Rigorous testing within CI/CT pipelines contributes to high-quality, reliable models in production environments. Reduced error risk: Automation minimizes human error, especially during repetitive tasks like testing and deployment. Efficiency in development: Automating the build-test-deploy cycle accelerates development and enables rapid iteration. Cost-effectiveness: The practices reduce resource waste, translating to lower development costs. Best practices By incorporating best practices and being mindful of common pitfalls, you can make your pipeline robust and effective. These practices include: Ensure your pipeline includes: Data and model versioning to track changes over time. Comprehensive test suites that mirror real-world data and scenarios. Regular updates to the test suite reflect new insights and data. Pitfalls to avoid: Avoid underestimating the complexity of models within the CI pipeline. Prevent data leakage between training and validation datasets. Ensure that the CI pipeline is equipped to handle large datasets efficiently. Throughout this article, you have explored the entire workflow for setting up a testing platform. You might have to configure and maintain several different components. Setting these up might require cross-functional and collaborative development and management efforts. So, most teams we have worked with often prefer using a platform incorporating all these features into one-click or one-deploy configurations. No spinning up servers, using tools that are not interoperable, or maintaining various components. Enter CV testing platforms! Using Platforms for Testing Computer Vision Models Over Building One Various platforms offer tools for testing ML models. Some examples are Encord Active, Kolena, Robust Intelligence, and Etiq.ai. Encord Active, for instance, excels at debugging CV models using data-centric quality metrics to uncover hidden model behaviors. It provides a suite of features for organizing test data, creating Collections to analyze model performance on specific data segments, and equipping teams to devise comprehensive tests. With Active Cloud, you can manage test cases and automatically compute metrics for your models through a web-based platform or the Python client SDK (to import model predictions). Conclusion: Using A Robust Testing Platform Throughout this article, you have learned that a robust testing platform is vital to developing reliable and highly-performant computer vision models. A well-set-up testing platform ensures comprehensive test coverage, which is crucial for verifying model behavior under diverse and challenging conditions. Managing your test cases and seamless team collaboration is also essential for addressing issues like hidden stratification—where models perform well on average but poorly on subgroups or slices—overfitting, and model drift over time. Remember to document the process and results of your accountability tests to inform future testing cycles. Regularly reviewing and refining your test strategy is key to maintaining an effective model development lifecycle. With the continuous advancements in traditional and foundation ML models over the next few years, we expect the integration of robust testing platforms to become increasingly critical. They will be pivotal in driving the success of LLM and ML applications, ensuring they deliver ongoing value in real-world scenarios. Your ML team's goal should be clear: to enable the development of CV models that are not only high-performing but also resilient and adaptable to the ever-changing data landscape they encounter.
Apr 09 2024
8 M


Fine-Tuning VLM: Enhancing Geo-Spatial Embeddings
As the world generates an ever-expanding volume of visual content, the need for efficient data curation becomes increasingly important. Whether it’s satellite imagery, aerial photographs, or remote sensing data, organizing and annotating these visuals is essential for scientific research, urban planning, disaster response, and more. In this blog post, we explore how fine-tuning the Contrastive Language-Image Pre-Training or CLIP model with the RSICD dataset—a collection of remote sensing images and captions—revolutionizes how we curate geospatial data. Unlike traditional image processing methods, CLIP offers advanced capabilities like semantic search and multilingual annotations, improving the processing and analysis of geospatial information. Fine-Tuning Vision-Language Models (VLMs) Fine-tuning Vision-Language Models (VLM) to enhance embeddings is a cutting-edge approach to data curation. VLMs are advanced models that combine visual and textual understanding, making them incredibly powerful tools for processing and analyzing multimedia data. By fine-tuning these models specifically for geospatial tasks, we aim to improve location-based data processing and analysis accuracy and efficiency. Geo-spatial Embeddings Geo-spatial embeddings refer to representations of geographical locations in a continuous vector space, where each location is encoded as a vector with semantic meaning. These embeddings are crucial for various applications such as geographical information systems (GIS), location-based recommendation systems, urban planning, environmental monitoring, and disaster response. However, generating accurate geospatial embeddings from heterogeneous data sources poses significant challenges due to the complexity and diversity of spatial information. At Encord, we address these challenges by fine-tuning VLMs like CLIP to produce more accurate and semantically rich geospatial embeddings. This can help streamline your data curation process with new possibilities for using geospatial data. Importance of Fine-Tuning VLM in Data Curation The importance of fine-tuning VLMs in data curation can be understood through several key aspects: Semantic Understanding VLMs are capable of understanding and interpreting both visual and textual information simultaneously. By fine-tuning these models on specific datasets relevant to a particular domain, such as medical imaging or satellite imagery, they can learn to associate visual features with corresponding textual descriptions. This semantic understanding greatly enriches the curated data by providing context and meaning to the information being processed. So, the annotators can quickly identify and tag images based on textual descriptions, improving dataset organization and curation. Adaptability to Domain-Specific Requirements Different domains have unique data characteristics and requirements. Fine-tuning VLMs allows for customization and adaptation to these domain-specific needs. For example, here we are fine-tuning the VLM model to improve geospatial embeddings. Improved Data Accuracy Fine-tuning VLMs enables them to better capture the complexities of curated data. This results in improved relevance and accuracy of the curated datasets as the models learn to extract and highlight the most relevant features and information. Consequently, curated datasets become more valuable for downstream tasks such as machine learning, analytics, and decision-making processes. Fine-Tuning CLIP with RSICD CLIP Contrastive Language-Image Pre-training or CLIP, developed by OpenAI, is a powerful multimodal model that bridges the gap between natural language and visual content. It learns to associate images and their corresponding captions in a self-supervised manner, enabling it to perform tasks like image search, zero-shot classification, and more. RSICD Dataset The Remote Sensing Image Caption Dataset or RSICD serves as our training ground. Comprising approximately 10,000 satellite images, this dataset features image labels and descriptive captions. These captions provide valuable context, making RSICD an ideal candidate for fine-tuning CLIP. Why Fine-Tune CLIP with RSICD? Geo-Spatial Specificity Satellite images differ significantly from everyday photos. They are satellite-captured images that differ from typical ground-level images in scale, perspective, and resolution. By fine-tuning CLIP with RSICD, we tailor the model to understand the complexities of geospatial data. This specificity enhances its ability to handle satellite imagery effectively. Strengthen Search Ability By incorporating captions during fine-tuning, we ensure that the model cohesively embeds both image and text information. Consequently, CLIP becomes adept at natural language search and image retrieval. Embedding Space Before Fine-Tuning. The scattered arrangement of clusters represents data points in the initial embedding space. Embedding Space After Fine-Tuning. A more refined and cohesive grouping of data points indicates an improved embedding space post-fine-tuning. Zero-Shot Performance Evaluation We evaluate the model’s zero-shot performance using ground truth labels. This involves assessing whether the textual embeddings align with the image embeddings. Such alignment validates the consistency of CLIP’s image-text capabilities. 🔥 NEW RELEASE: We released TTI-Eval (text-to-image evaluation), an open-source library for evaluating zero-shot classification models like CLIP and domain-specific ones like BioCLIP against your (or HF) datasets to estimate how well the model will perform. Get started with it on GitHub, and do ⭐️ the repo if it's awesome. 🔥 Significance of Fine-Tuning CLIP with RSICD Geo-Spatial Annotation Precision Contextual Understanding: RSICD provides satellite images alongside descriptive captions. By fine-tuning CLIP, we enhance its ability to understand the nuances of geospatial features—mountains, rivers, forests, urban areas, and more. Accurate Labeling: Curators can annotate images with greater precision. Whether identifying specific land cover types or pinpointing landmarks, CLIP ensures context-aware annotations. Efficient Data Exploration Semantic Search: Curators and researchers can query the dataset using natural language. CLIP retrieves relevant images based on textual descriptions. For instance, searching for “coastal erosion” yields coastal satellite imagery. Time Savings: Manual exploration of thousands of images becomes streamlined. CLIP acts as a smart filter, presenting relevant visuals promptly. Consistent Labeling and Quality Control Alignment of Embeddings: During fine-tuning, CLIP learns to align image embeddings with textual embeddings. Curators can cross-check whether the textual descriptions match the visual content. Uniform Annotations: Consistent labeling improves model training and downstream tasks. Whether detecting deforestation or urban sprawl, CLIP ensures uniformity. In summary, fine-tuning CLIP with RSICD empowers data curators by providing efficient search, consistent labeling, multilingual support, and domain-specific expertise. As we embrace this powerful tool, we pave the way for smarter, more accessible datasets. 🔥 NEW RELEASE: We released TTI-Eval (text-to-image evaluation), an open-source library for evaluating zero-shot classification models like CLIP and domain-specific ones like BioCLIP against your (or HF) datasets to estimate how well the model will perform. Get started with it on GitHub, and do ⭐️ the repo if it's awesome. 🔥
Apr 04 2024
5 M


Announcing the launch of Consensus in Encord Workflows
At Encord, we continually obsess over how to support ML teams managing their labeling workflows and make it as easy as possible for teams to improve model performance. Today, we’re announcing the launch of Consensus workflows within Encord. What is Consensus? Consensus allows multiple annotators to conduct a labeling task of the same file in a mutually blind fashion — that is, each annotator is unaware that other annotators are working on the task. All submissions are aggregated into the following evaluation substage where designated Consensus reviewers can evaluate the agreement between labels and select a representative set. Integrating Consensus into your labeling workflows allows you to create higher-quality annotations by assessing the submissions of multiple annotators and simplifying compliance with domain-specific regulatory requirements. Support within Encord Support will begin with image and video modalities, with full modality support progressively released soon after. You can read more in our documentation for more information on activating this feature and building consensus workflows.
Apr 02 2024
2 M


Announcing Auto-Segmentation Tracking For Video
In computer vision, where accurate training data is the lifeblood of successful models, video annotation plays an important role. However, annotating each frame individually is time-consuming and prone to inconsistencies. Nearby frames often exhibit visual similarities, and annotations made on one frame can be extrapolated to others. Enter automated polygon and bitmask tracking! Automated segmentation tracking significantly reduces annotation time, while simultaneously improving accuracy - gone are the days of tediously labeling every frame in a video. Polygon and Bitmask tracking provides the tooling required to build labeled training data at scale and at speed. Polygon tracking meticulously outlines objects with a series of interconnected vertices, offering precision and flexibility unparalleled in video annotation. Conversely, Bitmask tracking simplifies the annotation process by representing object masks as binary images, streamlining efficiency without compromising clarity. Join us as we explore these techniques that are not just enhancing the process of video annotation, but also paving the way for more accurate and efficient machine learning models. 🚀 Understanding Polygon and Bitmask Tracking Polygon Tracking A polygon is a geometric shape defined by a closed loop of straight-line segments. It can have three or more sides, forming a boundary around an area. In video annotation, polygons are used to outline objects of interest within frames. By connecting a series of vertices, we create a polygon that encapsulates the object’s shape. Advantages of Polygon-Based Tracking Accurate Boundary Representation: Polygons provide a precise representation of an object’s boundary. Unlike bounding boxes (which are rectangular and may not align perfectly with irregular shapes), polygons can closely follow the contours of complex objects. Flexibility: Polygons are versatile. They can adapt to various object shapes, including non-rectangular ones. Whether you’re tracking a car, a person, or an animal, polygons allow for flexibility in annotation. Use Cases of Polygon Tracking Object Segmentation: When segmenting objects from the background, polygons excel. For instance, in medical imaging, they help delineate tumors or organs. Motion Analysis: Tracking moving objects often involves polygon-based annotation. Analyzing the trajectory of a soccer ball during a match or monitoring pedestrian movement in surveillance videos are examples. Bitmask Tracking A bitmask is a binary image where each pixel corresponds to a specific object label. Instead of outlining the object’s boundary, bitmasks assign a unique value (usually an integer) to each pixel within the object region. These values act as identifiers, allowing pixel-level annotation. Advantages of Bitmask-Based Tracking Bitmasks enable precise delineation at the pixel level. By assigning values to individual pixels, we achieve accurate object boundaries. This is especially useful when dealing with intricate shapes or fine details. Use Cases of Bitmask Tracking Semantic Segmentation: In semantic segmentation tasks, where the goal is to classify each pixel into predefined classes (e.g., road, sky, trees), bitmasks play a vital role. They provide ground truth labels for training deep learning models. Instance Segmentation: For scenarios where multiple instances of the same object class appear in a frame (e.g., identifying individual cars in a traffic scene), bitmask tracking ensures each instance is uniquely labeled. Temporal Consistency Maintaining temporal consistency when annotating objects in a video is crucial. This means that the annotations for an object should be consistent from one frame to the next. Inconsistent annotations can lead to inaccurate results when the annotated data is used for training machine learning models. Temporal smoothing and interpolation techniques can be used to improve the consistency of the tracking. Temporal smoothing involves averaging the annotations over several frames to reduce the impact of any sudden changes. Interpolation, on the other hand, involves estimating the annotations for missing frames based on the annotations of surrounding frames. Both these techniques can greatly improve the quality and consistency Read the documentation, to know how to use interpolation in your annotation. Applications of Polygon and Bitmask Tracking Object Detection and Tracking With polygon tracking, objects of any shape can be accurately annotated, making it particularly useful for tracking objects that have irregular shapes or change shape over time. Bitmask tracking takes this a step further by marking each individual pixel, capturing even the smallest details of the object. This level of precision is crucial for detecting and tracking objects accurately within a video. Semantic Segmentation In semantic segmentation, the goal is to classify each pixel in the image to a particular class, making it a highly detailed task. Bitmask tracking, with its ability to mark each individual pixel, is perfectly suited for this task. It allows for the creation of highly accurate masks that can be used to train models for semantic segmentation. Polygon tracking can also be used for semantic segmentation, especially in scenarios where the objects being segmented have clear, defined boundaries. Interactive Video Editing Interactive video editing is a process where users can manipulate and modify video content. This involves tasks such as object removal, color grading, and adding special effects. Polygon and bitmask tracking can greatly enhance the process of interactive video editing. With these techniques, objects within the video can be accurately tracked and annotated, making it easier to apply edits consistently across multiple frames. This can lead to more seamless and high-quality edits, improving the overall video editing process. Semantic Context and Automation Semantic Context Scene Understanding: When placing polygons or bitmasks for video annotation, it’s crucial to consider the context of the scene. The semantics of the scene can guide accurate annotations. For instance, understanding the environment, the objects present, and their spatial relationships can help in placing more accurate and meaningful annotations. Object Relationships: The way objects interact within a scene significantly affects annotation choices. Interactions such as occlusion (where one object partially or fully hides another) and containment (where one object is inside another) need to be considered. Understanding these relationships can lead to more accurate and contextually relevant annotations. Automated Annotation Tool AI Assitance: With the advancement of machine learning models, we now have the capability to propose initial annotations automatically. These AI tools can significantly reduce the manual effort required in the annotation process. They can quickly analyze a video frame and suggest potential annotations based on learned patterns and features. Human Refinement: While AI tools can propose initial annotations, human annotators are still needed to refine these automated results for precision. Annotators can correct any inaccuracies and add nuances that the AI might have missed. This combination of AI assistance and human refinement leads to a more efficient and accurate video annotation process. Read the blog The Full Guide to Automated Data Annotation for more information. Real-World Applications Polygon and Bitmask tracking, along with the concepts of semantic context and automation, have a wide range of real-world applications. Here are a few key areas where they are making a significant impact: Medical Imaging: In medical imaging, precise annotation can mean the difference between a correct and incorrect diagnosis. These techniques allow for highly accurate segmentation of medical images, which can aid in identifying and diagnosing a wide range of medical conditions. Autonomous Vehicles: Polygon and Bitmask tracking allow these vehicles to understand their environment in great detail, helping them make better driving decisions. Video Surveillance: In video surveillance, tracking objects accurately over time is key to identifying potential security threats. These techniques can improve the accuracy and efficiency of video surveillance systems, making our environments safer. These are just a few examples of the many possible applications of Polygon and Bitmask tracking. As these techniques continue to evolve, they are set to revolutionize numerous industries and fields. In summary, Polygon and Bitmask tracking are transforming video annotation, paving the way for more precise machine learning models. As we continue to innovate in this space, we’re excited to announce that Encord will be releasing new features soon. Stay tuned for these updates and join us in exploring the future of computer vision with Encord. 🚀
Mar 22 2024
5 M


Validating Model Performance Using Encord Active
Model validation is a key machine learning (ML) lifecycle stage, ensuring models generalize well to new, unseen data. This process is critical for evaluating a model's predictions independently from its training dataset, thus testing its ability to perform reliably in the real world. Model validation helps identify overfitting—where a model learns noise rather than the signal in its training data—and underfitting, where a model is too simplistic to capture complex data patterns. Both are detrimental to model performance. Techniques like the holdout method, cross-validation, and bootstrapping are pivotal in validating model performance, offering insights into how models might perform on unseen data. These methods are integral to deploying AI and machine learning models that are both reliable and accurate. This article delves into two parts: Key model validation techniques, the advantages of a data-centric approach, and how to select the most appropriate validation method for your project. How to validate a Mask R-CNN pre-trained model that segments instances in COVID-19 scans using Encord Active, a data-centric platform for evaluating and validating computer vision (CV) models. Ready to dive deeper into model validation and discover how Encord Active can enhance your ML projects? Let’s dive in! The Vital Role of a Data-Centric Approach in Model Validation A data-centric approach to model validation places importance on the quality of data in training and deploying computer vision (CV) and artificial intelligence (AI) models. The approach recognizes that the foundation of any robust AI system lies not in the complexity of its algorithms but in the quality of the data it learns from. High-quality, accurately labeled data (with ground truth) ensures that models can truly understand and interpret the nuances of the tasks they are designed to perform, from predictive analytics to real-time decision-making processes. Why Data Quality is Paramount The quality of training data is directly proportional to a model's ability to generalize from training to real-world applications. Poor data quality—including inaccuracies, biases, label errors, and incompleteness—leads to models that are unreliable, biased, or incapable of making accurate predictions. A data-centric approach prioritizes meticulous data preparation, including thorough data annotation, cleaning, and validation. This ensures the data distribution truly reflects the real world it aims to model and reduces label errors. Improving Your Model’s Reliability Through Data Quality The reliability of CV models—and even more recently, foundation models—in critical applications—such as healthcare imaging and autonomous driving—cannot be overstated. A data-centric approach mitigates the risks associated with model failure by ensuring the data has high fidelity. It involves rigorous validation checks and balances, using your expertise and automated data quality tools to continually improve your label quality and datasets. Adopt a data-centric approach to your AI project and unlock its potential by downloading our whitepaper. Key Computer Vision Model Validation Techniques A data-centric approach is needed to validate computer vision models after model training that looks at more than just performance and generalizability. They also need to consider the unique problems of visual data, like how image quality, lighting, and perspectives can vary. Tailoring the common validation techniques specifically for computer vision is about robustly evaluating the model's ability to analyze visual information and embeddings across diverse scenarios: Out-of-Sample Validation: Essential for verifying that a CV model can generalize from its training data to new, unseen images or video streams. This approach tests the model's ability to handle variations in image quality, lighting, and subject positioning that it hasn't encountered during training. Cross-Validation and Stratified K-Fold: Particularly valuable in computer vision is ensuring that every aspect of the visual data is represented in both training and validation sets. Stratified K-Fold is beneficial when dealing with imbalanced datasets, common in computer vision tasks, to maintain an equal representation of classes across folds. Leave-One-Out Cross-Validation (LOOCV): While computationally intensive, LOOCV can be particularly insightful for small image datasets where every data point's inclusion is crucial for assessing the model's performance on highly nuanced visual tasks. Bootstrapping: Offers insights into the stability of model predictions across different visual contexts. This method helps understand how training data subset changes can affect the model's performance, which is particularly relevant for models expected to operate in highly variable visual environments. Adversarial Testing: Tests the model's resilience against slight, often invisible, image changes. This technique is critical to ensuring models are not easily perturbed by minor alterations that would not affect human perception. Domain-Specific Benchmarks: Participating in domain-specific challenges offered by ImageNet, COCO, or PASCAL VOC can be a reliable validation technique. These benchmarks provide standardized datasets and metrics, allowing for evaluating a model's performance against a wide range of visual tasks and conditions, ensuring it meets industry standards. Human-in-the-Loop: Involving domain experts in the validation process is invaluable, especially for tasks requiring fine-grained visual distinctions (e.g., medical imaging or facial recognition). This approach helps ensure that the model's interpretations align with human expertise and can handle the subtleties of real-world visual data. Ensuring a model can reliably interpret and analyze visual information across various conditions requires a careful balance between automated validation methods and human expertise. Choosing the right validation techniques for CV models involves considering the dataset's diversity, the computational resources available, and the application's specific requirements. Luckily, there are model validation tools that can help you focus on validating the model. At the same time, they do the heavy lifting of providing the insights necessary to validate your CV model’s performance, including providing AI-assisted evaluation features. But before walking through Encord Active, let’s understand the factors you need to consider for choosing the right tool. How to Choose the Right Computer Vision Model Validation Tool When choosing the right model validation tool for computer vision projects, several key factors come into play, each addressing the unique challenges and requirements of working with image data. These considerations ensure that the selected tool accurately evaluates the model's performance and aligns with the project's specific demands. Here's a streamlined guide to making an informed choice: Data Specificity and Complexity: Opt for tools that cater to the variability and complexity inherent in image data. This means capabilities for handling image-specific metrics such as Intersection over Union (IoU) for object detection and Mean Absolute Error (MAE) for tasks like classification and segmentation are crucial. Robust Data Validation: The tool should adeptly manage image data peculiarities, including potential discrepancies between image annotations and the actual images. Look for features that support comprehensive data validation across various stages of the model development cycle, including pre-training checks and ongoing training validations. Comprehensive Evaluation Metrics: Essential for thoroughly assessing a computer vision model's performance. The tool should offer a wide array of metrics, including precision-recall curves, ROC curves, and confusion matrices for classification, alongside task-specific metrics like IoU for object detection. It should also support quality metrics for a more holistic, real-world evaluation. Versatile Performance Evaluation: It should support a broad spectrum of evaluation techniques for deep insights into accuracy, the balance between precision and recall, and the model’s ability to distinguish between different classes. Dataset Management: The validation tool should help with efficient dataset handling for proper training-validation splits. For the sake of performance and scale, it should be able to manage large datasets. Flexibility and Customization: The fast-paced nature of computer vision demands tools that allow for customization and flexibility. This includes introducing custom metrics, supporting various data types and model architectures, and adapting to specific preprocessing and integration needs. Considering those factors, you can select a validation tool (open-source toolkits, platforms, etc.) that meets your project's requirements and contributes to developing reliable models. Using Encord Active to Validate the Performance of Your Computer Vision Model Encord Active (EA) is a data-centric model validation solution that enables you to curate valuable data that can truly validate your model’s real-world generalizability through quality metrics. In this section, you will see how you can analyze the performance of a pre-trained Mask R-CNN object detection model with Encord Active on COVID-19 predictions. From the analysis results, you will be able to validate and, if necessary, debug your model's performance. This walkthrough uses Encord Annotate to create a project and import the dataset. We use Encord Active Cloud to analyze the model’s failure modes. We recommend you sign up for an Encord account to follow this guide. Import Predictions Import your predictions onto the platform. Learn how to import Predictions in the documentation. Select the Prediction Set you just uploaded, and Encord Active will use quality data, label, and model quality metrics to evaluate the performance of your model: Visualize Model Performance Summary on the Validation Set Evaluate the model’s performance by inspecting the Model Summary dashboard to get an overview of your model’s performance on the validation set with details error categorization (true positive vs. false positive vs. false negative), the F1 score, and mean average precision/recall based on a confidence (IoU) threshold: Manually Inspect the Model Results Beyond visualizing a summary of the model’s performance, using a tool that allows you to manually dig in and inspect how your model works on real-world samples is more than helpful. Encord Active provides an Explorer tab that enables you to filter models by metrics to observe the impact of metrics on real-world samples. EA’s data-centric build also lets you see how your model correctly or incorrectly makes predictions (detects, classifies, or segments) on the training, validation, and production samples. Let’s see how you can achieve this: On the Model Summary dashboard, → Click True Positive Count metric to inspect the predictions your model got right: Click on one of the images using the expansion icon to see how well the model detects the class, the confidence score with which it predicts the object, other scores on performance metrics, and metadata. Still under the Explorer tab → Click on Overview (the tab on the right) → Click on False Positive Count to inspect instances that the model failed to detect correctly It seems most classes flagged as False Positives are due to poor object classification quality (the annotations are not 100% accurate). Let’s look closely at an instance: In that instance, the model correctly predicts that the object is ‘Cardiomediastinum’. Still, the second overlapping annotation has a broken track for some reason, so Encord Active classifies its prediction as false positive using a combination of Broken Object Track and other relevant quality metrics. Under Filter → Add filter, you will see parameters and attributes to filter your model’s performance. For example, if you added your validation set to Active through Annotate, you can validate your model’s performance on that set and, likewise, on the production set. Visualize the Impact of Metrics on Model Performance Evaluate the model outcome count to understand the distribution of the correct and incorrect results for each class. Under the Model Evaluation tab → Click on Outcome to see the distribution chart: Now, you should see the count for the number of predictions the model gets wrong. Using this chart, you can get a high-level perspective on the issues with your model. In this case, the model fails to segment the ‘Airways’ object in the instances correctly. The Intersection-of-Union (IoU) Threshold is 0.5, the threshold for the model’s confidence in its predictions. Use the IOU Threshold slider under the Overview tab to see the outcome count based on a higher or lower threshold. You can also select specific classes you want to inspect under the Classes option. Dig Deeper into the Metrics Once you understand the model outcome count, you can dig deeper into specific metrics like precision, recall, and F1 scores if they are relevant to your targets. Notice the low precision, recall, and F1 scores per class! Also, group the scores by the model outcome count to understand how the model performs in each class. You could also use the precision-recall curve to analyze and highlight the classes harder for the model to detect with high confidence. Also break down the model’s precision and recall values for the predictions of each object over the relevant metrics you want to investigate. For example, if you want to see the precision and recall by the Object Classification Quality metric, under Metric Performance → Select the Metric dropdown menu, and then the metric you want to investigate the model’s precision by: Validate the Model’s Performance on Business Criteria Now it’s time to see the metrics impacting the model’s performance the most and determine, based on your information, if it’s good or bad (needs debugging) for business. For instance, if the Confidence scores are the least performing metrics, you might be worried that your vision model is naive in predictions given the previous consensus on the outcome count (false positives and negatives). Here is the case for this model under the Metric Performance dashboard (remember, you can use the IoU Threshold slider to check the metric impact at different confidence intervals): The Relevative Area (the object's size) significantly influences our model’s performance. Considering the business environment you want to deploy the model, would this be a good or bad event? This is up to you to decide based on your technical and business requirements. If the model does not work, you can run more experiments and train more models until you find the optimal one. Awesome! You have seen how Encord Active plays a key role in providing features for validating your model’s performance with built-in metrics. In addition, it natively integrates with Encord Annotate, an annotation tool, to facilitate data quality improvement that can enhance the performance of your models. Conclusion Selecting the right model validation tools ensures that models perform accurately and efficiently. It involves the assessment of a model's performance through quantitative metrics such as the IoU, mAP (mean Average Precision), and MaE, or qualitatively, by subject matter experts. The choice of evaluation metric should align with the business objectives the model aims to achieve. Furthermore, model selection hinges on comparing various models using these metrics within a carefully chosen evaluation schema, emphasizing the importance of a proper validation strategy to ensure robust model performance before deployment. Validating model performance is particularly vital in sectors where such inaccuracies could compromise safety. Check out our customer stories to learn from large and small teams that have improved their data quality and model performance with the help of Encord. Platforms like Encord, which specialize in improving data and model quality, are instrumental in this context. Encord Active, among others, provides features designed to refine data quality and bolster model accuracy, mitigating the risks associated with erroneous predictions or data analysis.
Mar 02 2024
8 M


Comparative Analysis of YOLOv9 and YOLOv8 Using Custom Dataset on Encord Active
Even as foundation models gain popularity, advancements in object detection models remain significant. YOLO has consistently been the preferred choice in machine learning for object detection. Let’s train the latest iterations of the YOLO series, YOLOv9, and YOLOV8 on a custom dataset and compare their model performance. In this blog, we will train YOLOv9 and YOLOv8 on the xView3 dataset. The xView3 dataset contains aerial imagery with annotations for maritime object detection, making it an ideal choice for evaluating the robustness and generalization capabilities of object detection models. If you wish to curate and annotate your own dataset for a direct comparison between the two models, you have the option to create the dataset using Encord Annotate. Once annotated, you can seamlessly follow the provided code to train and evaluate both YOLOv9 and YOLOv8 on your custom dataset. Read the Encord Annotate Documentation to get started with your annotation project. Prerequisites We are going to run our experiment on Google Colab. So if you are doing it on your local system, please bear in mind that the instructions and the code was made to run on Colab Notebook. Make sure you have access to GPU. You can either run the command below or navigate to Edit → Notebook settings → Hardware accelerator, set it to GPU, and the click Save. !nvidia-smi To make it easier to manage datasets, images, and models we create a HOME constant. import os HOME = os.getcwd() print(HOME) Train YOLOv9 on Encord Dataset Install YOLOv9 !git clone https://github.com/SkalskiP/yolov9.git %cd yolov9 !pip install -r requirements.txt -q !pip install -q roboflow encord av # This is a convenience class that holds the info about Encord projects and makes everything easier. # The class supports bounding boxes and polygons across both images, image groups, and videos. !wget 'https://gist.githubusercontent.com/frederik-encord/e3e469d4062a24589fcab4b816b0d6ec/raw/fa0bfb0f1c47db3497d281bd90dd2b8b471230d9/encord_to_roboflow_v1.py' -O encord_to_roboflow_v1.py Imports from typing import Literal from pathlib import Path from IPython.display import Image import roboflow from encord import EncordUserClient from encord_to_roboflow_v1 import ProjectConverter Data Preparation Set up access to the Encord platform by creating and using an SSH key. # Create ssh-key-path key_path = Path("../colab_key.pub") if not key_path.is_file(): !ssh-keygen -t ed25519 -f ../colab_key -N "" -q key_content = key_path.read_text() We will now retrieve the data from Encord, converting it to the format required by Yolo and storing it on disk. It's important to note that for larger projects, this process may encounter difficulties related to disk space. The converter will automatically split your dataset into training, validation, and testing sets based on the specified sizes. # Directory for images data_path = Path("../data") data_path.mkdir(exist_ok=True) client = EncordUserClient.create_with_ssh_private_key( Path("../colab_key").resolve().read_text() ) project_hash = "9ca5fc34-d26f-450f-b657-89ccb4fe2027" # xView3 tiny encord_project = client.get_project(project_hash) converter = ProjectConverter( encord_project, data_path, ) dataset_yaml_file = converter.do_it(batch_size=500, splits={"train": 0.5, "val": 0.1, "test": 0.4}) encord_project_title = converter.title Download Model Weight We will download the YOLOv9-e and the gelan-c weights. Although the YOLOv9 paper mentions versions yolov9-s and yolov9-m, it's worth noting that weights for these models are currently unavailable in the YOLOv9 repository. !mkdir -p {HOME}/weights !wget -q https://github.com/WongKinYiu/yolov9/releases/download/v0.1/yolov9-e-converted.pt -O {HOME}/weights/yolov9-e.pt !wget -P {HOME}/weights -q https://github.com/WongKinYiu/yolov9/releases/download/v0.1/gelan-c.pt You can predict and evaluate the results of object detection with the YOLOv9 weights pre-trained on COCO model. Check out the blog YOLOv9 Explained and How to Run it if you want to run object detection on pre-trained YOLOv9 weights. Train Custom YOLOv9 Model for Object Detection We train a custom YOLOv9 model from a pre-trained gelan-c model. !python train.py \ --batch 8 --epochs 20 --img 640 --device 0 --min-items 0 --close-mosaic 15 \ --data $dataset_yaml_file \ --weights {HOME}/weights/gelan-c.pt \ --cfg models/detect/gelan-c.yaml \ --hyp hyp.scratch-high.yaml You can examine and validate your training results. The code for validation and inference with the custom model is available on Colab Notebook. Here we will focus on comparing the model performances. Converting Custom YOLOv9 Model Predictions to Encord Active Format pth = converter.create_encord_json_predictions(get_latest_exp("detect") / "labels", Path.cwd().parent) print(f"Predictions exported to {pth}") Download the predictions on your local computer and upload them via the UI to Encord Active for analysis of your results. Moving on to training YOLOv8! Train YOLOv8 on Encord Dataset Install YOLOv8 !pip install ultralytics==8.0.196 from IPython import display display.clear_output() import ultralytics ultralytics.checks() Dataset Preparation As we are doing a comparative analysis of two models, we will use the same dataset to train YOLOv8. Train Custom YOLOv8 Model for Object Detection from ultralytics import YOLO model = YOLO('yolov8n.pt') # load a pretrained YOLOv8n detection model model.train(data=dataset_yaml_file.as_posix(), epochs=20) # train the model model.predict() The code for running inference on the test dataset is available on the Colab Notebook shared below. Converting Custom YOLOv8 Model Predictions to Encord Active Format pth = converter.create_encord_json_predictions(get_latest_exp("detect", ext="predict") / "labels", Path.cwd().parent) print(f"Predictions exported to {pth}") Download this JSON file and upload it to Encord Active via UI. Comparative Analysis on Encord Active On Encord Active under the tab Model Evaluation, you can compare both the model’s predictions. You can conveniently navigate to the Model Summary tab to view the Mean Average Precision (mAP), Mean Average Recall (mAR), and F1 score for both models. Additionally, you can compare the differences in predictions between YOLOv8 and YOLOv9. Precision YOLOv8 may excel in correctly identifying objects (high true positive count) but at the risk of also detecting objects that aren't present (high false positive count). On the other hand, YOLOv9 may be more conservative in its detections (lower false positive count) but could potentially miss some instances of objects (higher false negative count). Recall In terms of recall, YOLOv8 exhibits superior performance with a higher true positive count (101) compared to YOLOv9 (43), indicating its ability to correctly identify more instances of objects present in the dataset. Both models, however, show an equal count of false positives (643), suggesting similar levels of incorrect identifications of non-existent objects. YOLOv8 demonstrates a lower false negative count (1261) compared to YOLOv9 (1315), implying that YOLOv8 misses fewer instances of actual objects, highlighting its advantage in recall performance. Precision-Recall Curve Based on the observed precision-recall curves, it appears that YOLOv8 achieves a higher Area Under the Curve (AUC-PR) value compared to YOLOv9. This indicates that YOLOv8 generally performs better in terms of both precision and recall across different threshold values, capturing a higher proportion of true positives while minimizing false positives more effectively than YOLOv9. Precision-Recall Curve is not the only metric to evaluate the performance of models. There are other metrics like F1 score, IOU distribution, etc. For more information on different quality metrics, read the blog Data, Label, & Model Quality Metrics in Encord. Metric Correlation The metric impact on performance in Encord refers to how specific metrics influence the performance of your model. Encord allows you to figure out which metrics have the most influence on your model's performance. This metric tells us whether a positive change in a metric will lead to a positive change (positive correlation) or a negative change (negative correlation) in model performance. The dimensions of the labeled objects significantly influence the performance of both models. This underscores the importance of the size of objects in the dataset. It's possible that the YOLOv9 model's performance is adversely affected by the presence of smaller objects in the dataset, leading to its comparatively poorer performance. Metric Performance The Metric Performance in model evaluation in Encord provides a detailed view of how a specific metric affects the performance of your model. It allows you to understand the relationship between a particular metric and the model's performance. In conclusion, the comparison between YOLOv8 and YOLOv9 on Encord Active highlights distinct performance characteristics in terms of precision and recall. While YOLOv8 excels in correctly identifying objects with a higher true positive count, it also exhibits a higher false positive count, indicating a potential for over-detection. On the other hand, YOLOv9 demonstrates a lower false positive count but may miss some instances of objects due to its higher false negative count. If you want to improve your object detection model, read the blog How to Analyze Failure Modes of Object Detection Models for Debugging for more information. The precision-recall curve analysis suggests that YOLOv8 generally outperforms YOLOv9, capturing a higher proportion of true positives while minimizing false positives more effectively. However, it's important to consider other metrics like F1 score and IOU distribution for a comprehensive evaluation of model performance. Moreover, understanding the impact of labeled object dimensions and specific metric correlations can provide valuable insights into improving model performance on Encord Active.
Mar 01 2024
8 M


How to Analyze Failure Modes of Object Detection Models for Debugging
Developing models that consistently perform well across various real-world scenarios is a formidable challenge in computer vision. These models often encounter errors and inaccuracies that significantly impact their effectiveness and reliability. Identifying and debugging these errors is a complex process requiring a nuanced understanding of the model's behavior, making it time-consuming and intricate. Computer vision engineers and researchers grapple with errors that can degrade performance, facing a labor-intensive debugging process that demands a deep dive into model behaviors. The stakes are high, as inefficiencies in this process can impede applications critical to safety and decision-making. The inability to efficiently debug and analyze model errors can lead to suboptimal model performance, impacting critical applications such as autonomous driving, security surveillance, and medical diagnostics. This not only diminishes the value of the technology but can also have serious implications for safety and decision-making processes based on these models. Encord Active is a debugging toolkit designed to solve these challenges. It allows a more focused and effective approach to model evaluation and debugging in the computer vision domain. It gives insights into model behavior and makes finding and fixing errors easier through an intuitive and complete set of features. In this article, you will learn how to use Encord Active to automatically identify and analyze the failure modes of computer vision models. By incorporating Encord Active into your model development process, you have a more efficient debugging process that can help build robust computer vision models capable of performing well in diverse and challenging real-world scenarios. Why are Traditional Model Metrics no Longer Enough? One critical concern we see with data and ML teams is figuring out how to detect where their model is struggling and fix the failure patterns to shore up performance problems. They often train a model and perform regular metric calculations (like recall, precision, F1-score, and accuracy). However, these metrics alone cannot detect edge cases or test the model’s robustness for real-world applications. Taking a more data-centric approach to debugging the model's performance has enabled most computer vision teams to fix errors and deploy robust models. Let’s see how to find and fix model errors in a data-centric way using Encord Active. Analyzing Model Errors with Encord Active Encord Active helps you understand and improve your data, labels, and models at all stages of your computer vision journey. Beyond finding and fixing label errors through data exploration, it lets you visualize the important performance metrics for your computer vision mode. Encord Active is available in two versions: Encord Active Cloud and Encord Active OS. Active Cloud and Encord Annotate are natively integrated, with Encord hosting both services. Encord Active OS is an open-source toolkit that you can install on a local computer or server. This walkthrough uses Encord Annotate to create a project and import the dataset. We use Encord Active Cloud to analyze the model’s failure modes. We recommend you sign up for an Encord account to follow this guide. Here are the steps we will practically walk through to analyze the model errors in this guide. Step 1: Import your Project and Predictions Step 2: Evaluate Model Performance Step 3: Error Categorization Step 4: Quantitative Analysis Step 5: Data Distribution Analysis Step 1: Import your Project and Predictions The dataset we use for this guide is COCO 2017. A good place to start using Active is Importing an Annotate Project. From Annotate, you can configure the dataset and ontology for your Project. Once that is done, move to Active. We have pre-loaded the dataset into Annotate for this walkthrough and imported the Project to Active. Select your project to head to Explorer. Great! The next step is to import your model predictions to Encord Active to analyze model errors. It will automatically provide visualizations to evaluate your model, detect label errors, and provide valuable insights to improve the overall performance of your model. You must import Predictions into Active before using the Predictions feature on the Explorer and Model Evaluation pages. Learn how to do it in this documentation. We have trained a Mask-RCNN model for this guide and imported the Predictions file (JSON format). Let’s see how to use the Model Evaluation page to navigate the model's performance and analyze the errors. Pro tip here? Use your object detection model to make predictions on a validation subset of the dataset. Ensure this subset is diverse and covers various categories, object sizes, and scenes to get a comprehensive view of the model's performance. Step 2: Evaluate Model Performance The next step is to evaluate the model's performance using standard object detection metrics such as mean Average Precision (mAP) and Intersection over Union (IoU). These metrics will help us identify overall performance issues but not specific errors. On the Explorer, navigate to the Model Evaluation tab → Model Performance → Performance to see the standard metrics: [Optional] Interpreting the Standard Metrics See those metrics and model results? Let’s interpret them: A mean Average Precision (mAP) of 0.5927 (or 59.27%) at an IoU threshold of 0.5 indicates the model has moderate accuracy in detecting objects on this dataset. Although the model is relatively effective at identifying objects, it has room for improvement, especially in achieving higher precision and recall across all classes. We’ll look at the precision and recall scores in the next section. A mean Average Recall (mAR) of 0.7347 (or 73.47%) at the same IoU threshold of 0.5 indicates the model's ability to detect a proportion of all relevant instances across all classes. A higher mAR suggests the model is quite good at identifying most of the objects it should, but there might still be missed detections (false negatives) affecting its overall recall. This should cause you to think back to what your goal for the real-world application is. Would it be appropriate to miss detection if it identifies most objects in the grand scheme? Remember that mAP says the model is only moderately effective at identifying the objects. This is reflected in the F1 score. An F1 score of 53.62% indicates that, despite the model's relatively high ability to detect pertinent objects (as suggested by mAR), its precision, or the accuracy of these detections, is lower, which lowers the F1 score. The model might be generating too many false positives. We’ll confirm that in the error categorization section. Potential Fix: Improving the model could involve reducing false positives through better background discrimination, refining anchor box sizes, or incorporating more varied examples in the training data to improve precision without significantly sacrificing recall. Step 3: Error Categorization Based on your observations, classify errors into categories such as: False Positive and Negative Counts Still on the Model Performance tab, notice the False Positive Count for this model is 38,595 predictions. No wonder the precision was that low! This implies that our model may have learned incorrect features indicative of certain classes. This could be due to noise in the training data or an imbalance leading the model to err on the side of making detections too readily. Under Model Outcome Count, let’s see the classes in which the model incurs the most false positive predictions: Encord Active suggests that the model incurs the most false positives with the “person” class, but this is expected due to the proportion of the prediction count compared to other classes. So, if you expect your model to perform better in a certain class, you might have to zoom in on that and inspect it. Under Model Performance → Click False Positive Count → Predictions tab → Add filter → Choose the Class and Prediction IOU (adjust to 0.5) filters: Great! Manually inspect the predictions alongside their ground truth annotations. Take note of the incorrect classifications (wrong annotations). Click Select Class under the Filter tab to choose a class to inspect specifically. Use the quality metrics to filter the dataset further: Under Prediction → Choose a quality metric to filter the predictions with: The goal for you here is to look for error patterns. Are certain object sizes (Absolute Area), classes, or scenarios (e.g., occlusions, varying lighting conditions) more prone to errors? What about duplicates? Is the model likely to detect the same object more than once in an instance? This analysis can help pinpoint specific weaknesses in the model. When you conclude, repeat the same process for the False Negative Count metric if you are optimizing to identify predictions that the model missed detections of objects that are present. Filter by the Missing Objects metric. Potential Fix: Addressing the false positives may require cleaning the dataset to remove inaccuracies, using regularization techniques to prevent overfitting, or adjusting the detection threshold to make the model more conservative in its predictions. Localization Errors (Correct class but incorrect bounding box position or size) Here, you are looking for instances (predictions) where the model correctly identifies the presence of an object but inaccurately predicts its bounding box. This can mean the box is too large, small, poorly positioned, or improperly shaped relative to the object. There are metrics to check for localization errors within EA: Border Proximity: Rank annotations by how close they are to image borders. Broken Object Tracks: Identify broken object tracks based on object overlaps. Inconsistent Object Classification: Looks for overlapping objects with different classes (across frames). Label Duplicates: Rank labels by how likely they are to represent the same object. Object Classification Quality: Compare object annotations against similar image crops. Polygon Shape Anomaly: Calculate potential outliers by polygon shape. Let’s use two metrics: Under Prediction → Choose Inconsistent Object Classification and Track → Sort by Descending Order → Expand one of the instances to inspect the error: Such errors suggest issues with how the model perceives object boundaries. This might be due to inadequate feature extraction capabilities that fail to capture the precise contours of objects or a mismatch between the scale of objects in the training data and those in the validation or real-world scenarios. Potential Fix: Improving localization might involve adjusting the anchor box configurations to better match the typical object sizes and shapes in the COCO dataset or improving the spatial resolution at which the model processes images. Also, check for: Classification Errors: Errors that arise when the model detects an object but assigns it an incorrect label. Confusion with Similar Classes: Errors observed when the model confuses objects between similar classes, mislabeling them in the process. Step 4: Quantitative Analysis If you need more help identifying which classes are most problematic, use error analysis features such as the metric impact on the model’s performance, precision and recall by metric chart, and precision-recall curves for each class within EA. First off, the metric impact on model performance. Visualizing the Impact of Metrics on Model Performance Encord Active applies quality metrics to your data, labels, and model predictions to assess their quality and rank them accordingly. EA uses these metrics to analyze and decompose your data, labels, and predictions. It ships with pre-built quality metrics, but you can also define custom quality metrics for indexing your data, labels, and predictions. Navigate to the Model Evaluation tab → Metric Performance: The longest orange bar indicates that the confidence metric impacts the model's performance the most. This indicates that the confidence scores the model assigns to its predictions are strongly correlated with the precision of those predictions. Zoom into a specific metric (say, height) you want to assess using the Precision By Metric chart. Under Metric → Label/Height and Label/Width: The visualization shows a drop in precision once the model starts to predict instances with heights and widths > 500 pixels. Toggle on the Show Model Outcome Count option for a nuanced view with error categorizations (True Positive Count, False Negative Count, and False Positive Count). Potential Fix: To improve the model, consider augmenting the dataset with more examples of objects at the widths where precision is low. Alternatively, you might adjust the model architecture or training process to handle better objects of these sizes, such as using different anchor box sizes in the case of object detection models like YOLO or SSD. Switch to Recall to analyze the average recall of the model by the quality metrics. Precision and Outcome Count Chart Under the Model Evaluation tab → Toggle back to the Model Performance tab → Precision. We have looked at the mean Average Precision (mAP) earlier, but here, you can inspect the average precision per class and the model outcome count: There is a notable variance in precision across classes, which indicates that the model's performance is not uniform. From all indications, this, in part, is due to a class imbalance in the training data, varying difficulty distinguishing certain classes, and the different amounts of training data available for each class. Check the same analysis under the Recall tab: The blue line is close to 1 for many classes, indicating that the recall across most classes appears quite high. This suggests that the model is generally effective at detecting instances of these classes when they are present in the data. The blue line dipping near the bottom of the chart indicates that "scissors," "toaster," and "hairdryer" are some of the classes with a very low recall (close to 0). This means the model is missing most instances of these classes, a significant concern for model performance. Precision-Recall Curves Precision-recall curves for each class reveal the trade-off between precision and recall at various IOU threshold settings. Analyzing these curves class by class can highlight which classes are harder for the model to detect with high confidence. Under Model Performance tab → Precision-Recall Curve → Use the slide to set the IOU Threshold value: You can also analyze the precision-recall trade-off for all the classes. Toggle the Decompose by Class option on and adjust the slider to balance between leniency and strictness on spatial accuracy: If there are specific classes you want to analyze, you can select them under the Classes dropdown box → Toggle on Decompose by Class: Use the insights from these curves to guide how you optimize the class-specific detection thresholds. This way, you can improve overall model performance by balancing precision and recall according to the specific requirements of each class. Step 5: Data Distribution Analysis You can also analyze the distribution of classes, object sizes, and scenarios in your training data. Imbalances or insufficient representation of certain cases can lead to higher error rates for those categories. Navigate to the Explorer tab → Data view → Filter → Add filter → Class: Here are other analyses you could carry out here: Size Inclusion in Training: Ensuring the training data includes a variety of object sizes and implementing multi-scale training techniques can improve detection across different object sizes. Variety in Object Conditions: Objects can appear in various conditions, such as different lighting, occlusions, and backgrounds. A lack of diversity in these scenarios can lead to a model that performs well only under the specific conditions it was trained on. Understanding Context: The context in which objects appear can provide additional cues for accurate detection. For example, certain objects are more likely to be found indoors versus outdoors, and some objects are typically found in proximity to others. A holistic data distribution analysis can uncover biases and gaps in the training dataset that may lead to certain prediction errors your model makes. Next Steps: Troubleshooting the Errors Now that you have diagnosed the model issues with the potential fixes we discussed earlier, what do you do next? Here are some steps: Focus on Problem Areas: Once you’ve identified error patterns, focus on these areas for further analysis. For example, if small objects are often missed, inspect how such objects are represented in the dataset and whether the model’s architecture can detect small features. Formulate Hypotheses: Based on your analysis, formulate hypotheses on why certain errors occur. This could involve feature representation, anchor box sizes, or training data quality. Experiment: Make targeted changes based on your hypotheses, such as adjusting the model architecture, re-balancing the training data, re-training the model on the data segment it performs poorly on, or using specific data augmentation techniques. Validate Changes: Re-evaluate the model on the validation subset to see if the changes have reduced the specific errors you identified. Iterative Improvement: Finding and fixing errors in object detection models is an iterative process. Repeating the steps of error identification, hypothesis testing, and validation can improve model performance. Debugging with Encord Active Encord Active (EA) is a data-centric debugging platform that offers a wide range of features to assist computer vision teams with efficiently debugging their models. Here are some key capabilities of EA: Interactive Debugging: Encord Active provides visualization tools, an explorer, and model-assisted features for interactive debugging where you can explore model predictions step by step. You can inspect the model's errors, see how it performs on data segments, and use quality metrics to assess how well the models generalize at the class level. Explainability: EA computes metric performance and importance for model predictions, so you can get insights into why the model made a specific decision Anomaly Detection: Encord Active can automatically detect anomalies and outliers in your data, helping you identify data quality issues that may affect your model's performance. Collaboration: Encord Active supports collaboration among team members, enabling multiple stakeholders to collaborate on identifying model errors and getting insights to improve machine learning models. Integration with Encord Annotate: EA natively integrates with Encord Annotate, the computer vision data annotation tool many computer vision teams use. Easily sync your project to Annotate and directly edit images within Annotate without moving across platforms or tools. Key Takeaways: In this guide, we identified and analyzed the failure modes of an object detection model based on its prediction errors. We trained a Mask R-CNN model on the COCO 2017 dataset and validated it on a subset of that dataset. We went through five analysis steps and potential fixes to the model errors. Debugging in machine learning is an intricate process, much like detective work. It's critical for making your models work correctly and for various strategic and technical reasons. Here's a recap of the error analysis steps we discussed in this guide: Step 1: Import your Project and Predictions Step 2: Evaluate Model Performance Step 3: Error Categorization Step 4: Quantitative Analysis Step 5: Data Distribution Analysis
Feb 19 2024
10 M


How to Use Semantic Search to Curate Images of Products with Encord Active
Finding contextually relevant images from large datasets remains a substantial challenge in computer vision. Traditional search methodologies often struggle to grasp the semantic nuances of user queries because they rely on image metadata. This usually leads to inefficient searches and inaccurate results. If you are working with visual datasets, traditional search methods cause significant workflow inefficiencies and potential data oversight, particularly in critical fields such as healthcare and autonomous vehicle development. How do we move up from searching by metadata? Enter semantic search! It uses a deep understanding of your search intent and contextual meaning to deliver accurate and semantically relevant results. So, how do you implement semantic search? Encord Active is a platform for running semantic search on your dataset. It uses OpenAI’s CLIP (Contrastive Language–Image Pre-Training) under the hood to understand and match the user's intent with contextually relevant images. This approach allows for a more nuanced, intent-driven search process. This guide will teach you how to implement semantic search with Encord Active to curate datasets for upstream or downstream tasks. More specifically, you will curate datasets for annotators to label products for an online fashion retailer. At the end of this guide, you should be able to: Perform semantic search on your images within Encord. Curate datasets to send over for annotation or downstream cleaning. See an increase in search efficiency, reduced manual effort, and more intuitive interaction with your data. What are Semantic Image Search and Embeddings? When building AI applications, semantic search and embeddings are pivotal. Semantic search uses a deep understanding of user intent and the contextual meanings of queries to deliver search results that are accurate and semantically relevant to the user's needs. Semantic search bridges the gap between the complex, nuanced language of the queries and the language of the images. It interprets queries not as mere strings of keywords but as expressions of concepts and intentions. This approach allows for a more natural and intuitive interaction with image databases. This way, you can find images that closely match your search intent, even when the explicit keywords are not in the image metadata. Image Embeddings to Improve Model Performance Embeddings transform data—whether text, images, or sounds—into a high-dimensional numerical vector, capturing the essence of the data's meaning. For instance, text embeddings convert sentences into vectors that reflect their semantic content, enabling machines to process and understand them. OpenAI's Contrastive Language–Image Pre-Training (CLIP) is good at understanding and interpreting images in the context of natural language descriptions under a few lines of code. CLIP is a powerful semantic search engine, but we speak to teams running large-scale image search systems about how resource-intensive it is to run CLIP on their platform or server. Check out our workshop on building a semantic visual search engine with ChatGPT & CLIP. Encord Active runs CLIP under the hood to help you perform semantic search at scale. Semantic Search with Encord Active Encord Active uses its built-in CLIP to index your images when integrating them from Annotate. This indexing process involves analyzing the images and textual data to create a searchable representation that aligns images with potential textual queries. You get this and an in–depth analysis of your data quality on an end-to-end data-centric AI platform. You can perform semantic search with Encord Active in two ways: Searching your images with natural language (text-based queries). Searching your images using a reference or anchor image. The walkthrough below uses Encord Annotate to create a project and import the dataset. We use Encord Active to search data with natural language. We recommend you sign up for an Encord account to follow this guide. Import your Project A good place to start using Active is Importing an Annotate Project. From Annotate you can configure the Dataset, Ontology, and workflow for your Project. Once you complete that, move to Active. Explore your Dataset Before using semantic search in Encord Active, you must thoroughly understand and explore your dataset. Start by taking an inventory of your dataset. Know the volume, variety, and visual content of your images. Understanding the scope and diversity of your dataset is fundamental to effectively using semantic search. One of the most exciting features of Encord Active is that it intuitively shows you all the stats you need to explore the data. Within the Explorer, you can already see the total number of images, probable issues within your dataset, and metrics (for example, “Area”) to explore the images: Play around with the Explorer features to inspect the dataset and understand the visual quality. You can also examine any available metadata associated with your images. Metadata can provide valuable insights into the content, source, and characteristics of your images, which can be instrumental in refining your search. You can also explore your image embeddings by switching from Grid View to Embeddings View in the Explorer tab: It’s time to search smarter 🔎🧠. Search your Images with Natural Language You’ve explored the dataset; you are now ready to curate your fashion products for the listings with semantic searches using natural language queries. For example, if you want images for a marketing campaign themed around "innovation and technology," enter this phrase into the search bar. Encord Active then processes this query, considering the conceptual and contextual meanings behind the terms, and returns relevant images. Within the Explorer, locate the “Natural Search” bar. There are two ways to perform semantic search within Encord: through natural language or a reference image. We’ll use natural language for the rest of this guide. Say our online platform does not have enough product listings for white sneakers. What can we do? In this case, enter “white sneakers” in the search bar: Awesome! Now you see most images of models in white sneakers and a few that aren’t. Although the total images in our set are 2,701, imagine if the product listings were an order of magnitude larger. This would be consequential. Before curating the relevant images, let’s see how you can search by similar images to fine-tune your search even further. Search your Images with Similar Images Select one of the images and click the expansion button. Click the “Find similar” button to use the anchor image for the semantic similarity search: Sweet! You just found another way to tailor your search. Next, click the “x” (or cancel) icon to return to the natural language search explorer. It’s time to curate the product images. Curate Dataset in Collections Within the natural language search explorer, select all the visible images of models with white sneakers. One way to quickly comb through the data and ensure you don’t include false positives in your collections is to use the Select Visible option. This option only selects images you can see, and then you can deselect images of models in non-white sneakers. In this case, we will quickly select a few accurate options we can see: On the top right-hand corner, click Add to a Collection, and if you are not there already, navigate to New Collection. Name the Collection and add an appropriate and descriptive comment in the Collection Description box. Click Submit when you: Once you complete curating the images, you can take several actions: Create a new dataset slice. Send the collection to Encord Annotate for labeling. Bulk classify the images for pre-labeling. Export the dataset for downstream tasks. Here, we will send the collection to Annotate to label the product listings. We named it “White Sneakers” and included comments to describe the collection. Send Dataset to Encord Annotate Navigate to the Collections tab and find the new collection (in our case, “White Sneakers”). Hover over the new collection and click the menu on the right to show the list of next action options. Click Send to Annotate and leave a descriptive comment for your annotator: Export Dataset for Downstream Tasks Say you are building computer vision applications for an online retailer or want to develop an image search engine. You can export the dataset metadata for those tasks if you need to use the data downstream for preprocessing or training. Back to your new collection, click the menu, and find the Generate CSV option to export the dataset metadata in your collection: Nice! Now, you have CSV with your dataset metadata and direct links to the images on Encored so that you can access them securely for downstream tasks. Next Steps: Labeling Your Products on Annotate After successfully using Encord Active to curate your image datasets through semantic search, the next critical step involves accurately labeling the data. Encord Annotate is a robust and intuitive platform for annotating images with high precision. This section explores how transitioning from dataset curation to dataset labeling within the Encord ecosystem can significantly improve the value and utility of the “White Sneakers” product listing. Encord Annotate supports various annotation types, including bounding boxes, polygons, segmentation masks, and keypoints for detailed representation of objects and features within images. Features of Encord Annotate Integrated Workflow: Encord Annotate integrates natively with Encord Active. This means a simple transition between searching, curating, and labeling. Collaborative Annotation: The platform supports collaborative annotation efforts that enable teams to work together efficiently, assign tasks, and manage project progress. Customizable Labeling Tools: You can customize the annotation features and labels to fit the specific needs of the projects to ensure that the data is labeled in the most relevant and informative way. Quality Assurance Mechanisms: Built-in quality assurance features, such as annotation review and validation processes, ensure the accuracy and consistency of the labeled data. AI-Assisted Labeling: Encord Annotate uses AI models like the Segment Anything Model (SAM) and LLaVA to suggest annotations, significantly speeding up the labeling process while maintaining high levels of precision. Getting Started with Encord Annotate To begin labeling the curated dataset with Encord Annotate, ensure it is properly organized and appears in Annotate. New to Annotate? Sign up on this page to get started. From there, accessing Encord Annotate is straightforward: Navigate to the Encord Annotate section within the platform. Select the dataset you wish to annotate. Choose or customize the annotation tools and labels to your project requirements. Start the annotation process individually or by assigning tasks to team members. Key Takeaways: Semantic Search with Encord Active Phew! Glad you were able to join me and stick through the entire guide. Let’s recap what we have learned in this article: Encord Active uses CLIP for Image Retrieval: Encord Active runs CLIP under the hood to enable semantic search. This approach allows for more intuitive, accurate, and contextually relevant image retrieval than traditional keyword- or metadata-based searches. Natural Language Improves Image Exploration Experience: Searching by natural language within Encord Active makes searching for images as simple as describing what you're looking for in your own words. This feature significantly improves the search experience, making it accessible and efficient across various domains. Native Transition from Curation to Annotation: Encord Active and Encord Annotate provide an integrated workflow for curating and labeling datasets. Use this integration to curate data for upstream annotation tasks or downstream tasks (data cleaning or training computer vision models).
Feb 16 2024
10 M


Announcing HTJ2K Support for DICOM Files in Encord
Announcing HTJ2K Support for DICOM Files in Encord We are thrilled to announce that Encord now supports the High Throughput JPEG 2000 (HTJ2K) transfer syntaxes for DICOM files. 🎉 Now, I know what you're thinking. "What's all the buzz about HTJ2K?" Well, let me break it down for you in plain English. What is HTJ2K? HTJ2K, or High Throughput JPEG 2000, is a variant of the JPEG 2000 image compression standard. It is designed to overcome the limitations of traditional JPEG 2000 by offering higher encoding and decoding throughput, making it particularly suitable for applications where speed is critical. Think of it as the turbocharged version of JPEG 2000, designed to handle massive DICOM datasets with lightning-fast speed.⚡ So, why is this a big deal? Picture this: you're a busy medical professional trying to access critical imaging data. Every second counts, right? With HTJ2K support in Encord, you'll experience faster rendering and import times, meaning you can get to that crucial image quicker than ever before. Importance of HTJ2K for DICOM Files In medical imaging, DICOM transfer syntax dictates how pixels are encoded within datasets. Despite significant advances in imaging technology, the DICOM standard has seen limited transfer syntax updates over the past two decades. Enter HTJ2K, a variant of JPEG 2000 that combines the efficiency of JPEG 2000 compression with high throughput capabilities. Unlike its predecessor, which struggled due to its heavyweight nature, HTJ2K offers streamlined compression without sacrificing image quality. The recent approval of HTJ2K transfer syntaxes by the DICOM Standard Committee marks a significant milestone. This new syntax brings unprecedented efficiency and speed to image compression, reducing file sizes and transmission times while improving workflow efficiency for medical practitioners. At Encord, we're thrilled to be at the forefront of this advancement in DICOM labeling.🎉 Why is it Exciting for Medical Professionals? One of few to support HTJ2K: With only a handful of applications currently supporting HTJ2K, Encord is among the pioneers in utilizing this advanced compression format. Time to First Image: With HTJ2K, medical professionals can expect significant efficiency gains as the compression rate is reduced by 40%. The time-to-first-image is dramatically reduced, meaning that practitioners can access critical imaging data faster, enabling quicker diagnoses and treatment decisions. Performance Improvements: As the image takes up less storage space, there reduction in both presentation time (loading time) and transmission time means that medical professionals can spend less time waiting for images to render and import, leading to improved productivity and workflow efficiency. Industry Adoption: The fact that AWS has already built a medical imaging platform based on HTJ2K, underscores its potential to revolutionize the field. By aligning with this industry trend, Encord is empowering medical professionals with tools that are not only cutting-edge but also endorsed by industry leaders. So, the news that Encord now supports HTJ2K is nothing short of groundbreaking for medical professionals. It represents a significant leap forward in imaging technology, promising enhanced efficiency, performance improvements, and alignment with industry trends. With HTJ2K, medical practitioners can expect to save both space and time, ultimately leading to improved patient care and outcomes. Don't miss out on this exciting opportunity to elevate your medical imaging workflow to new heights with Encord. Contact us today to learn more and experience the power of HTJ2K for yourself!
Feb 16 2024
5 M


Product Updates [January 2024]
Happy New Year 2024! We put our heads down in January for a fashionably late new years welcome party. Check out below to see everything we’ve prepared, including: New Home Page and Onboarding A new way to manage your data Workflows Usability Enhancements DICOM MPR Annotations and other improvements Simple and intuitive Encord Active imports Welcome to Encord Opening the new year with a new home page with points directly Projects, Datasets and Ontologies — you’re never more on than one click away from creating any necessary entities. Of course, you can continue to do so from the relevant list pages as well. We’ve also introduced in-context documentation and explainers after performing various key actions to give you the information you need when you need it. Welcome to the new year, and welcome to Encord! Interact and manage your data directly Registering and indexing your data into your annotation platform is a critical step on your journey to a first-class AI application. Making sure your cloud integrations are front and center helps easily manage all your data sources. Read about it here. You’ll notice Datasets and Integrations appearing under a new section — Index! We’re working with select customers on the new Storage application to manage your data directly. Storage allows you to step past Datasets and interact with every file registered on Encord directly. Global file search, tracking and assigning dataset membership, and the ability to organize files into folders to suit your purpose are some of the initial features we’re rolling out. Contact us at support@encord.com to be part of the early cohort helping us develop and iterate how you manage your data! Get up to speed with the Storage explainer, here. Workflows Usability Enhancements We upgraded Workflows to the default task management system at the end of last year, and have continued to add functionality and scale. Creating workflow projects now happens in one simple interface — from 1,2,3,4 to 1 and done! We’ve also added several popular features. You can now change task routing on percentage routers after project creation, and annotators can skip difficult tasks and conveniently leave a comment for project managers to understand what is happening. We’ve also made it possible to update priorities and attach comments in bulk via the SDK making it possible to scale these operations to many thousands of tasks quickly. Smooth Integration Of Encord Active and Annotate The import process has been split into 4 separate stages to give you quicker access to useful features and enable you to start working with Active within minutes instead of hours. Choose between Data, labels, Embeddings, and Quality metrics to start your curation or label validation workflow. We’ve also enhanced the integration going from Active to Annotate as well. You can now adjust task priorities and comments from Active in bulk to optimize your annotation workflows ensuring the most high-value data gets annotated first. Use priorities and comments to surface the most important data and instructions to your annotation team — making the most of your resources and your team’s time. Finally, bulk classification allows you to classify multiple images or frames simultaneously, accelerating some classification workloads from hours to minutes. Combined with a foundation model such as CLIP this feature is powerful at classifying the simpler classes in your ontology before your annotation teams handle the details. Encord Active: Search Anything and Look Good Doing It Take your dataset querying to the next level with Search Anything! Building on the success of our natural language search feature, we're excited to introduce a new dimension to your search capabilities. Our latest feature, Search Anything, uses embeddings-based search technology to find images in your dataset that closely resemble an external image you provide. Simply drag and drop your chosen external image into Encord Active whereafter our algorithms will match it against your dataset, quickly and accurately identifying the most similar images for your review. For when you can’t describe an image, let the image describe itself! Coming Soon: We are improving the model predictions import process in the next month to make it even easier to get your models into Encord for evaluation, comparison, or pre-labeling. If you would like to provide input or feedback to the process please reach out to product@encord.com DICOM Improvements We’ve redoubled our efforts in making the DICOM annotation tool fit your workload. To start off the year, we’re quite pleased to be rolling out increased access to not one but two foundational improvements to our DICOM tool. Regardless of your modality (x-ray, CT, MRI, etc) — we’ve updated our recently introduced all new rendering engine. We’ve seen performance increases surpassing 3x loading time improvements with our recent changes and are very excited to be making it available. We’ve also added functionality to the MPR brush capabilities — the default mode is to annotate one slice at a time using the 2D brush, but you can also select the 3D brush mode to annotate on multiple slices at once. Refer to the reconstructed view documentation for the details and best practices. Contact us if you’re interested to hear more and help be part of the roll-out period. You can now also utilize our custom overlay feature to make your annotation experience as convenient as possible. Custom overlays allow you to control what DICOM information is conveniently surfaced and always visible in the editor interface. This means you won’t have to browse the metadata to find the information you need to annotate with accuracy! Full instructions and illustrations available in the documentation. Thanks for reading — as always, the inbox at product@encord.com is always open — we’d love to hear your thoughts on the feedback on the above! Talk to you soon!
Feb 15 2024
5 M


Multiplanar Reconstruction (MPR) in the DICOM Editor
MPR transforms cross-sectional scans into 2D orthogonal images (coronal, sagittal and axial views) and is crucial for a comprehensive understanding of human anatomy. MPR in Encord Our latest updates to MPR allow you to create Bitmask annotations directly on reconstructed views, and in any annotation window within the Label Editor. Annotations made in the one view automatically appear in all other views, and cross-reference lines are projected across all three views, assisting with precise anatomy annotation. All reconstructed views can also be transformed into detailed 3D renderings that prominently display your annotations. Labeling in Encord's MPR: A How-To Guide Now, let's get into the practical aspects of using MPR in Encord's Label Editor: Step 1: Open a DICOM annotation task in the Label Editor. The primary view is your main workspace, positioned on the left in the Label Editor. Reconstructed views are conveniently placed on the right. Step 2: Select a Bitmask object, and apply a label on any window. Use the 'Annotate from this tile' button to change the tile you're working on. By incorporating these steps into your workflow, you can leverage the full capabilities of MPR in Encord. Explore the Label Editor, experiment with Bitmask labels, and observe your annotations synchronize seamlessly across different views.
Feb 12 2024
3 M


How to Pre-Label Data at Speed with Bulk Classifications
As businesses grapple with enormous volumes of unstructured data, the need for innovative solutions to streamline data classification and analysis has become increasingly important. This is where Encord Active comes in, particularly with its Bulk Classification feature, designed for Data Operations & ML teams who are looking to improve enrichment and labeling efficiency. Encord Active for Bulk Classification Encord Active helps teams visualize and curate their data, detect label errors, and evaluate model performance. In this article, we’ll touch on a specific feature of Active: Bulk Classification. Imagine you’re handling a large dataset for a weather analysis project. With Encord Active, you can swiftly filter out specific weather patterns and apply relevant classifications to these frames in bulk. This process not only saves time but also ensures consistency across your dataset, paving the way for more accurate and efficient analysis. What is Bulk Classification and How is it Helpful? Bulk Classification is designed to accelerate the process of data labeling and organization by applying uniform classifications to large collections of images or frames swiftly and consistently. This transforms the laborious task of individual data labeling into a more manageable, efficient process, making it an invaluable tool for teams aiming to speed up their labeling workflows while ensuring precision. Applying Bulk Classifications: 4 Simple Steps Using the Bulk Classification feature by following these 4 simple steps: 1. Importing and Exploring Your Project: Start by importing your project into Encord Active and attach an ontology that contains the classifications you want to apply. Once imported, the Explorer page of the project opens up. 2. Filtering and Selecting Data: Dive into the ocean of data using EA’s intuitive filter, sort, and search functionalities. This process helps you pinpoint the exact subset of data needed for your task 3. Creating a Collection: After selecting your data, add it to a collection. 4. Applying Bulk Classifications: Navigate to the Bulk Classify option, where you can choose the relevant classifications and settings for your collection. When you’re ready, Initiate the Bulk Classify job. The classifications fully support nested ontologies meaning that you can provide extra levels of granularity to the classifications. You can find more detailed information in the Encord Active documentation on Bulk Classifications. Conclusion With Bulk Classification in Encord Active, teams can now enrich and pre-label their data in just a few simple steps. If you’re handling large datasets or complex classifications, this feature will serve to streamline your data pipeline. Try out Encord Active's Bulk Classification feature to experience a transformative change in your data management and labeling strategy. For a deeper dive into Encord Active and its many fascinating features, be sure to check out our other blog posts, and the Encord Active documentation! Sign-up for a free trial of Encord: The Data Engine for AI Model Development, used by the world’s pioneering computer vision teams. Follow us on Twitter and LinkedIn for more content on computer vision, training data, and active learning.
Dec 21 2023
10 M


How to automate annotation with GPT-4 Vision’s rival, LLaVA
In April, we announced the integration of Segment Anything Model (SAM) into our annotation platform, Encord Annotate, marking the first of such integrations for our industry. Over the past few months, we have been proud to see the benefits that automated labeling with SAM has brought to our customers, advancing further on our goal of enabling more efficient workflows for our customers' annotation process. With the release of the new multimodal Vision Language Models like Gemini and GPT Vision, visual labelling is about transform fundamentally. Today, we are excited to introduce another first - with the first automated labeling tool powered by the open-source VLM LLaVA. As highlighted in a recent post, GPT-4 Vision vs. LLaVA, LLaVA has shown impressive performance in combining the power of large language models with visual tasks. Read on to learn more about how you can leverage this with Encord. What is LLaVA Large Language and Vision Assistant (LLaVA) is one of the pioneering multimodal models. Although LLaVA was trained on a small dataset, it demonstrates remarkable skills in image understanding and answering image-related questions. It shines when it comes to tasks that require a high level of visual interpretation and following instructions. It is worth mentioning that LLaVA exhibits behaviors similar to those of GPT-4 and other multimodal models, even when given instructions and images that it has never seen before. Introducing LLaVA-Powered Classification Available on Encord to Automatically Label Images with Natural Language With our latest release, our LLaVA-powered classification tool automatically labels your image based on nothing more than natural language comprehension of your labeling ontology. Give the tool an image and an arbitrarily complex ontology, and let it auto-label for you! How to get started: Annotate with our LLaVA-powered multimodal automated labeling tool in four simple steps Step 1: Set up your classification project by attaching your dataset and ontology Step 2: Open your annotation task and click ‘Automated labeling’ Step 3: Go to the LLM prediction section and press the magic ‘Predict’ button. Step 4: Within a few moments, LLaVA will populate your tasks with labels based on your ontology. You can adjust and correct the labels if you deem them inaccurate for your task. With the integration of SAM, you could segment anything in your images that aided annotation. Now, with LLaVA, our platform can understand labeling instructions through natural language and context from your images. We have started seeing customers use LLaVA as labeling assistants to suggest corrections to what could be incorrect annotations, which is faster than going through a review cycle. Why LLaVA? We chose to integrate LLaVA for automated labeling due to the following reasons: Comparative strengths with GPT-4: When compared to GPT-4, we found that LLaVA showed comparable performance in interpreting images and excelled in certain scenarios. Although it struggled with tasks requiring Optical Character Recognition (OCR), its overall performance, especially considering its training on a smaller dataset, is noteworthy. Improved chat capabilities and Science QA: LLaVA demonstrates impressive chat capabilities and sets new standards in areas like Science Question Answering (QA). This indicates its strong capacity to grasp and interpret labeled diagrams and complex instructions involving text and images. Open source accessibility: One of the key advantages of LLaVA is its availability as an open-source project. This accessibility is a significant factor, allowing for wider adoption and customization based on specific annotation needs. Multimodal functionality: LLaVA works well for comprehensive data annotation because it was trained to be a general-purpose multimodal assistant capable of handling textual and visual data. Data privacy: Incorporating LLaVA into our platform aligns with our unwavering commitment to data privacy and ethical AI practices. With LLaVA, we can guarantee that data won't leak because we don't send anything outside our infrastructure. The essential advantage of integrating LLaVA is its ability to process and understand complex multimodal datasets. With LLaVA, our annotation platform now uses the power of advanced AI to analyze and label vast amounts of data with unprecedented speed and precision. This enhances the efficiency of your annotation process and significantly boosts the output's accuracy. What’s Next? With this advancement, we can accelerate annotation efforts across various domains. Over the coming months, we will continue improving the accuracy and output quality of this feature to ensure it can better understand the relationships in your ontology. LLaVA, and other VLMs, will be able to improve training data workflows in many more ways, and our team is very excited for what's to come. 👀✨ This feature will be available for select customers, and we will continue sharing more case studies and use cases from customers where their annotation workflow efficiency is no longer bottlenecked by long review times. If you want to try our automated labeling with natural language, please contact our team to get started.
Dec 11 2023
2 M


Product Updates [November 2023]
Upgraded workflows, improved bitmask and DICOM editor, a new automated labeling system, and an enhanced interface between Annotate and Active round out November with Encord. Looking forward to the holidays ahead! 💪 🚀 Workflows - the new Task Management System Workflows graduated from Beta and are now the default task management system for all customers. Scaled to handle 500,000 tasks — workflows is your new go to for large-scale annotation projects. In addition to performance, Workflows enjoy a significantly enhanced UX with a new template editor and easy-to-use task queue, now with priorities! Of course — no matter the priority, some tasks can still pose a problem — corrupted data and unclear annotation instructions are among the main reasons annotators might need to skip a task until later. Fortunately, workflows will enhance collaboration by prompting the annotator to clearly explain why the task is being skipped for clear communication with the labeling manager. Redesigned Bitmask Tool We're thrilled to announce upgrades to the threshold brush tool for bitmask labels! In addition to B/W (black and white) say hello to RGB (red/green/blue) and HSV (hue/saturation/values) thresholds - allowing you to target specific color ranges with ease. And to make sure you’re labeling what you think you are, the threshold preview has evolved to keep pace. You can now preview your work in transparent and inverted modes in addition to B/W. Whether you're fine-tuning reds, greens, blues, or playing with hues, saturations, and values, these new options make sure bitmask labeling can fit your data. Combine the above threshold range improvements with our bitmask lock feature, which allows you to designate that certain bitmask labels should not overlap. Our bitmask brush is now the perfect tool to ensure perfect annotation coverage per frame. Encord Active - Supporting Nested Attributes, Custom Metadata, Priorities Encord Active is improving across the board. We have extended support for custom metadata which means you can now filter your images/videos based on all the extra information associated with your data such as location, time of day, or anything else you might have available. Simultaneously we added the option to filter your classes based on all the nested attributes in your label ontology on the Encord platform. Pair these enhanced filtering capabilities with improved synergy between Active <> Annotate and you have a fully featured computer vision data platform. Among the headline improvements in November were the ability to create datasets with only specific frames from videos and image groups and send bulk or individual comments to Annotate. Coming soon, adjust priorities, bulk classification, and much more — contact us to learn how Encord Active can help you label the right data faster. DICOM The world of DICOM imaging is sprawling with various stakeholders and implementations. While it’s great to have so many organisations working together, in practice it means there may be difficulties handling various interpretations or small inconsistencies. To alleviate these pains, we're excited to announce a significant upgrade to our DICOM parsing capabilities! We’re introducing a new parser which extends our compatibility capabilities as well as increasing DICOM performance in the browser! In addition, we are enhancing our Multiplanar Reconstruction (MPR) capabilities — we’re making it possible to create bitmask annotations in the reconstructed views. With MPR Annotations you can now view and annotate from the best angle — giving you the power to annotate accurately and efficiently. Introducing VLM Automated Labeling You may have seen OpenAI’s exciting announcement about GPT 4 Vision, and if you’re anything like us, you were probably thinking something like: ”how can we leverage this to accelerate annotation?” 🤔 After some thinking, we’re happy to introduce our new VLM prediction feature! Currently available for classifications, our VLM prediction tool is a new repertoire in automated labelling which understands the content of the image and automatically creates the appropriate classifications from your ontology. Contact us to discuss if it’s right for your use case, and watch this space as we expand our automated labelling capabilities going forward!
Dec 07 2023
5 M


Expert Review with Workflows
Introduction Expert review workflows are crucial for accurate and successful annotation projects ensuring high data quality, efficient task allocation, and time savings. In this walkthrough, you’ll learn how to customize workflows to facilitate expert review flows and improve collaboration. As the AI and computer vision landscapes evolve, expert review workflows help you maintain data integrity, ensure optimal model performance, and maintain flexibility for future unknown labeling demands. Understanding Workflows Workflows are systematic processes (or graphs) that define how tasks are organized, assigned, routed, and automated within an annotation project. They provide a structured way of handling various stages of a project, ensuring that each step is completed efficiently and in the correct order while tracking performance at each step. Expert Review With the importance of training data ever-increasing, expert review workflows ensure the highest quality of annotations, in turn leading to improved model performance. The expert review ensures data meets the required standard through subject matter experts thoroughly checking and validating a subset of the annotations created. Benefits of Expert Review Workflows Expert review workflows offer a range of benefits that contribute to the success of data-centric projects: Improved Data Quality: Expert review ensures that data is accurate and error-free, leading to more reliable models and results. Efficient Task Allocation: Workflows help allocate tasks to the right experts, ensuring that each annotation or review is handled by the most qualified individuals. Error Detection and Correction: Issues can be identified and addressed promptly during the review process, preventing them from propagating further in the project. Time and Resource Savings: Automation within workflows streamline the process, reducing the time and effort required for manual coordination and ensuring experts aren’t wasting their time on menial tasks. Setting up Expert Review Workflows with Encord Create a New Workflow Template First, navigate to the "Workflow Templates" and click on the "+ New workflow template" button. For this walkthrough, we will create a workflow for an object detection model. Configuring the Workflow Template In the center, you will find the edit button and by clicking on it you will find on the right-hand side of the screen, you'll find the workflow library. This library contains components to build your workflow. Let’s look at each of these components as we add them to our insect detection project. Start Stage It's where your project begins, offering a clear overview of the project's foundation and helping team members understand the data they'll be working with. Annotate Stage This stage is the heart of the workflow, where data is annotated. The stage initially includes all annotators by default. To choose specific annotators, click the Annotate component, go to the Selective tab, enter the user's email, and select from the list. Only collaborators added via Project-level Manage collaborators will be available. The optional Webhook feature adds a layer of real-time notifications, enhancing project monitoring. Review Stage Multiple review stages can be included within a project, each with its unique set of reviewers and routing conditions helping to establish a structured process where subject matter experts validate annotations and detect errors. Strict Review With strict review, tasks stay put after label approval or rejection, giving reviewers time for adjustments and the ability to add comments for missing annotations. This provides reviewers with an additional opportunity to evaluate and, potentially, revise their judgments. This added layer of scrutiny helps to maintain accuracy and quality. Router A Router divides the pathway that annotation and review tasks follow within the workflow. You have the choice between two router types to select for your project: Percentage Router Precisely allocates annotations based on defined percentages, which is useful for the precise distribution of tasks, ensuring an equal workload split between different stages or groups of reviewers. Collaborator Router Customize annotation workflows based on collaborators to assign tasks strategically, ensuring alignment with expertise and responsibilities, and providing flexibility for diverse collaborators. For instance, a new annotator, Chris, may have his tasks automatically routed to an expert review queue, assigning pathology annotations to Dr. Smith and radiology annotations to Dr. Johnson. This approach optimizes the workflow, maintains quality through expert review, and allows flexibility for exceptions, enhancing collaboration in diverse teams Now that we've covered each element of the workflow, let's explore an instance of a workflow designed for object detection. Using Workflows in Annotation Projects To understand the integration of workflows in annotation projects, let's create an annotation project for an insect detection model with the following steps: Select and name the annotation project. Add insect dataset. You can create a new dataset here as well. Add the ontology for the annotation project. For quality assurance, opt for a workflow, either by creating a new one or utilizing an existing setup. And you are ready to start annotating! Select your annotation project and open the summary. The Summary provides an overview of your workflow project, displaying the status of tasks in each workflow stage, and offering a high-level visual representation of project progress. Navigate to the Queue for task management and labeling initiation, with options tailored to user permissions. It encompasses the Annotator's Queue, Reviewer's Queue, and Annotator & Reviewer, Admin, and Team Manager Queue. Users can filter, initiate, and assign tasks as needed, and this functionality varies based on the user's role. Admins and Task Managers can assign and release tasks, ensuring efficient task management within the project. Select the Start Labeling button to annotate your dataset. Label your dataset! Once the data has been annotated, reviewers find the labeled data to be reviewed in Queue as well. The reviewer has the option to exert bulk action on multiple reviews at once. Once the review is complete, any rejected images can again be found in the Annotator’s queue. The reason for rejection can also be specified and the annotator must resolve the issue to submit the re-annotated data. The approved images are found in the expert review queues. Once all the reviews are accepted the annotation is complete! The multiple review stages process in the annotation project contributes to the refinement of the dataset, aligning it with the desired standards and objectives of the project. The flexibility to perform bulk actions on multiple reviews simultaneously streamlines the review workflow and the ability to specify reasons for rejection provides valuable feedback to annotators. Wrapping Up In conclusion, expert review workflows play a pivotal role in ensuring the accuracy and success of data-centric projects like annotating an insect detection model. These workflows offer benefits such as improved data quality, efficient task allocation, and time savings. As technology advances, the importance of expert review workflows in maintaining data integrity becomes increasingly evident. They are an essential component in the evolving landscape of data-driven projects, ensuring optimal model performance.
Dec 05 2023
5 M


Product Updates [September 2023]
The world of computer vision and AI never slows down. OpenAI is pushing new boundaries, adding foundation sight and sound support to ChatGPT. Encord isn’t slowing down either, making it easier than ever to annotate and understand your datasets with improvements to our workflows, benchmark quality assurance algorithms, and active learning platform. Read on for all the details below. Workflow Enhancements: Force Review and Change Review Judgement Reviewing annotations is a critical part of ensuring label quality going into downstream workloads. Depending on the domain or sample difficulty, it can often be difficult even for subject matter experts to make the correct judgment in one shot, or correctly identify labels in every sample. As part of empowering teams with flexible review workflows, Encord is unveiling two improvements to reviews inside our annotation workflows. First, by toggling on Strict Review for any given review stage, you’ll be able to ensure a review task is not over until you explicitly reject or approve it. This means tasks without any labels will be stopped for a review, as well as making it easy to make detailed comments on reviews before sending them back to annotation. We’re also making it possible to change whether a label should be approved or rejected — even if you have already decided once. Simply select the labels under the ‘completed’ section in question and press ‘Return to pending.’ Combine this with the ‘Strict Review’ feature to carefully consider the most difficult quality control workloads and make fully informed judgments. Upgrades to Annotator Training and Benchmark QA: DICOM and Keypoint Support We're excited to announce several improvements to Benchmark QA and training projects! We’re introducing support for DICOM data, as well as for ‘Keypoint’ ontology types in Benchmark QA and training projects — making it even easier to use Encord to upskill annotation workforces and scale your annotation efforts while maintaining consistent quality control. Don’t hesitate to reach out to us for assistance in setting up your Benchmark QA or training project workloads! Single Label Review Settings Navigating and reviewing labels just got even more efficient! We're excited to introduce an update to our Single Label Review - you now have the power to adjust the default zoom level for the label editor, providing greater control and precision when reviewing individual labels. Don’t worry about having to find a setting that works for all labels - you can easily fine-tune the zoom level to focus on the details that matter most to you when a label is being reviewed while having a useful default that accelerates your workflow when reviewing many labels in a single session! Did you know? Set Dynamic Attributes with our Keyframe Editor Objects in temporal media may have different attributes at different points in time. Dynamic attributes are the perfect way to model attributes that change over an object’s lifetime, and our powerful keyframe editing interface is the perfect way to scale annotation workloads with such attributes. Set the frames where the attribute values change, and then propagate those changes along the object's lifecycle with just a few simple clicks! The label editor timeline instantly reflects any changes you make for easy verification and inspection. Dive into our documentation for more details! Encord Active: Search Anything and Look Good Doing It Take your dataset querying to the next level with Search Anything! Building on the success of our natural language search feature, we're excited to introduce a new dimension to your search capabilities. Our latest feature, Search Anything, uses embeddings-based search technology to find images in your dataset that closely resemble an external image you provide. Simply drag and drop your chosen external image into Encord Active whereafter our algorithms will match it against your dataset, quickly and accurately identifying the most similar images for your review. For when you can’t describe an image, let the image describe itself! In addition to putting all that power in your hands, we’re making it easier to wield as well. We are thrilled to announce that we're saying goodbye to Streamlit in our OSS and Deployed versions of Encord Active. Streamlit was an invaluable partner during our 6-month beta phase, aiding in swift prototyping. As we transition, we're focusing on a platform that is aligned with Encord’s core design principles and meets our customers' scalability and performance needs. You'll soon witness a completely refreshed version of Encord Active—stay tuned and feel free to contact us if you want an early test drive and the chance to offer pre-release feedback. Thanks for reading — as always, the inbox at product@encord.com is always open — we’d love to hear your thoughts on the feedback on the above! Talk to you soon!
Dec 05 2023
5 M


Product Updates [October 2023]
TLDR Workflows leaves Beta! Label snapshot versioning AI support is now in the platform - instant-access to support Encord Active improves Data Curation, Model Observability Introducing Encord Labs Encord @ RSNA - Come and see us at Booth #3772! All this and more! Read on to make your day. Workflows Leaves Beta We are thrilled to announce that our highly-anticipated feature, Workflows, has officially transitioned from beta to general availability! This milestone could not have been achieved without the invaluable feedback from our dedicated users throughout the beta phase. Workflows are designed to give you full control of the annotation process, ensuring a blend of high performance, usability, and extensibility that scales with the rapid pace and change of the AI industry. Some of the major improvements are: Performance: Handle larger projects efficiently (a tenfold increase from the previous benchmark), with significant speed enhancements across the platform. Usability: A new drag-and-drop UI simplifies workflow creation and the updated queue gives you full insight into the progress of your project. Extensibility: Advanced routing, better review functionality, and integration with Encord Active tailored to evolving AI demands. Editor Power Ups Workflow scalability means more tasks and more labels in your annotation projects. We're also juicing up the editor to be more performant -- which means more labels per task, faster. Backend improvements mean your data will save faster and more seamlessly, and we're introducing raised limits on labels per task to benefit from those improvements as well -- contact us to work with more data per task! Arriving soon are further performance improvements to enhance the user experience when dealing with many objects and complex label timelines. This all adds up to create a more natural pre-processing and editing experience, even on long, label intense, video annotation workloads. Exciting! AI Support We understand that searching our documentation isn’t always your first thought when you need to learn about the platform. To address this, we've integrated AI support directly into our platform, ensuring you have quick access to the assistance you need, precisely when needed. Whether you're onboarding for the first time, looking for a quick refresher on using the Label Editor, or need help understanding terminology, our AI assistant is here to help. It is regularly trained on all our platforms & SDK documentation, enabling it to provide intelligent and up-to-date responses to any questions you may have about our application! Active Improves Data Curation and Model Evaluation We know that curating the best images, frames from a video, or slices from a scan is a daunting, difficult, and time-intensive task. First, ensuring that your dataset is free of outliers, duplicates, and irrelevant images, and second, selecting the best samples is crucial for building robust and performant models. Encord is your trusted partner along your journey and based on your feedback we have designed Active's new Explorer to simplify this process, incorporating best practices into intuitive user journeys: Automated data quality checks: Active automatically identifies potential issues in your datasets, such as duplicates, blurry images, or corrupted frames. By filtering out these problematic frames, you can reduce annotation costs and prevent detrimental effects on your model's performance. Intelligent curation: Use Active to curate a balanced and diverse dataset. Whether you're establishing a dataset for an initial model run or curating targeted data for critical edge cases or blind spots, Active has a tailored workflow ready for you. After your data is annotated and your model is trained, Encord Active simplifies the shift to evaluation. Simply import your model predictions and access a detailed analysis of your model’s performance, with options to break it down by class, data collections, and splits such as train, test, and validation. You can also use the Explorer to investigate your prediction types following a series of best-practice workflows: Prediction inspection: Use the Explorer to delve into the types of model predictions – True Positives (TP), False Positives (FP), and False Negatives (FN), to understand your model's accuracy and behavior. Spot and address blind spots: When an edge case or a blind spot is detected, Active's similarity search allows you to surface and curate additional samples from your unlabeled data pool that resemble these critical cases. Continuous improvement cycle: Integrate these new samples into your annotation workflow, retrain your model, and directly compare performance improvements against previously identified edge cases. Label Snapshot Versioning Labeling training data is, like the model training process it supports, an iterative process. You’ve asked for ways to snapshot your progress — whether it’s to save a checkpoint before re-labeling, check-in progress as you work through a large project, or name different subsets for purposes such as training, testing, and validation. We’ve listened, and are happy to introduce label versioning for workflow projects. Navigate to the labels tab, select your tasks, and press ‘Save new version’ — you can refer to these snapshots by name and time. Initially, we’re rolling out support for exporting labels from saved checkpoints, but look out for coming improvements such as restoring to different projects. As always, let us know how it helps and what more we can do to enhance your AI initiatives with labels and label set management tools! Opt-in to Beta Features Faster with Encord Labs Many of you have shown interest in working closely with our product development team and helping us create the best features — as such, we’re very happy to be introducing Encord Labs! Encord Labs will give you access to features at the bleeding edge, but give you control over how features appear in the platform. This means you will get all the power of rapidly evolving technology with none of the risks. Getting in on the ground floor means you can shape how features evolve faster, helping us ensure we build with tight customer feedback in mind. Encord Labs will be rolling out several select features in Q4 — contact us if you’re interested or would like to join our collaborative early tester program! Thanks for reading, feel free to email product@encord.com with any questions or suggestions, and let us know if you're attending RSNA 2023!
Nov 10 2023
5 M


Addressing Nuanced Machine Learning Tasks with In-Depth Ontologies
TLDR Ontologies play a central role in solving Computer Vision problems, offering structured data organization, consistent labeling, and giving your models the necessary information to perform as expected. An ontology can include different object types, classifications, and descriptive attributes, each annotated in distinct ways. In Encord you can create arbitrary complex, detailed, and nested ontologies, with Dynamic Classification adapting video annotations in real-time. A good ontology ensures ongoing consistency and is essential for the success of your project. Complex ontologies have proven invaluable in complex computer vision tasks, as seen in real-world applications such as medical diagnosis, insurance claims, sports analytics, and agriculture. Understanding Ontologies Ontologies provide a structured framework for categorizing data, ensuring uniform terminology, hierarchical organization, and consistent labeling. Annotations within ontologies conform to predefined concepts, relationships, properties, and attributes. This adherence significantly elevates data quality while reducing potential for errors. Ontologies are divided into two key components: Objects Objects represent individual entities or instances of the same entity within a domain. These are concrete elements that can be classified or categorized based on their attributes and characteristics. For example, in a medical ontology, individual patients, diseases, or forms of medication would be considered objects. When it comes to annotating these objects in your projects, various object annotation types can be employed: Bounding Boxes Rectangular boxes around objects of interest within images or frames. Use Cases: Object detection (identifying and localizing objects within images), face recognition (enclosing faces), and vehicle tracking (tracking vehicles in surveillance footage). Polygon Annotators outline objects using polygons with multiple vertices. Use Cases: Semantic segmentation (precisely delineating object boundaries in images), building footprint extraction from satellite imagery, annotating irregularly shaped objects. Keypoint Specific key points or landmarks on objects. Use Cases: Pose estimation (annotating key points on human body parts), facial landmark detection (marking key points on a face), and hand gesture recognition. Bitmask or Pixel-Level Annotation Annotators can iteratively define regions of interest by assigning specific ‘bits’ or values to pixels, effectively categorizing them within the selected areas. Use Cases: Semantic segmentation (pixel-wise object labeling in images), medical image segmentation (identifying structures in medical scans). Classification Classification represents broader categories or classes within the ontology. Using the medical ontology example, classifications could include categories like "Patients," "Diseases," or "Medication”. Ontologies refine classification tasks by organizing classes hierarchically, enhancing precision in labeling and prediction. Unlike objects, classifications are applied to the entire frame and they typically fall into one of the following categories: Checklist Single option from a list of predefined categories. Use Cases: Scene classification (e.g., categorizing images as "indoor" or "outdoor"), sentiment analysis (e.g., categorizing reviews as "positive," "negative," or "neutral"). Radio Multiple options from a list of predefined categories. Use Cases: Image tagging (e.g., tagging an image with multiple labels like "beach," "sunset," and "ocean"), document classification (e.g., labeling documents with multiple relevant topics). Text Freely input text to describe or classify data. Use Cases: Text classification (e.g., categorizing text documents into custom-defined categories), user-generated content moderation (e.g., labeling text as "spam" or "not spam"). Building Your Own Ontology with Encord Create New First, navigate to the ‘Ontologies’ section of Encord and create a new ontology using the + New Ontology button. For this walkthrough, we will create an ontology for annotating humans for a semantic segmentation task. Configure Ontology Now, build your ontology structure by adding all the objects and classifications necessary for the creation of your dataset. As you can see, to annotate the types of clothes a human is wearing we have created a very detailed ontology. The objects with “*” denote the objects which are required to be annotated. This prioritization enhances data quality, annotation efficiency, and project scalability. Utilizing Encord's Nested Classification feature, our ontology design extends beyond just identifying primary clothing items like "shirts," "pants," and "shoes." It dives into finer details, encompassing attributes such as "accessories" and "sleeve length." This hierarchical approach doesn't stop at surface categorizations; it goes deeper to capture nuanced attributes. The result is a highly informative and granular dataset, perfect for demanding computer vision tasks. Moreover, Encord offers the flexibility to create as many nested levels as your project requires, ensuring that your annotation process adapts seamlessly to the complexity of the data. In the case of annotating videos, Dynamic Classification plays a pivotal role in enhancing the accuracy and granularity of labeling, through providing temporal accuracy, increased granularity, reduced annotation effort through automation and enhanced ML training via more informative training data. Saving Ontology While creating your ontology, you can preview the ontology being created. The ontology can also be previewed in the JSON format. This helps you ensure that the ontology structure accurately reflects your intended categorization and that all necessary objects, classifications, and attributes are correctly defined. JSON preview offers a convenient way to validate and share the ontology's structure with team members or stakeholders. The saved ontology now can be found in the ontologies section. This ontology now can be attached to any number of annotation projects. You can edit this saved ontology at a later time; however, it's important to note that any modifications made to the ontology will also result in changes to its structure across all attached annotation projects. Watch the video on creating an ontology with Encord or read the documentation for more information. Using Ontology in Annotation Projects Now, you can apply the ontology you've created within an annotation project. Create a New Annotation Project In the left-side navigation pane, find your annotation project or create a new project. For this demonstration, let’s create a new project. You can add a description to enhance clarity and understanding for all users on the project. Add Dataset You now have the option to either incorporate an existing dataset or generate a new dataset as needed. For detailed guidance on creating a dataset, please refer to the documentation. Add Ontology Now it's time to add the ontology you have created earlier. Here you can also create the ontology. Set up Quality Assurance In this section, you'll be presented with a choice between two quality assurance options: Manual QA and Automated QA. In Manual QA, you can configure the percentage of annotations that require manual review. In the Automated QA mode, automated checks and validation processes are utilized by the system to evaluate annotation quality. The ontology acts as a reference and framework for these automated QA procedures, enabling validations that conform to the ontology's predefined structure. This integration not only simplifies the QA process but also guarantees consistency, precision, and adherence to project standards in annotations. For this project, you can select manual QA. Keep in mind that, once the project is created, the QA mode cannot be switched! Now Create Project! Annotation Project You can find the summary of your annotation project, the queued tasks, and who it is assigned to here. Start labeling! The highly detailed and well-structured ontology provides the capability to produce training data with a high degree of granularity. This attribute proves invaluable, especially in complex ML tasks, as it allows for the precise and detailed labeling of data. In such projects, where discerning subtle patterns and nuances is essential, the ability to create a comprehensive dataset, underpinned by ontology, becomes crucial. This detailed dataset serves as the bedrock for training ML models, equipping them to excel in tasks that demand an in-depth comprehension of intricate concepts. Consequently, this approach leads to more robust and insightful results in complex ML applications. Usecases of Ontologies in Real-World ML Projects Now, let’s discuss real-world case studies where the integration of in-depth ontologies has not only elevated model performance but also enhanced interpretability and generalization. Medical Diagnosis and Treatment Personalization: Memorial Sloan Kettering Cancer Center Challenge Medical diagnosis is a multifaceted challenge, often requiring the consideration of various symptoms, patient history, and medical literature. Developing personalized treatment plans based on these factors demands precise understanding. Solution By constructing an ontology capturing medical concepts, symptoms, diseases, and treatment options, an ML model can be trained to comprehend the intricate relationships between these elements. The ontology not only aids in data preprocessing but also guides feature engineering by providing contextual information. Impact The model's enhanced accuracy is made possible by leveraging the intricate relationships between symptoms and diseases within the ontology, while also improving interpretability. This approach is supported by Encord's flexible ontology study, enabling: Over 1000 protocol configurations. A swift 10-minute setup time. A 100% auditable process. Seamless collaboration among team members. Read the Memorial Sloan Kettering Cancer Center case study here. Sports Analytics with Agile Ontology Creation: Sports Tech Startup Challenge In sports analysis, it is important to detect key events, by detecting various objects and positions. Diversified data needs to be collected to build robust detection models. Solution Using an annotation tool that allowed the ML team to build new ontologies and annotate data at speed. This allowed the ML team to experiment and add new features for efficient sports analysis. Impact The flexibility of Encord's ontology-building capabilities enabled rapid experimentation, innovation, and cost-effective iteration, leading to more adventurous development and enhanced sports analytics outcomes. Read this case study where adopted Encord to improve their sports analysis: Rapid Annotation & Flexible Ontology for a Sports Tech Startup Wrapping up In conclusion, ontologies are essential to the success of annotation projects, ensuring structured data organization and consistent labeling. Encord empowers users to create complex and nested ontologies, with Dynamic Classification adding real-time adaptability to video annotations. Complex ontologies are invaluable in hard ML tasks, as evidenced by real-world applications in medical diagnosis and sports analytics, where they enhance accuracy and interpretability. It's a tool that paves the way for more insightful and robust results in the realm of complex machine learning applications. Ready to elevate your machine learning annotation projects with Encord's powerful ontology-driven approach? Experience the difference for yourself – Try Encord now!
Oct 06 2023
5 M


Encord Active 0.1.75 released: Kill Streamlit, Faster UI, and a Smoother Experience
At the Active Community, we are elated to announce the release of Encord Active 0.1.75, marking a significant milestone in our ongoing commitment to delivering unparalleled user experiences. This isn't just any update; we've made changes to redefine how you interact with our platform. Gone is Streamlit, paving the way for a more agile, quicker, and responsive UI. As always, our primary objective is to ensure that you have the smoothest experience possible, and with this latest release, we've achieved just that. Discover the transformative features and improvements we've meticulously integrated into Encord Active 0.1.75! Encord Active provides a data-centric approach for improving model performance by helping you discover and correct erroneous labels through data exploration, model-assisted quality metrics, and one-click labeling integration. With Encord Active you can: Slice your visual data across metrics functions to identify data slices with low performance. Flag poor-performing slices and send them for review. Export your new data set and labels. Visually explore your data through interactive embeddings, precision/recall curves, and other advanced visualizations. Check out the project on GitHub, and hey, if you like it, leave us a 🌟🫡. Highlights of Major Features and Changes No more streamlit: New native UI At the heart of the Encord Active 0.1.75 release is the evolution of our user interface. While Streamlit served us well as the primary UI in our initial stages, we recognized its limitations, particularly for an open-source tool designed for scalability and production-level performance. From constraints like its numerous dependencies and limited potential for custom frontend components to a lack of Google Colab integration, Streamlit posed challenges that hindered our vision. We took this as a cue to redesign and introduce a new native UI that's faster and offers a significantly smoother experience. By transitioning to a dedicated backend-frontend setup, we've eradicated previous complications and set the stage for a more performant Encord Active in future iterations. You'll now experience custom frontend components, seamless integration with Google Colab, a more responsive Explorer interface for delving deep into image datasets, enhanced usability, and swift loading times—a direct response to feedback from our community, who voiced concerns about sluggish interfaces with large datasets. By cutting ties with Streamlit and its inherent limitations, we have ushered in an era of increased speed and responsiveness—vital for effectively handling large computer vision datasets. With this release, Encord Active gets a completely new look and feel. We think that it is fresh enough to get a brand new command: encord-active start The start command has now replaced the previous visualize command. Prediction import We’ve streamlined the prediction imports via the SDK. They follow the same fundamental structure, and the documentation should be clearer. 10x improvement when tagging large datasets We have supercharged data tagging efficiency, achieving a remarkable 10x performance boost when tagging large amounts of data at once. Now, Encord Active can seamlessly handle large data batches simultaneously. This improvement improves your flow and makes data tagging lightning-fast. Deep Dive into Key Features Native UI While Streamlit was instrumental during our inception, its inherent challenges limited our scalability and adaptability. The all-new native UI in Encord Active 0.1.75 presents a clear, intuitive, responsive design built to serve our users' evolving needs. Direct Google Colab integration A significant advantage of moving away from Streamlit is the seamless integration with Google Colab. This feature paves the way for smoother workflows, especially for those using Google Colab for their data and ML tasks. No more `ngrok` or `nginx` integrations are required! We have put together a notebook for you to test this out. Run it directly from this notebook. Responsive Explorer interface and a button to hide annotations Exploring large image datasets? Our revamped Explorer is designed to ensure you navigate your datasets with unparalleled ease and speed. We have also added a button you can toggle under the Explorer tab to show or hide annotations in your images. Custom frontend components These allow for a more tailored user experience, giving you the tools and views you need without the fluff. Bug Fixes Video predictions Importing predictions for videos had a bug that assigned predictions to the wrong frames in videos (and image groups). This is now resolved. Classification predictions We have also addressed a crucial issue in our latest release concerning classification predictions. You can now trust that your classification predictions will be imported accurately and seamlessly. Optimized data migrations We have optimized data migration processes to be more efficient. We've addressed the issue where object embeddings, a compute-intensive task, were unnecessarily calculated in certain scenarios. With this release, expect more streamlined migrations and reduced computational overhead. Docker file release and include `liggeos` In our previous releases, the Docker file was wrong, so the Docker version did not get released. We've rectified this oversight. With this fix, this release is now fully Docker-ready for smoother installations and deployments. We have also included `liggeos` in the Docker image during build when trying to set up a project. That fixes issue #598. Got rid of the ` encord-active-components` package In our commitment to streamlining and simplifying, we've made a pivotal change in this release. We've eliminated the separate `encord-active-components` package, opting instead to directly distribute the build bundled with its essential components. This move ensures a more integrated and efficient deployment for you. Explorer: signed URLs from AWS displayed "empty" cards We've rectified an issue where signed URLs from AWS displayed "empty" cards in the explorer. Expect consistent and accurate data representation for your AWS-stored content. On Our Radar Big video projects We've seen the import process crash when importing projects with many/long videos (more than an hour of video in total). The issue is typically a lack of disk space from inflating videos into separate frames. We suggest using smaller projects with shorter videos for now. With one of the following releases, video support will be much more reliable and eliminate the need for inflating videos into frames. Project subsetting Project subsetting is slow. We’re working to make this work much faster. We’ve also noticed complications when projects came from a local import (via the `init` command or `import --coco` command). We’re working on fixing this before the next release. Filtering the “Explorer” by tags If you have added a filter on the Explorer that includes Data or Label tags and then remove tags from some of the shown items, the Explorer won’t remove the items immediately. A page refresh will, however, show the correct results. What's No Longer Available? Most of the features in previous versions of Encord Active are still there. Below, we’ve listed the features that are no longer available. Export to CSV and COCO file formats Prediction confusion matrix We plan to bring back the confusion matrix, and if you’re missing the export features, please let us know in the Active community. Community Contributions This release wouldn't have been possible without the feedback and contributions from our community. We'd like to extend our heartfelt gratitude to everyone who played a part, especially those who highlighted the challenges with Streamlit and pushed for improved UI responsiveness. Your voices were instrumental in shaping this release. Join our Active community for support, share your thoughts, and request features. Get the update now 🚀 pip install --upgrade encord-active See the releases (0.1.70 - 0.1.75) for more information Check the documentation for a quick start guide ⚠️ Remember to run `encord-active start` and not `encord-active visualize` in your project directory.
Sep 08 2023
5 M


Product Updates [August 2023]
Improved Performance and Onboarding Focused on getting you up and running as quickly as possible, a simplified home page points out the essentials. When navigating through annotation tasks, we are now loading image annotation tasks ahead of time to get one step closer to a native application experience. All the convenience of the cloud and the responsiveness of a desktop application showing that you can have your Encord cake and eat it too. A crucial early step, before you examine, annotate, or otherwise review your data, is connecting your cloud storage solution to Encord. Between multi-cloud, permissions and CORS it can be an arduous process. So — we’ve revamped the integration process into a guided step-by-step process in the app, and added the ability to confirm against storage resource URLs immediately after to give you complete and immediate feedback that your setup is in working order. Once you’ve onboarded your data integration, we’ve also made getting started with the SDK a one-step process. Simply generate your API key on the platform, and supply the file path of the downloaded private key when initiating your Encord SDK client. No copy-pasting and no fuss. Require Annotations in Labeling Tasks Annotation tasks can be numerous and complex. In order to remove some of the burden of annotation and review, it can often be helpful to enforce that at least one of a particular annotation is present in a task. In addition to ongoing support for required specific nested attributes on objects and classifications, Encord has added support for ontology objects and classes to be required as well — enforcing that at least one of the indicated instance labels is present in a labeling task. We’ve paired this strict requirement enforcement with an improved issues drawer so annotators can quickly resolve outstanding issues and submit high quality annotation work. Enhanced Workflow Collaboration with Collaborator Router and Simplified Queues We’ve simplified and separated the workflows task queue interface from the data inspection features. For team members — move through your annotate and review tasks with greater clarity. For admins, cleaner separation between data review and task control interfaces will keep you focused on the goal. We’re also adding a collaborator router so that you can route annotation tasks based on who made the most recent annotation submission or review judgement. Perfect for training newer annotation or review team members, or setting up partnerships and collaborations within wider projects and annotation workflows. DICOM Updates Improvements in the label editor functionality are often especially relevant for DICOM annotation workloads. For example, the polygon tool’s new ability to show measurement vertex angles in the label editor with DICOM annotations can add value to your labelling workloads. Head over to the DICOM Update Blog to see the details, and other DICOM updates for this month. Around the web and around the world Encord is here to keep you up-to-date on the rapidly evolving world of AI. Check out these explainers for a deep-dive into the inner-workings of the latest in AI. Meta AI's CoTracker: It is Better to Track Together FastViT: Hybrid Vision Transformer with Structural Reparameterization Meta AI’s Photorealistic Unreal Graphics (PUG) Thanks for reading — as always, the inbox at product@encord.com is always open — we’d love to hear your thoughts on the feedback on the above! Talk to you soon,
Sep 06 2023
3 M


DICOM Updates [August 2023]
Require top-level ontology categories This month, we are introducing the highly-anticipated top-level required feature, designed to empower you with greater control and precision in your annotation projects. With this feature, you can now define and prioritize the most critical requirements of your DICOM annotation tasks, ensuring that your team's efforts are focused on capturing the key insights that matter most. Have a look at our documentation for further guidance on how to use it. 📊 Introducing Advanced Measurement Features! 📏 Say hello to the brand-new measurement feature, designed to precisely quantify angles and areas. Whether it's evaluating the size of a tumor, determining the angle of a joint, or gauging the extent of a lesion, DICOM's new measurement feature empowers medical experts to make more informed decisions. Upgraded DICOM de-identification With the increasing importance of data privacy and compliance in healthcare, we understand the challenges you face when handling medical imaging data. Our upgraded DICOM de-identification service offers a comprehensive solution to de-identify DICOM files swiftly and securely, and offers integration with customisable reviewer workflows. Protect patient privacy and ensure regulatory compliance effortlessly with our state-of-the-art de-identification technology. Seamlessly remove all sensitive information from DICOM metadata as well as from pixel data while preserving the integrity of the data. We are excited as ever to receive your feedback on the latest and upcoming updates. Please feel free to contact us at product@encord.com if you have any thoughts or ideas on how we can enhance your experience with us. We eagerly await hearing from you.
Sep 06 2023
2 M


DICOM Updates [July 2023]
Summer 🌴 is here, and we have updates in store for all our DICOM 🩺 users! These improvements offer 3D rendering and visualization of DICOM volumes including MRI and CT and smooth zooming 🔍 and panning 🖐️ for all editor views! We are very excited to share these updates with you! 3D Volume Rendering 3D visualizations is out of beta! You can now explore medical scans in three-dimensional detail, enabling a comprehensive and intuitive assessment of anatomical structures. Gone are the days of sifting through 2D slices! Instead, our volume rendering feature provides a seamless experience that empowers you to make more informed diagnoses and preciser annotations. Zoom and Pan in all views Zoom and Pan is now available in all DICOM views! Seamlessly navigate through high-resolution scans with ease, zooming in to scrutinize the finest details and panning across images effortlessly. Whether you're examining radiographs, MRI, CT, or another DICOM modality, this new feature ensures that no vital information goes unnoticed. Crosshair Toggle Looking for a clearer view of your DICOM sample? Just click the "Display DICOM Crosshairs" toggle to enjoy an unobstructed view without any crosshairs on the screen. Coming soon 3D Visualisation of Annotations Stay tuned for the official release, when users will soon be able to explore medical image annotations with a whole new level of depth and clarity. Get ready to visualize your annotations like never before! We are excited as ever to receive your feedback on the latest and upcoming updates. Please feel free to contact us at product@encord.com if you have any thoughts or ideas on how we can enhance your experience with us. We eagerly await hearing from you.
Aug 01 2023
7 M


Product Updates [June 2023]
The heat is on 🔥 — recent summer scorchers and a fury of CVPR preparation and follow-ups have everyone at Encord both turning up and basking in the heat. We’re also excited to announce a bevy of other useful solutions — read on for more. Introducing Encord Apollo and Encord Active — On Platform We’re very excited to announce we’ve completed the groundwork in transitioning from an annotation platform to a complete ML data engine and software stack solution. Describe your problem with Encord Annotate — our annotation tooling and workflow solution. Validate and debug datasets in systematic, data-driven active learning cycles with Encord Active, now hosted on the platform for a more seamless experience. We’re starting with the ability to apply micro-models across your entire organization, and keep watching for the ability to fine-tune foundation models coming soon! After its official launch on Product Hunt, where it was hunted by Michael Seibel, Encord Active is now available as a seamless hosted solution in Encord as well! Contact us to learn how to enable Active on the platform and incorporate active learning cycles into your daily workflow — including our new Search Anything Model for Encord Active, which allows you to search for images using natural language. Que wow. New Workflow Templates and SDK Support Our new workflow templates are here! Create templates of your most common workflows, and use them to create new projects with ease. The template editor lets you build and edit templates usable across any projects you create. Furthermore, add collaborators to templates, which means you setup not only common workflows but also common teams, and re-use them as necessary. After you’ve created the perfect template, select it during the project creation process in the app or the SDK (!) and you’re good to go. "What if a template isn’t quite what I need for a particular project?" Glad you asked! You can customize a selected template during project creation to suit your exact needs - see our documentation here to learn how to do this in just a few simple clicks. Consensus coming soon to Encord Workflows We are pleased to announce that Encord Workflows will soon include a highly requested Consensus stage in the new workflow composer. Details of a useful consensus calculation can vary depending on the labeling task and data modality. With your needs in mind, we are actively engaged in prototyping various consensus setups, and would like your input. At the same time, the design teams are working on the details on the look and feel integrating consensus into workflow, as shown in the sneak peek below ⤵️. We would love your input in developing the most useful consensus comparisons and the appropriate integration into annotation workflows. Get in touch at product@encord.com to get early access and be a part of the process! Collaborator timings available through the SDK Welcome to the first stage in accessing your analytics in a scalable, programmatic manner. Access collaborator session information programatically using the SDK to provide you valuable insights into the duration your project collaborators spend on a given task. Using the SDK to monitor annotations makes it easy to analyse and process thousands of records by giving you direct access with just a few simple lines of code. Accessing analytics via the SDK will only get easier from this point forward! Keen to learn more? Check out our SDK documentation here. DICOM Updates We’re excited to announce the launch of our sharing and deep-linking feature in our DICOM editor! Sharing a URL will now guide users to a specific image or slice within the project, making collaboration easier than ever before! More big news — you can now rotate DICOM files to seamlessly manipulate the orientation of medical images, including CT scans, MRIs, and Mammograms, with just a few clicks. By enabling easy rotation of DICOM volumes, we're helping you enhance visualisation, make better annotations, and make more informed decisions. Catch up on all the DICOM news in this months DICOM update blog, here. Did you know? High-quality datasets require accurate labels, but fixing multiple labels can be tedious and long-winded - if you’re not using our bulk label operations! Make effortless changes to multiple annotations in the label editor at the same time to merge multiple instance labels into a single instance, or efficiently delete labels in bulk. Around the world and around the web Brace for impact! The EU AI Act is hitting the stage with the world's first-ever legislation on artificial intelligence. Imagine GDPR but for AI. Technical definitions for foundation models and general purpose AI are as varied as their practitioners — the EU is undertaking a large task leapfrogging ahead to set legal definitions. Stay ahead of the game by joining our webinar on the 12th of July. The panel will cover the most important Articles and answer any questions regarding the AI Act ➡️ Sign up here Regulators are turning up the heat, but so are innovators. The competition for building the best models has intensified from open source teams to Meta AI and Google DeepMind. Fear not, our machine learning team is here to provide a quick overview and summary of the latest models for you. 💡Find out more with Encord’s guides on these models: TAPIR: Tracking Any Point with per-frame Initialization and temporal Refinement Tracking Everything Everywhere All at Once Meta AI’s I-JEPA, Image-based Joint-Embedding Predictive Architecture If you have any feedback, ideas, or suggestions that you would like to share, please don't hesitate to reach out to us. We would love to hear from you!
Jul 06 2023
10 M


DICOM Updates [June 2023]
Summer ☀️ brings a lot of updates for all our DICOM users! These enhancements provide you with the convenience of effortlessly sharing your projects with colleagues 👥, easily rotating 🔁 DICOM series for a smoother annotation experience, an improved mandatory attribute ✅ to ensure no details are overlooked 🔍 on a sample, and many other exciting features. We are delighted to announce and share these updates with you! Sharing and Deep Linking! 👋 We are launching a new sharing and deep-linking feature within our DICOM editor! This feature will enable our users to easily share their work with colleagues, clients, or anyone they wish to collaborate with. With just a click, users can generate a shareable link to their project or specific parts of it. This new feature also allows for deep linking, meaning that users can direct others to a specific image or slice of their work instead of sharing the entire project. This is a significant enhancement to our platform, and we are excited to offer it to our users. We believe that this feature will enable more seamless collaboration and make our editor even more user-friendly. Rotation support for DICOM With this new feature, medical professionals and annotators can seamlessly manipulate the orientation of medical images, including CT volumes, MRIs, and Mammograms, with just a few clicks. By enabling easy rotation of DICOM volumes, we're helping you enhance visualization, streamline workflows, and make more informed decisions. Improved “required” ✅ setting for your ontology Gone are the days of manual checks and potential oversights, as this updated feature automatically verifies the presence not only of required attributes, but required annotations, streamlining your workflow and saving you valuable time ⏱️. We are excited as ever to receive your feedback on the latest and upcoming updates. Please feel free to contact us at product@encord.com if you have any thoughts or ideas on how we can enhance your experience with us. We eagerly await hearing from you.
Jul 03 2023
5 M


Product Updates [May 2023]
Computer vision and AI march ever-forward, and ever-faster — we’re there to give you the tools you need annotate, understand, and deploy quality models — just in time for summer 😎. Take a look to learn how re-interpolation helps you work faster, comments can enhance your teams collaboration, bitmask support levels up difficult segmentation support and many other enhancements to your annotation workflow! Successive interpolations improve label accuracy The interpolation feature now supports the ability to override previous labels generated via interpolation. This enhances support for powerful bulk labeling workflows. Apply interpolation across a large range of frames, step through and re-adjust at key frames, and run re-interpolation as many times as necessary to re-adjust the intervening labels, secure in the knowledge your trusted manual labels won’t be overwritten! Check out the documentation for the details, and see below for sample of re-interpolation in action. That’s what I’m talking about Encord’s label review system already enables precise communication targeting specific label instances, and even when labels are missing in a frame. To bring this a step further, we’re adding a general comment system to the label editor to enable full communication across your team, from annotators to reviewers, and every which way. Make comments on specific annotation tasks, specific frames, and even localize your frames in the editor to areas of interest! Better labeling through communication, now in Encord. Workflow Templates Workflows are now in open beta, our documentation shows you how to get started. We’re also rolling out support for workflow templates. You can configure flows you use regularly, optionally add any team members to particular roles and webhooks, and then quickly re-use them when creating projects. Also use workflow templates to easily create projects from the SDK — making it easier than ever to integrate scalable annotation and active learning processes into your own applications! We’d love to hear how workflow templates can help you accelerate and scale your annotation efforts — get in touch! What you need, when you need it Finding the correct dataset, project, or ontology you as your organisation grows can be challenging. We’re happy to be introducing a global search feature which allows you to search across all your projects, datasets, and ontologies, no matter where you are in the platform at any given time. Depending on your search, you can jump straight to desired result, or jump to the relevant list page with a pre-filtered result list to find exactly what you need. Our search infrastructure is starting here, but we’re planning to expand this capacity to organisation collaborators, individual data units, and other platform entities going forward to create a simple, central navigation interface. Let us know what you need to find so we can help you find it! Try looking at it from a new angle Depending on where data comes from — it may arrive in orientations that are hard for you and your team to understand. We hear you. We’ve added the ability to rotate your data in the label editor, so you can see your data as it was meant to be seen — or however helps you annotate best. You can use the slider or text entry form to control free rotation. Or, use the clockwise rotate button to advance in 90 degree intervals — whatever works best for you. Annotations are stored oriented to the media’s original orientation so downstream pipelines can rest assured annotations made while rotated are correctly aligned with the original media. Rotation is supported for all media types including images, image groups, and videos. Bitmask annotation is here Encord has long supported segmentation annotations via our lightweight polygon representation. However, sometimes we want to annotate multiple disjoint areas or enclose an unannotated space. In such cases, masks are the best options. You can now take advantage of bitmasks in Encord in every supported modality — including DICOM. Create new mask annotations with our brush tool, taking advantage of advanced features such as erasing, or thresholding on a grayscale representation of the image. Additionally, use our SDK or upload and download bitmask segmentations from the platform. More advanced capabilities to control annotations by hue and saturation are also in the pipeline — let us know if these will assist with your annotation workloads! Get Active this summer Encord Active enables key active learning flows allowing you to search, sort, and select your data, labels and predictions by relevant metrics to quickly find the most troublesome and underperforming sections. However, ensuring you’re teaching your model what you think you are can be another troublesome task. Therefore, Active has added a new Data Drift feature to help you effortlessly compare how two datasets differ across your set of relevant metrics — to ensure you understand relevant metric differences between datasets before assigning them to labeling or training! For premium users, Active has also integrated ChatGPT to help turn your natural language queries and statements into code and metrics compatible with the Active system. Join us to enquire how to become a premium Active user! SAM at your speed Encord was the first collaborative annotation tool to bring the power of SAM to your annotation workflow. However, we feel that delivering a next generation platform requires constant improvement. We’ve heard from various customers that they want SAM segmentations faster — particularly with large files. In order to give users greater control over segmentation speed and quality we’ve introduced a feature which allows you to tune the speed and quality trade-off to your media and precision needs. For high resolution media and clear segmentation boundaries — tune up the speed for snappy segmentation performance. For nuanced segmentation workloads, tune to quality to ensure your segmentations are pixel perfect. Click the magic wand for the category you want to segment, tune for your desired performance and then point and click as always — voila! To catch up on SAM, read our explainer, here. Let us know how SAM can be further moulded to accelerate your labeling workflow! The DICOM Special In addition to general editor improvements, a number of DICOM specific enhancements have landed as well. You can now deep link to specific DICOM slices, and the bitmask brush tool can perform windows threshold on DICOM’s native Hounsfield units as well — delivering all the benefits of a collaborative annotation platform with the power of native DICOM tools you would expect. Read up on all the details in our DICOM update blog entry, here. Around the world and around the web Encord’s digital presence was in full gear this May! Always quick on the draw, we’re ensuring you understand the latest advancements in ML such as Meta’s MTIA, and the revolutionary ImageBind which helps tie vision learning to other sensory data. Or as Meta put it in their homage to J.R.R. Tolkien — “One Embedding Space to Bind Them All”, truly highlighting the central importance of vision data in multi-modal models and learning — exciting! We’re looking forward to moving through the real world as well! CVPR 2023 starts mid June in Vancouver Canada — and we can’t wait to show off all our hard work over the last year, and learning about all the cutting edge advancements pushing the field of computer vision forward. Drop us a line if you’re planning to attend, we’d love to see you there 😉! We hope you’re enjoying the weather as we head into longer, and (finally!) warmer days of summer — and as always, that all your initiatives are moving forward as fast as can be. Don’t hesitate to reach out with feedback, ideas, or whatever else strikes your fancy.
Jun 02 2023
7 M


DICOM Updates [May 2023]
Exciting DICOM updates! We've brought in some exciting new updates to enhance DICOM performance this month. The updates enable teams to perform sophisticated image annotations, speed up annotation times and much more. We're constantly seeking to improve the platform, and we're very excited to share the following updates with you! Updates include: Enhanced bit mask brush feature support Image rotation in label editor 3D Visualisation of DICOM data (Coming soon) Bit mask brush features for DICOM and SDK support🖌️ Our DICOM Editor will support bit masks! This new feature allows you to perform powerful and sophisticated image annotations by using our brush tool. You can easily paint regions and use thresholding to get pixel-perfect annotations. Our DICOM Editor now offers an array of powerful tools to help you achieve your desired results. With the Encord Bitmask SDK, you can now seamlessly create, manipulate, and analyze annotations directly within the Encord platform, all while harnessing the full potential of Python's extensive libraries and tools. Image rotation in label editor Our platform now supports DICOM image rotation, giving our users the ability to easily adjust the orientation of medical images. This feature is particularly useful when reviewing x-ray or mammography images or when attempting to align multiple images for comparison. With the ability to rotate DICOM images, our users will be able to better visualize and interpret medical images, leading to more accurate annotations and labels. 3D Visualisation of your DICOM data (Coming Soon) We are excited to announce soon the launch of our new 3D Visualization feature for DICOM images! This cutting-edge tool allows medical professionals to view medical images in a more comprehensive and detailed manner, providing a clearer understanding of complex annotations. With its advanced visualization capabilities, users can rotate, zoom in, and explore the image from any angle, enabling a more accurate assessment.
Jun 02 2023
3 M


DICOM Updates [April 2023]
A faster DICOM 🚀 ⭐ We're thrilled to share that our platform has made significant enhancements in DICOM performance. Our recent updates enable faster and more efficient processing of DICOM images, resulting in smoother user experience, quicker load times, and overall improved performance. Our team has put in immense efforts to optimize the platform, and we're excited to see the positive results. Whether you're a healthcare professional, researcher, or anyone who uses DICOM images, we're confident that you'll observe the difference with our upgraded platform. Improved mammography detection! 🕵️♀️ We are excited to announce that we have made significant improvements to the speed of our DICOM mammography detection system. With these enhancements, we are now able to process mammography and breast tomography images faster than ever before, which means that annotators and reviewers can start their work much more quickly. Enhanced loading performance for large volumes 🏎️ This exciting new functionality allows for a faster and more efficient way to load medical images! DICOM slices are loaded progressively, enabling quicker access to images without having to wait for the entire series to load. This feature is particularly beneficial for large datasets, where traditional loading times can be a hindrance. Coming soon 🔥 Bit mask brush features for DICOM 🖌️ Our DICOM Editor will support bit masks! This new feature allows you to perform powerful and sophisticated image annotations by using our brush tool. You can easily paint regions to get pixel-perfect annotations. Our DICOM Editor now offers an array of powerful tools to help you achieve your desired results. Zoom & pan 🔍 You’ll soon be able to zoom and pan your DICOM images with ease. This means you'll be able to view your images in greater detail than ever before! Whatever your background is, you will appreciate the added functionality and flexibility that this new features provide. 3D Visualizations We are excited about the launch of our new 3D Visualization feature for DICOM images! This cutting-edge tool allows medical professionals to view medical images in a more comprehensive and detailed manner, providing a clearer understanding of complex annotations. With its advanced visualization capabilities, users can rotate, zoom in, and explore the image from any angle, enabling a more accurate assessment.
Apr 26 2023
3 M


Automating Foundation Models with Segment Anything Model (SAM) Using Encord Annotate
At Encord, our mission is to accelerate the development and democratization of quality AI and computer vision applications by providing tools which enable actionable insights across your data, labels and models. Today, we’re bringing that one step further announcing our product launch integrating Meta’s Segment Anything Model (SAM) into the Encord Annotate platform. Watch the video below to learn more about SAM and its integration with Encord. SAM, or the Segment Anything Model, is Meta’s new zero-shot foundation model in computer vision, a cornerstone of their Segment Anything project. As a zero-shot foundation model, and as its name suggest, SAM is immediately capable of "segmenting anything" including image data it hasn't seen before, from a simple combination of keypoints and, if you wish, a delimiting bounding box. For all the details of the inner workings and greater significance of SAM, check out our SAM explainer. The release last week set the internet ablaze with possibilities, those both obvious and those yet to come. We’re here to tell you about the possibilities available now. Integrating SAM with Encord Annotate pairs the power of SAM to segment anything with Encord’s powerful ontologies, interactive editor, and comprehensive media support. Encord supports using SAM to annotate images and videos, as well as speciality data types such as satellite and DICOM data. DICOM support includes X-ray, CT, and MRI among others — with no additional effort from you. Our powerful labeling tool gives you an interactive editor experience allowing you to define regions to include and exclude, producing both bounding boxes and segmentations to your exact specification. Of course, integrating with Encord means you can take advantage of our annotation workflows as well — ensuring you get all the benefits of a collaborative annotation and review platform powered by AI-assisted labeling and our annotator training module. We’re very excited to bring SAM to Encord to support your AI initiatives - get started here. You can also check out our tutorial on how to fine-tune Segment Anything here.
Apr 11 2023
8 M


March Updates from Justin @ Encord
Shake off the winter blues and welcome spring with us -- we're delivering some snappy performance improvements across the platform and speeding up the DICOM editor as well. Also excited to showcase new features about to bloom, read on for the details and reach out with any questions or thoughts! Coming Soon Customizable workflows are coming to Encord Your data and labelling processes uniquely depend on your problem domain, labeling team, and data management practices. Redesigned from the ground-up to support configurable actions and events at each stage of the labeling process, our annotation workflow creation tool will empower teams to meet their needs as they know best. Workflows will be developed and released in stages in collaboration with our customers who need powerful customizable flows to support their accuracy and throughput needs -- we would love to talk about what you need in your workflow management tooling. All Aboard Encord Preparing reliable, quality labeled data for machine learning development can be a tough task. A reliable toolset is an indispensable part of the journey. As your partner in data driven AI — Encord wants to make learning the tools of the trade as simple as possible, and we’re rolling out a suite of in-app educational materials to help you find everything you need as quickly as possible. Use the ‘Help’ button in the upper right to follow tutorials on general platform usage and how to use our powerful label editor. Give it a spin and let us know what you think! We’ll be adding more material in the future — don’t hesitate to get in touch about guidance or tutorials you would love to see. Projects: faster and more informative Comprehensively redesigned from front to back, projects have been engineered to support your work style and flows. The new Summary Dashboard gives you project status at a glance — quickly confirm the status of annotation tasks and labels as they move through the annotation pipeline. All green means all good means all done! While your project is in progress, use the performance dashboard to track progress over time and get detailed, granular insights into your annotator and reviewer performance per project per task and per label. All of this delivered to scale so you can raise the number of tasks and labels in each project while still enjoying a snappy user experience. Fire-and-forget data uploads One step closer to supporting effortless integration with active learning and data driven pipelines, Encord has improved the upload process’s scalability and interface. Start an upload with the new add_data_start method, and programmatically monitor the status using the add_data_get_results method. Alternately, the web interface will allow you to monitor upload job progress, as usual. Combine this with our existing skip_duplicate_url flag to create simple append-only workflows, or simply upload the JSON job and go grab a coffee while we do the rest. Check out the APIs in our docs and follow end-to-end tutorials. We’ve also added SDK capabilities to support working with large datasets, and exporting labels in a more sustainable manner. Encord Active your way Encord Active is now easier than ever to integrate into your active learning workflow. With an interactive project browser — you can manage all your projects from the Active dashboard without having to jump back to the terminal and orient to a different project directory. We’ve also added support for exporting project subsets directly from the Active interface to Encord’s annotation platform. This means you can seamlessly jump across projects, search and sort by important metrics, and export the target data to be checked into our annotation platform all in one browser session. And, if you need more flexibility, you can now use the CLI to define your metric set on a per-project level — including adding your own custom metrics. Check out our documentation to learn how you can make this power your own. DICOM: faster and more powerful DICOM performance enhancements to speed up series loading and responsiveness have been recently released. We've complemented the increased performance with features to match. Powerful editor enhancements including the ability to annotate, view annotations, zoom and pan in all windows, the ability to make study-wide classification annotations, and to simultaneously view all series in a study have all arrived as well. For the full suite of DICOM enhancements, see the March 2023 DICOM product release on our blog, here. Introduction of ECG annotation tool We're excited to announce the launch of our brand new ECG annotation tool, designed to revolutionize the way healthcare professionals monitor and analyze heart rhythms. With a user-friendly interface and intuitive design, our ECG tool is easy to use and accessible for medical professionals of all levels. Our platform includes measuring and annotation tools to help you label your data and build better ML models. Read all about it, here. Around the web and around the world Large language models like GPT-4 are upon us. Last month we decided to employ ChaptGPT as an ML Engineer for a day — the results? ML engineers keep their spot on top — for now. Read all the details on the blog, and stay tuned for when we take GPT-4 for a spin. Then, catch up with our co-founder and CEO Eric Landau and Luc Vincent, VP of AI at Meta in a fireside chat about the challenges and opportunities in ML and computer vision! Finally, head over to TechCrunch to learn why we think active learning is the future of generative AI. Once you’re convinced, head to encord.com to learn how to activate the power of active learning with Encord Active — our full-stack active learning solution. This wraps up the March updates, but stay tuned for more exciting news as we journey through AI together. As always, looking forward to hearing your feedback on recent and upcoming updates -- don't hesitate to reach out to product@encord.com with any thoughts or ideas on how to improve your experience with us! Speak soon -- Justin.
Mar 31 2023
3 M


DICOM Updates [March 2023]
Exciting DICOM updates! We are excited to announce that our platform has significantly improved DICOM performance. With these changes, you can experience faster and more efficient DICOM image processing, which translates to quicker load times, smoother user experience, and improved performance. Our team has been working hard to optimize our platform, and we're thrilled to see the results of our efforts. Whether you're a healthcare professional, researcher, or someone who relies on DICOM images, we're confident you'll notice the difference in our upgraded platform. Updates include: Local caching in your browser Improved cloud download speed Multi-frame DICOM support Progressive loading of DICOM slices* Faster Mammography detection* *Coming soon! Caching - from minutes to seconds Caching allows frequently accessed DICOM files to be stored securely in your local browser memory, allowing them to be retrieved quickly and efficiently. As a result, our users can expect faster load times when accessing medical imaging data. This improvement is particularly beneficial for busy healthcare professionals who require quick access to patient records and diagnostic imaging. We are committed to continually improving our system to provide the best user experience and deliver reliable and efficient healthcare solutions. Cloud speed improvements for large DICOM volumes We are excited to announce that we have implemented a new feature that speeds up loading large DICOM volumes from the cloud! With this enhancement, you can now access and view your medical images with lightning-fast speed, no matter where you are. This improvement means getting the images you need quickly and efficiently. Multi-frame DICOM Support We now fully support multi-frame DICOMs, making it even easier and faster to load data onto our platform! With multi-frame DICOM support, our users can save time and streamline their workflows due to a reduced amount of header data repetition. Seamlessly integrated in our platform, you just have to upload your multi-frame DICOMs like you did with your normal DICOMs, either via the user interface or our powerful python sdk. Coming soon Progressive loading This feature allows medical images to load progressively as you view them, resulting in a seamless and smooth viewing experience. Whether you're working with large medical image files or accessing them remotely, our new progressive loading feature will ensure that you can view your DICOMs without any frustrating delays or lag time. This enhancement is just one of the many ways we're working to improve our platform and provide the best possible experience for our users. Mammography detection This feature brings significant improvements to mammography workflow on our platform! We understand that mammography images are critical for breast cancer screening and annotations; therefore, a seamless viewing experience is essential. With this in mind, we have improved our platform's loading speed, quality, and overall performance of mammography images. These improvements will ensure you can view mammography images quickly and easily without delays or hiccups. These enhancements will make your experience with our platform even more efficient and effective, resulting in better patient healthcare outcomes.
Mar 30 2023
3 M


Product Updates [February 2023]
The shortest month of the year has drawn to a close, but we're putting a cap on February (no matter how short!) by introducing everyone to Encord Active -- a new product which allows Encord to confidently step into the role as your active learning software platform. We're also introducing a new label interface to scale your programmatic interactions going forward. Dig in below! Coming Soon - Data Upload Performance Increases In addition to all the platform capabilities we're carving out below, we're putting weight on scaling efforts to meet the increasing scaling demands as well. Following on last month's release of idempotent uploads with skip duplicate functionality, we're actively working on asynchronous data uploads to be available early March. Stay tuned! Encord Active We’re beyond thrilled to announce that Encord Active, an active learning platform which supports the full active learning lifecycle and helps you understand and improve your data, labels, and model predictions, is available as open source toolset you can use today in open beta. Getting Active Head to the home page for an introduction to the power and usage of Encord Active, and then pop over to our getting started guide to download and get running with our quickstart projects in just 5 minutes. We’ve made it easy to get running with instructions for setting up a python virtual environment, or if you prefer, just kick things off with a a simple “docker run” command and don’t sweat the small stuff. You can find us on Docker Hub! Once you’re all booted up, join us on Slack for community, feedback and interesting discussion. Looking forward to seeing you there! Getting Informed with Embeddings and Scene Classifications Encord Active already gives you a sample by sample breakdown of your data according to a number of helpful metrics which are tuned to help you understand your data, your labels and your model performance. We’ve now made it even easier to understand all three with 2D embeddings. Start by looking at the entire space, but zoom into the graph to highlight areas of interest in the embedding space. It's easy to spot unexpected relationships or possible areas of model bias for object and scene labels. What's that horse doing with all those deer? Getting Slim - Removing Duplicates and Near Duplicates Too much of the same or similar data can cause ML models to develop an unhealthy bias compared to real data distributions. You can use a combo of the Image Singularity metric and “Bulk Tagging” to find and tag duplicates in bulk. Then, export your filtered list and remove those images from your dataset, problem solved! DICOM Says Search No matter the organization of patients, studies and series in a project, we’ve made it easy to arrange your DICOM annotation experience exactly as you need. We’ve arranged the series selection interface to help you sort by patient, study and series ID, to create an easy to understand information hierarchy. Of course, it’s fully searchable as well — just enter the the id of the patient, study, or series of interest to jump straight to what you need! SDK - Speaking your label language Ensuring you’re able to label your data exactly as your algorithms need requires flexible ontologies, compatibility with multiple media types, and the ability to place your labels precisely where they belong in your media and your ontology. We’re super excited to reveal our new label interface — the LabelRow V2, available the first week of March. The V2 interface has been designed from conception to support intuitive label read and write workflows across a variety of data modalities. Dig into the V2 interface, documented in the SDK API Reference, here. Once you’re familiar with the interface, learn how to use the V2 interface in end-to-end examples such as creating and reading labels for object instances, or adding labels to multiple frames in a video in our tutorials section, here. As always, looking forward to hearing your feedback on recent and upcoming updates -- don't hesitate to reach out to product@encord.com with any thoughts or ideas on how to improve your experience with us! Speak soon -- Justin.
Mar 06 2023
4 M


Product Updates [January 2023]
2023 is upon us! Encord is happy to be back in the office after re-charging over the holidays, and charging forward to enhance the annotation and machine learning development experience of our partners. We're starting the year off with several strong improvements to the DICOM tool! We're balancing with universal improvements to the label editor, and setting up foundational changes in our workflows capabilities. Please read and review! New Year, New DICOM Never miss the details with our metadata viewer When making annotations, it’s often important to have context beyond the image data itself, such as confirming the study identifier, or which manufacturer it came from. You can now access the metadata for a given series by clicking the icon next to the view angle selection interface, allowing you to confirm any of necessary details. Conveniently drag the metadata overview to a convenient location so you can monitor while you annotate! Manage tasks by study Medical professional often need to view corresponding slices from multiple series in the same study simultaneously. We've already been providing the ability to view slices from different series in one session, and you will soon be able to submit the entire study at once when done with your annotations. This will allow you to treat studies, not just series, as units of annotation work — making it easier to progress through your work in the way that makes sense to you. Hanging protocols: your data as you like it Annotating tasks that require a specific arrangement of series and study data can be made much easier via not only custom window arrangements, but pre-populated the view windows with the data you need. Encord is soon rolling out custom hanging protocol presets which can automatically fill with the correct series and slice information based on the type of DICOM data being loaded. Contact us about setting up hanging protocol presets for your data type and modality, and get ready for the next level of productivity. Annotate in other windows Now that you've got your view windows arranged just how you want, take full advantage by annotating in those views. The first version of being able to annotate in other views, will allow you to use the 'Start annotating' button to set a main annotation window and annotate in that window going forward. Future iterations are also in the works to allow seamlessly annotating in all views without the switch button. Don’t hesitate to be in touch if you feel this is something you or your team would benefit from. Workflows and editor love Tune your benchmarks Determining the best scoring metric for automated benchmark QA functionality, whether in production or training projects, is often an iterative, empirical process. We’re introducing the ability to update benchmark scoring parameters in ongoing projects to help teams iterate and discover the system that works for them. Use the benchmark function editor in the project’s settings, and then hit ‘Recalculate scores’ in the performance dashboard to test the effects of your changes. As always, contact us if you’re interested in our benchmark QA or annotator training functionality. Label editor enhancements Working with deep, complex ontologies can sometimes be a delicate operation to get everything right. In order to make annotating complex objects a more stress-free task you can now clear your selection of radio-button ontology attributes as well. So go on, click around. No worries. And for those working with special image or video data, we’ve added gamma correction in addition to standard brightness and contrast controls, to make it easier to work with media featuring annotations which may be hard to distinguish from other background components. We would love to hear how these tools amplify your annotation output! Same Data No Problems Large data uploads can often be interrupted by unstable network conditions. Now, you can use the new 'skip_duplicate_urls' parameter in the upload specification files to remove the hastle involved in de-duplicating data on interrupted upload tasks! Details in the documentation. We're winding down this month's update, but just winding up for the year. DICOM and related tools have seen a large bump in power and versatility over the last month — don’t hesitate to be in touch about how you can use these features, or if you’re curious about the upcoming evolution of these powerful tools. We’re looking forward to expanding more universal features such as enhanced workflow management and collaboration tools soon. Stay tuned and stay in touch, 2023 here we come!
Jan 31 2023
8 M


Product Updates [December 2022]
Happy holidays everyone! 2022 is almost over -- but before we sign off for the year, wanted to drop a couple of holiday presents in your inbox! Easy onboarding with annotator training modules Building on our powerful benchmark QA functionality, Encord has created a special sandbox training space for you to bring your annotation team up to speed. The training module allows you to create projects with a designated set of ground-truth labels which serve as a rubric to quickly evaluate new trainees. Annotators will be learning to annotate data that closely resembles production data, in the production labeling environment, with a specially tuned performance dashboard to help you evaluate and educate your team as fast as possible. Contact us if you’d like to hear more about the training module! Improved image group support We’re expanding our support for groups of images forming a single labeling task from our previous video-only representation, to include support for the original images as well. This means images of different aspect ratios can be a part of one task and preserve the full quality of the original image. If you upload via the GUI and want the original image representation, be sure to uncheck the optimized video option. For those uploading with JSONs or CSVs from the private cloud, follow our documentation. Required attributes implemented at the application level Encord introduced the required flag as a communication tool so that teams could indicate to their annotators which nested attributes are required. Despite the possible slowdown in the annotation process, feedback has been strongly in favor of actually enforcing attributes at the application level. We listened. Henceforth, Encord will prevent labels from being submitted for downstream processing unless all required attributes are filled in — annotators will receive a warning if they’re trying to submit a labeling task with missing required attributes. Labels may still be saved in any state to ensure no loss of progress. To ensure there's a smooth roll-out of 'required' attributes, we will begin enforcing this feature with select customers who have requested it be turned on, and scheduling a full roll-out over the course of Q1 2023. Reach out if you and your team would like to take advantage of the required behavior. Please keep in mind this will affect any previously submitted label tasks as well. Previously submitted labels that remain in the ‘Complete’ state will not be affected, but any task that enters the annotation queue, including previously completed and re-opened tasks will now be subject to this behavior. Reach out if you’ve any questions about how enforcing required attributes can change and empower your annotation workflows! Sorting the label editor If you have many objects or scene-level classifications, it may be difficult to find just the one you’re looking for. We’ve now introduced the ability to sort instances according to when they were created or by when they appear in your media, either ascending or descending, making it a breeze to find what you need! DICOM is not just hanging around In addition to usability and performance improvements including enhanced window level support by view pane, we’ve also rolled out preset tiled layouts from 1x1 to 4x4, to more easily support the hanging protocols used by medical professionals in various situations. Going forward, we’re investigating adding support for other more complex presets or even pre-populating tiles with relevant data according to particularly common or useful workflows. Please reach out if enhanced hanging protocol support is an important consideration for your DICOM tool, we’d love to evaluate how we can help facilitate your annotation workflows! The SDK will now fetch your metadata too The SDK debuted a couple of critical features customers have been asking for to enhance general functionality. Private cloud users can now set arbitrary metadata with data units such as images and videos, and use the SDK to fetch that associated metadata back with individual data units. We’ve also been expanding the SDK support for ops-level work, and you can now add users to datasets as well using the SDK. It’s also been keeping pace with all the features necessary to keep up with benchmark QA released over the last month! Head to the changelog for all the latest! Announcement: Deprecating ‘app.cord.tech’ domain As part of continuing focus on shifting towards supporting our Encord name, we are deprecating the app.cord.tech domain, and will be fully removing support at the end of January 2023. This means if you access the application via app.cord.tech (or indeed, any other *.cord.tech domain), we can no longer provide support for any issues that may arise as of Q1 2023, and the domains will cease working at the end of January 2023. Any access via app.cord.tech will be automatically forwarded to app.encord.com. For those who simply access the app, there should be no change to your daily workflow. However, for those working with data from private buckets or other cloud integrations, please ensure your CORS policies are updated to allow access from encord.com by the end of January 2023 or there may be data access difficulties. Please do not hesitate to contact us with any questions or concerns you may have regarding this! Around the web (and elsewhere) The team made an appearance in Chicago at the Radiological Society of North America (RSNA) ‘22 back at the end of November. We had a great time meeting many of you, learning about diverse use cases, and exploring how our DICOM annotation tool and workflow management features can accelerate annotation in radiology-focused work. We also enjoyed handing out some “Encord brains!” If we missed you, it’s never too late to drop a line, and don’t hesitate to drop by next time! Our co-founder Ulrik also chimed in on predictions for AI in 2023, along with other industry leaders in Venture Beat: https://venturebeat.com/ai/ai-will-thrive-in-3-areas-despite-economic-conditions-experts-say/. We’re expecting to see advances in generative AI and of course… data-centric AI. We’d love to hear your thoughts about what’s in store for AI in 2023! We’ll wind down this holiday letter with some gratitude towards you, our customers. We pride ourselves on our customer-centric approach, understanding and quickly responding to customer needs. We’re proud to announce that with your support, G2 has announced Encord as a High Performer for Winter 2023! We’re both motivated and privileged to be supporting some of the most innovative and interesting applications of computer vision and machine learning. We wish everyone a safe and Happy New Year and look forward to growing and supporting you next year and all the years to come!
Dec 22 2022
6 M


Product Updates [October 2022]
We hope everyone has been enjoying a proper chill in the air, and looking forward to closing the year out strong with us. While Thanksgiving is a tradition observed across the Atlantic, we're still thankful to be on this journey to improve AI and computer vision with all of you. Read on to catch up on another month’s worth of news and features from the world of Encord — enjoy! Automatic QA - Benchmark Assessment Manual review of data labeling might not scale for a variety of reasons — volume, limited access to domain experts, or perhaps a large valid range of annotations which can be hard for human reviewers to consistently evaluate. In these cases, automating the process can help solve for bottlenecks or control for previously unmanaged variables in your QA process. Encord is happy to introduce an automatic benchmark QA process. Choose groundtruth labels already on the platform or upload your own, and configure our flexible benchmark process based on your ontology. The QA process will automatically integrate benchmark data and production data, and update annotator performance metrics so you can easily monitor your team’s performance and identify problems before they grow! Scale Organization Operations Coming Soon - Annotator Training Programs Scaling an annotation team is a difficult task — new annotators have to learn how to recognize domain specific concepts and deal with complex tooling. Teams, and the data they’re working with, can change frequently. Arranging expert schedules for review and education of new annotators can be a logistical challenge as well. That’s why we’re rolling out annotator training programs. Encord’s training program allows your team to train on real data, in the production labeling environment, in order to easily evaluate annotator progress and pain points and elevate your team to the highest annotations standards with minimal effort and confusion. Annotator evaluation functions are highly configurable depending on your labelling protocols and ontologies — please reach out to discuss how we can help scale your training efforts! Team Member Groups Quickly assigning many organization members to platform assets such as projects, datasets, and ontologies can be difficult as the organization grows both in people and platform entities. We’re working fast to make it easier to manage your growing operations. As a first step in that direction, we’re happy to introduce team member groups. Organization administrators create groups inside the organization section of the Encord App. Then, administrators of projects, datasets and ontologies can grant access to everyone in the group by simply adding the group on the relevant settings page! We’re eager for feedback on how we can further ease any growing pains you might have as you scale operations on the Encord platform — don’t hesitate to get in touch! Bulk Assign and Release Once you’ve assigned your team to the appropriate projects, you still have to manage their workload. Ensuring proper task allocation across large teams and projects can be a separate challenge all its own. If you’ve been having trouble managing your task pipeline, we have good news for you. Look for bulk assign and bulk release functionality, as well as an enhanced Queue UI Tab to land in the platform before you know it! As always, don’t hesitate to reach out to us with any pain points in your labeling workflow — we’d love to learn how we can help! Enhanced Label Editor Collaboration and Automation Collaborate easier with annotation URLs Getting a second opinion, checking your work, or sharing something interesting with colleagues is now easier than ever with annotation instance URLs, which allow you to share deep links straight to an annotation directly in the label editor. Select your object or classification, copy the URL from the action menu, and send it wherever URLs are accepted — sorted! Let the robots put some spin on that box Why limit collaboration to just the analogue world? Rotatable bounding boxes entered play last month, and this month we’ve completed rolling out full support including tracking and interpolation automated labelling features for rotating bounding boxes -- so now the robots can spin the boxes for us. Additionally, we’ve enhanced the interpolation workflow to match the tracking workflow. Press Shift-I for interpolation and Shift-T for tracking, and let the robots get to work. Did you know? Improved Automation Workflows Automated labeling can multiply the efficiency of annotation teams by leaps and bounds. It's easy to access our powerful automated labeing features in bulk via the automated labelng drawer. Configure the objects to track or interpolate, the desired frame ranges to operate on, and click go! But what about when you want to quickly work with a particular object? We've got you covered there too! Single object tracking has been accessible using "Shift + T" in the platform, and it's now joined by single object interpolation as well! Annotate the key frames and press "Shift + I" to quickly interpolate your target object! Get what you need, when you need it Label data can often be complex, and nested — and associated with various data units and identifying hundreds, thousands or even tens of thousands of objects. Managing these associations is in turn a complex process which requires precision and coordination across annotation and engineering teams. Encord has enhanced the label export functionality to make it easier to find what you need, when you need it. Filter by label approval status — ensuring you get only approved labels, or only the rejected labels, if that’s what you want! Or any combination thereof. This pairs well with our expert review feature, which allows labels to be permanently rejected. Filter labels by their ontology category to get only the objects or scene classifications of interest. Enhanced COCO export fields to include track_id and rotation, enabling COCO to be used more comprehensively to support video annotations and rotating bounding box annotations. Faster DICOM, Better DICOM Correctly annotating DICOM data means ensuring you have the full context for what you're looking at. In addition to supporting annotations visible in all angles from last month, we've also added multi-series windowing configuration support so you can adjust windowing levels for different series in one session independently. You can also adjust MIP slab thickness in views independently as well -- making it easy to know you're looking at and annotating the correct areas of interest. Loading multiple series in one session can also strain performance requirements -- so we've improved the data fetching and caching capabilities to give you a smoother experience from start to finish. Check it out, and do not reach out to us with any thoughts on how to enhance your DICOM annotation experience! Dynamic classifications and our dynamic SDK A large part of annotating video annotations is tracking when objects take temporary actions. For those new to the space, our blog post here fully introduces the topic. For those already familiar, you may be aware Encord models these temporary actions as dynamic classifications. To match their importance to video annotations, we’ve enhanced support for uploading labels with dynamic classifications via the SDK as well. Reach out to us if you’re interested in how dynamic classifications can enhance your model performance, or if you would like help configuring a labeling protocol to support dynamic classifications! Keep up with all the other changes in our SDK on the changelog. Important recent updates include enhanced CVAT support and support for filtering labels by ontology class on export. Take a look! Around the world and around the web Encord was very humbled to be selected as one of 10 startups to work with the AWS Defence Accelerator, joining 10 other startups and 6 of those 10 from the UK. A strong showing for UK startups on the whole! This was followed by an early November appearance from our co-founder Ulrik on stage at the Hague for the GovTech Summit 2022 — further illustrating our commitment to meaningful collaboration in this sector. In the medical space, we hope to round off this November seeing many of you at this year’s RSNA annual meeting in Chicago — do let us know if you’ll be dropping by! Encord is keeping up a strong digital presence as well, dropping into TheSequence substack with a guest post describing three ways models fail in production, and how our new tool for promoting active learning, Encord Active can help address these challenges! Do give it a read, and give us a shout if you’d like to learn more about Encord Active or how active learning tools can help uncover and correct weak spots in model performance! That’s all for now — talk to everyone again soon.
Nov 24 2022
5 M


Product Updates [September 2022]
The leaves have hit the pavement and the days are growing shorter here in London. We hope everyone is staying warm and healthy as the weather cools — and most importantly, that you’re eager for another round of updates from Encord. Read on to catch up with Encord on the web, and to learn about our new and coming QA workflows, powerful DICOM upgrades, and flexible annotation features. Customize Your QA Empower domain experts Many industries and domains require years of training or experience to accurately recognize and classify examples — and an expert’s time can often be expensive or hard to schedule. In other cases, there may be additional requirements on your data quality assurance processes depending on the regulatory environment. To help customers speed up their data annotation processes in these complex environments, Encord has improved the power of their expert review workflows. You can now configure how reviews are forwarded to experts after each review, as well as setup a final review, such that all rejections at the final review stage are forwarded to expert reviewers you designate. When an expert reviews an annotation instance, their judgement is final, reflecting their recognized authority in the domain. This means labels rejected by experts are not returned for annotation but instead permanently rejected from the label set. Read more about the power of expert review flows in our documentation, and don’t hesitate to reach out if you have special quality assurance and data processing workflows you would like to consult with us about! Coming Soon - Automatic QA Controlling the manual review sampling rate helps us control how many annotations pass through the review stage before being accepted into downstream processing. However, manually reviewing live production data can create several bottlenecks in labeling workflows including disagreements between reviewer and annotator, and a lack of reviewer time leading to ever longer backlogs of labels to review. Automating the QA step using pre-labeled data presented to annotators can provide a scalable alternative to manual review workflows. Encord is working on enabling automated benchmark quality assurance — so that project and team managers can monitor annotator performance against known quality standards without having to schedule and allocate manual reviews! Contact us if you’d like to know how automatic QA can accelerate your labeling pipeline, or if you have a QA workflow you need implemented — we would love to hear how we can assist in your use case! Flexibility in the label editor Put some spin on that box Segmentations allow arbitrary precision but can make it difficult to work with advanced automation techniques. Bounding boxes are quick to draw and enable the full suite of automations, but often lag in accuracy when the captured object is at an angle. How to get the best of both? Start with a bounding box — then twist it. Introducing rotating bounding boxes! Indicate your object should be rotatable in our ontology editor, then use the rotation handle to precisely position the box around your object of interest. Also compatible with the CVAT implementation of bounding boxes that rotate. Encord is currently rolling out support for rotatable boxes with interested customers. Contact us if you’d like to discuss how rotatable boxes could assist in your annotation endeavours. DICOM In order to more properly support medical professional's working environment and expectations, we’re happy to announce the following new features in DICOM: Export measurements Maximum Intensity Projection (MIP) Cross-hair navigation Visualise annotations in all views Auto-segmentation Catch a quick preview below and head to our documentation for details. Don’t hesitate to contact us to learn more about our best-in-class DICOM annotation tool! Export measurements If your labelling protocol requires you to measure many structures, our new measurement export feature will come in handy! All you have to do is draw a line using the polyline annotation type and click on the copy measurement icon. This will copy the length of the line measured in millimetres to the clipboard, which you can then easily paste outside the editor anywhere you need. Maximum Intensity Projection (MIP) MIP enables you to project the voxels with the highest attenuation value on every view throughout the volume onto a 2D image. This method is great to visualise contrast material-filled structures and bones. Another use case is the detection of lung nodules in lung cancer screening programs because it enhances the 3D nature of these nodules, making them easier to spot in between pulmonary bronchi and vessels. Cross-hair navigation Now you can navigate through all views of a volume simultaneously by clicking on any location within the views. This is a more natural way to inspect a volume. Cross-hair mode can be activated using the toggle in the Healthcare icon. Visualise annotations in all views With our new release, you will be able to see your annotations in all views, not just the one they’re drawn in. For example, you can annotate on the axial view and the annotations will show up in realtime on the corresponding sagittal and coronal view. Useful to ensure that you’ve captured your target structure to its full extent. Auto-segmentation In order to ease the annotation process, our DICOM tool now supports auto-segmentation! To use it, open the Settings drawer and scroll down to the Drawing settings section, and turn the switch for Auto-segmentation ON. Then, draw a polygon around your target structure. With auto-segmentation on, there is no need to be completely precise. Finish drawing the polygon and the auto-segmentation feature ensures the polygon will "snap" down to a snug fit around the object of interest. For the programmers - SDK We’ve been moving forward adding powerful programmatic interfaces to our SDK as well. As always, the github changelog is the best place to find all the details. We’ve also pulled out a couple new updates for special focus, below. It’s now possible, to fetch multiple label rows with one method call using the new get_label_rows method. As this may lead to an increase of label exports, we’ve made it easier to track export history. A label row’s export history is now included with the exported label JSON when you export from the Encord Web App. Each history entry tracks the who and when of the export, regardless of if it was from the web app or the SDK - confirm the details in our documentation. We’ve also added support for uploading not only DICOM data, but DICOM annotations as well. Platform Power-ups Dashboards - Reorganized We’re happy to report customers are getting more and more usage out of Encord — and projects on the platform are growing as well. We’ve reorganized the project dashboards to speed up loading times, and make it easier to find what you’re looking for. The simplified Summary tab is now focused solely on clean indicators of task progress. The newly debuted ‘Explore’ dashboard is all about understanding the instance and label statistics of your project in greater detail. We’ve also added ‘Reviewed by’ and ‘Reserved by’ filters to the Label Tab’s Queue and Activity panes — making it easier to search and sort through tasks as projects grow bigger. Catch up on the details of our new dashboards in our documentation. Add collaborators to your organization You can now invite collaborators not only to projects, datasets and ontologies, but at the organizational level as well. From the organization control panel, click ‘Add user’, enter the e-mails of the collaborators to invite, select the type of organisation member (Internal, External, or Workforce) and then click ‘Add’! You must be an Administrator user in your organization to invite new users. Zoom your way Everyone has their own preferences for scroll and zoom direction. We’ve heard customers asking to be able to scroll up to zoom in and we’re happy to say you now set how zoom responds to mouse scrolling in our label editor settings. See the documentation if you need a reminder of how to modify your settings, otherwise simply set the toggle and zoom until your heart’s content. As always, more than happy to hear comments, feedback and feature requests — keep them coming!
Nov 11 2022
5 M


Product Update [August 2022]
Fall is almost here, but just because the weather is cooling down (finally!) doesn't mean we're letting off the heat driving our product engine. Take a gander to learn more about recent deliveries from Encord! Annotate in Style (with a stylus) Encord fits not only your workflows, but also your working environment and tools. If (like us) you spend a lot of time drawing complex or complicated segmentations, you may agree the standard computer mouse is not always the best tool for the job. Now, there is another way. We’ve added label editor stylus support so you can draw in a natural manner with your favorite tablet. Don't hesitate to reach out with thoughts and feedback. See before you annotate With deeply nested and complex ontologies, it can sometimes be tough to remember where to find the various nested classifications necessary while annotating. We’ve made the ontology tree fully explorable on a per instance basis inside the label editor so you and your team can easily find the the nested classifications and attributes you need, no matter where they may have been hidden before. You can explore pathways without having to select a value — perfect to understand all the possibilities and quickly select from the best option! Include AND exclude tags for your project search Project tags are a simple, flexible, and powerful way to organize your projects in Encord. Until now, you’ve been able to add tags to your projects and search for projects with those tags. Going forward, you can also exclude projects with certain tags as well. Combine the include and exclude filters to quickly find your projects of interest — even if you don’t know the project name! Get a handle on project progress We’ve updated the project summary dashboard so you can more easily understand and estimate project progress. Get a quick overview of the progress of your labeling and review tasks. Once your project is in progress, use the estimate calculator to get a quick idea of how long your project might require. We would love to hear from you on what you need in our dashboards to give you the insights you want! Updates from the SDK SDK support for additional data modalities is moving forward in leaps and bounds — as well as features to speed up workflows and enhance convenience. Head over to our SDK Changelog for all the details, and continue below for some of the highlights. Additionally you can now set a custom title for image sequences and videos on upload, instead of in a separate sequential call. Your code is shorter and upload times faster. Win win! We’ve also added SDK support for DICOM uploads, as well as uploading single images at a time as well. Feature Highlight Did you know Encord offers webhook functionality so you can integrate notifications directly into your workflows? You can configure Encord’s webhooks to notify you on a variety of events such as annotation task submissions, review approvals — or perhaps a daily summary of progress. We provide notifications to popular communication systems such as e-mail and Slack, as well as HTTP integrations for teams that want full programmatic integrations. Read all about the details of sample workflows, and don’t hesitate to reach out with feedback or ideas!
Nov 11 2022
5 M


Product Updates [July 2022]
Encord Product Update July 2022: read about the latest features we've added to Encord, including dark mode, additional label export formats and improved documentation search. Encord goes Dark (Mode) We’ve all been there: working late at night, or in a room with dim lighting (purposefully or otherwise). We’ve heard customers request Dark Mode to make it easier on the eyes in these trying times, and we’re happy to inform you Dark Mode is now available in the Encord app. Especially useful for long annotating sessions in dark rooms or late at night — or perhaps that’s just your style. Dark Mode is activated automatically according to your system settings, or you can click the moon icon in the upper right to turn off the lights anytime. Export Labels in COCO Format We recognize that many teams use a variety of annotation representation formats in their downstream processes. If you’re a COCO user, we have good news for you — you can now export your labels in COCO format from our export page! Head to the Export tab for your project of interest, select the data assets from which you would like to export labels and press Export! Sorted. Documentation Search We’re proud of the work we do at Encord to develop world-leading features to help our customers produce high-quality data for their machine learning and computer vision projects. But the value of best-in-class tech can only be realized if our customers are aware of the features in our product, and know how to use them. We’ve introduced a documentation search to make it one step easier for you to find your way around our platform. Head to our documentation, access the search bar in the upper right of any documentation page, or use the hotkey combo “Cmd” + “K” to search at any time from within our documentation! Visualize Dynamic Classifications in the Editor We’re proud of our dynamic classifications feature, which allows you to tag nested attributes on objects only in specific frames. Very useful for object attributes that change over time in a given data asset. We’re now displaying that information directly in the editor as well, above your object of interest — making it easy to review and confirm everything is as you intended. Don’t hesitate to contact us for insights or to discuss how dynamic classifications can enhance your annotations! Encord's Labelling Service If Encord's platform has all the tools you need to get your data labeled, but you're still missing the team -- we're pleased to inform you about Encord's labeling service. We have the technology and experience to quickly and securely produce high-quality labels across a number of industries. Check out our product page for more, and don't hesitate to contact us with any questions or inquiries! Configurable Upload Settings in the SDK Uploading a lot of data at once is convenient, but has unexpected pitfalls due to intermittent drops in network connectivity or other hard to predict issues. We’ve added support for configuring your upload settings including allowing individual failures in large batch uploads to ensure your dataset is created despite any turbulence in the web on the way over. Check out our updated SDK Documentation for all the details, and grab the latest version of our SDK from PyPI. Like the sound of our latest features and want to understand how they can help your business? Sign-up for an Encord Free Trial: The Active Learning Platform for Computer Vision, used by the world’s leading computer vision teams. AI-assisted labeling, model training & diagnostics, find & fix dataset errors and biases, all in one collaborative active learning platform, to get to production AI faster. Try Encord for Free Today. Want to stay updated? Follow us on Twitter and LinkedIn for more content on computer vision, training data, and active learning.
Nov 11 2022
6 M


Software To Help You Turn Your Data Into AI
Forget fragmented workflows, annotation tools, and Notebooks for building AI applications. Encord Data Engine accelerates every step of taking your model into production.